Showing posts with label #The monthly stitch august 2016 challenge. Show all posts

Thursday, 1 September 2016

62: Gingham-along top

I came across the gingham along challenge by accident. I was just browsing a few blogs in my lunch break and there it was. This seemed a great challenge since I have just finished the Monthly Stitch Birthday challenge so was feeling like I am ready to take on a new and exciting challenge since I actually managed to complete a real challenge in the allowed time.
I have several meters of a lilac stretch gingham I have been wondering what to do with it for ages.  I do not want to make just anything with this fabric. I cannot see me at all in a 1950s style dress or in a school uniform dress or any of the usual clothing that I see around that is made from gingham. I obviously liked the fabric since I bought it. About 5m in fact! 

I already managed to make the top at the start of this post. 


Spider lace
Black satin ribbon edge

 This I actually made before the gingham along happened I just have not got round to writing a blog post about it. I have worn this top probably at least once a week all summer so it must be "me". The lace on the sleeves is cut from a halloween tablecloth. I collect them since the black lace is usually made up of skulls or spiders etc and are my kind of price range at around £1.00 each.

The neck edging is the same black stretch lace that I used on my black pointy-hemmed dress here: 61: 3 Dresses from one pattern - The Monthly stitch challenge August 2016 and the pattern is the same free blank slate top pattern that I made a quick top/muslin from
When I first made this top I did it just as the previous top but I hated it. Too Mumsy for my style I am afraid. But the pattern is nice and fits well having done the shoulder adjustment suggested by Mel so I took out the darts which gives a kind of wider swing effect and added black lace at the neck and wrists. I also added a black satin ribbon at the hem edge. And just changing this pattern made it into a favourite top!
here: 20: Blank Slate patterns High Low top   

                     So then to the Gingham along which you can find out more about here:

I decided I just have to go for it. I am not sure how long I will keep my confidence up after the nice comments I got for my 3 pointy-hemmed dresses: https://themonthlystitch.wordpress.com/2016/08/24/3-pointy-hem-dresses/ so best to get on with it. 

My first item ( other than the top I have already made  above but probably could use for this is challenge) is a pair of side panel leggings which are stretch black leather at the sides and gingham for the centre panels. I have made this pattern before here: 38: side panel leggings

My working area is rather small and cluttered so I could not get a picture of my entire leggings without putting them on and have no one available to take the photo so here is the top bit and the ankle bit. The pattern is for knitted stretch fabrics which could explain why I am having some issues because although the gingham is stretchy it may not be as stretchy as is needed. I thought it was else I would not have used it but the pattern was a little big when I used it for stretch knits but the same size seems a bit wrinkly with the gingham and leather. I have yet to add the waistband so hopefully this may get sorted yet. So far I have sewed up the sides and the front and back seams and left them and started to make this to go with them:

1299 Simplicity Victorian Steampunk Jacket Skirt Costume Sewing Pattern Szs 6-12


I am doing the jacket in view B so the leather version with buckles at the front. I have yet to source the buckels so that could end up changing a bit. Again I am mixing the lilac gingham with stretch leather to get a kind of punk look - or so I am hoping.

 
The jacket is so far going OK. This is the side pockets which have a lilac gingham lining but the side panels are fake stretch leather:


This is the two sides with pockets put in: 


The Jacket has princess seams. The centre front and back panels will be lilac gingham:


Fist I sewed very close to the edge within the seam allowance to secure everything similar to basting since I do not want to use lots of pins since its leather and they will make marks and tiny holes. Then I overlocked everything together cutting off the machine sewed basted line. Repeat for the other side.


As you can see the leather is a bit creased. I am hoping this will hang out since I cannot risk pressing this and melting it.


And repeat for the second side:

Then the pattern says to sew up the centre back seam and top stitch. My top stitching is far from perfect and I do not have a perfect pattern match either!
The top is not too bad but as the seam goes down the back the pattern goes out. It will have to do. Right now I am aiming at making something slightly more challenging but not at total perfection and for me this is turning out very challenging!
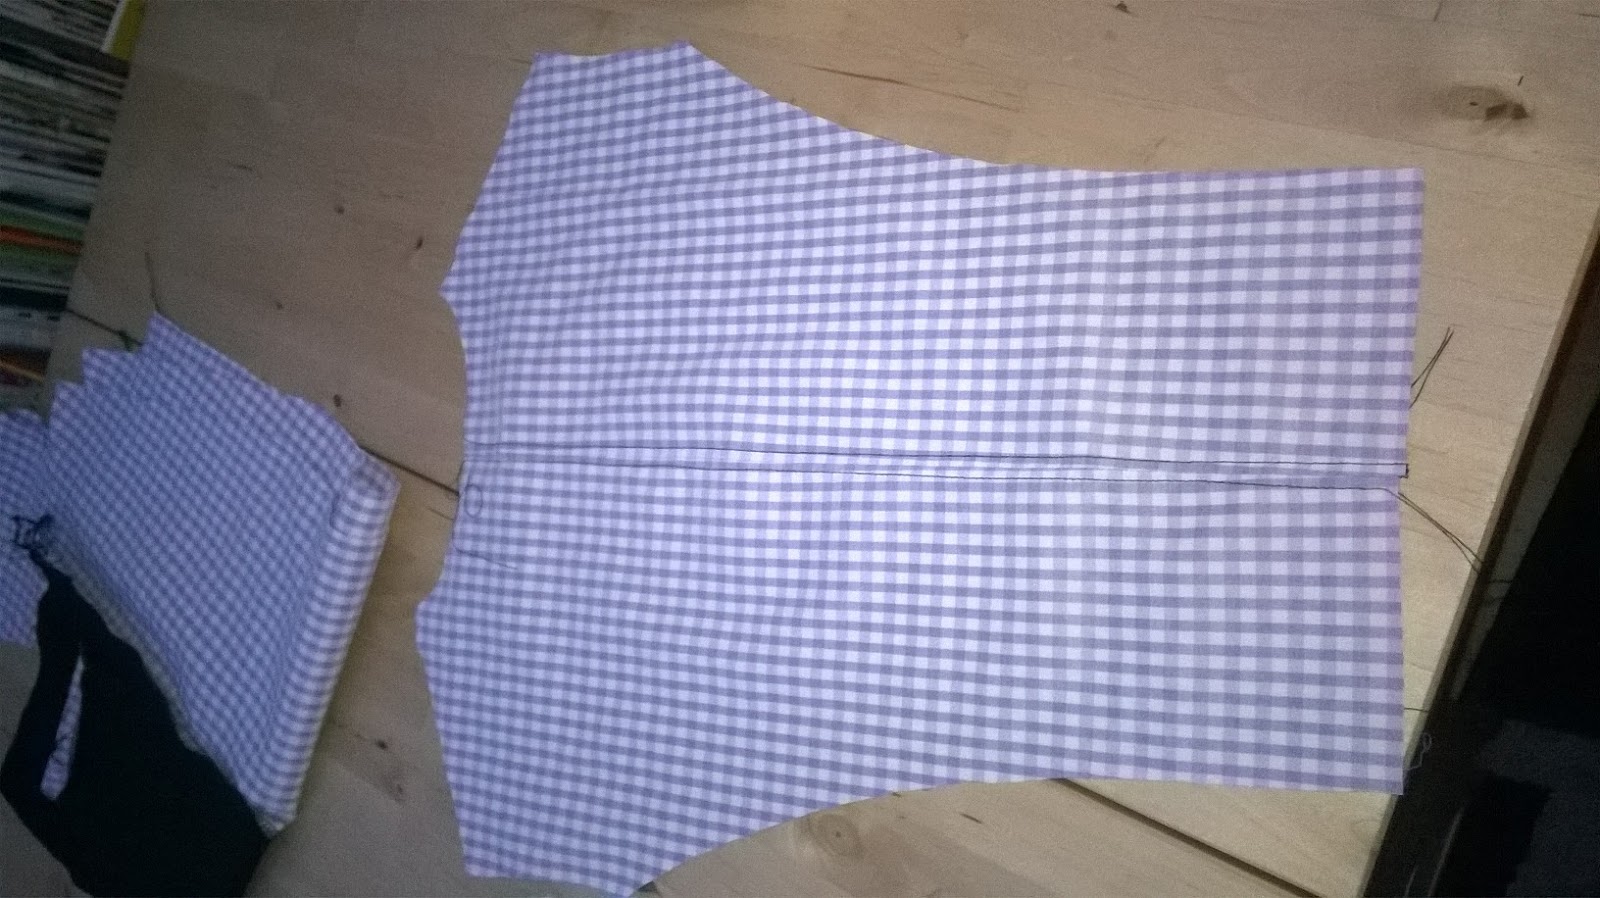

Next the lower back panel has a pleated bit. You need to overlock and twin needle stitch the edge first then pin into place. 


Here are the bits so far:

And this is my "TO DO" pile taking up far too much room at the end of my table.


It includes a pair of cut out cullottes which I have left sitting waiting for about a month now, my citrus trousers I have cut out but not sewn so yet to finish here: Life!, my half made summer coat:30: Summer coat, a pair of curtains I need to hem and an IKEA blind that is waiting to be put up. And out of sight are several upcycling projects and a pile of repairs to do! I really need to start to do just one sewing project not several at once!


Anyway thats what I have been up to this week. Next week I will hopefully have some progress to show for the Gingham along challenge since it ends on 13th September so I had best get cracking.
Thanks for visiting
Bracken


Tuesday, 23 August 2016

61: 3 Dresses from one pattern - The Monthly stitch challenge August 2016


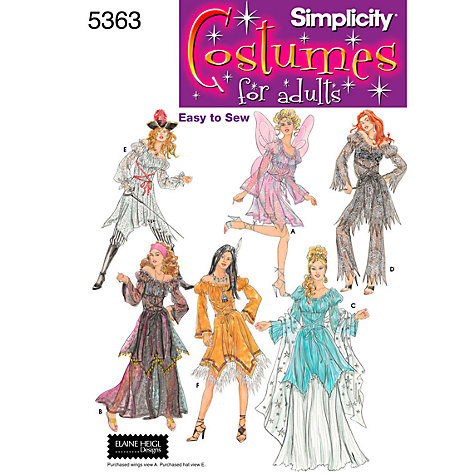
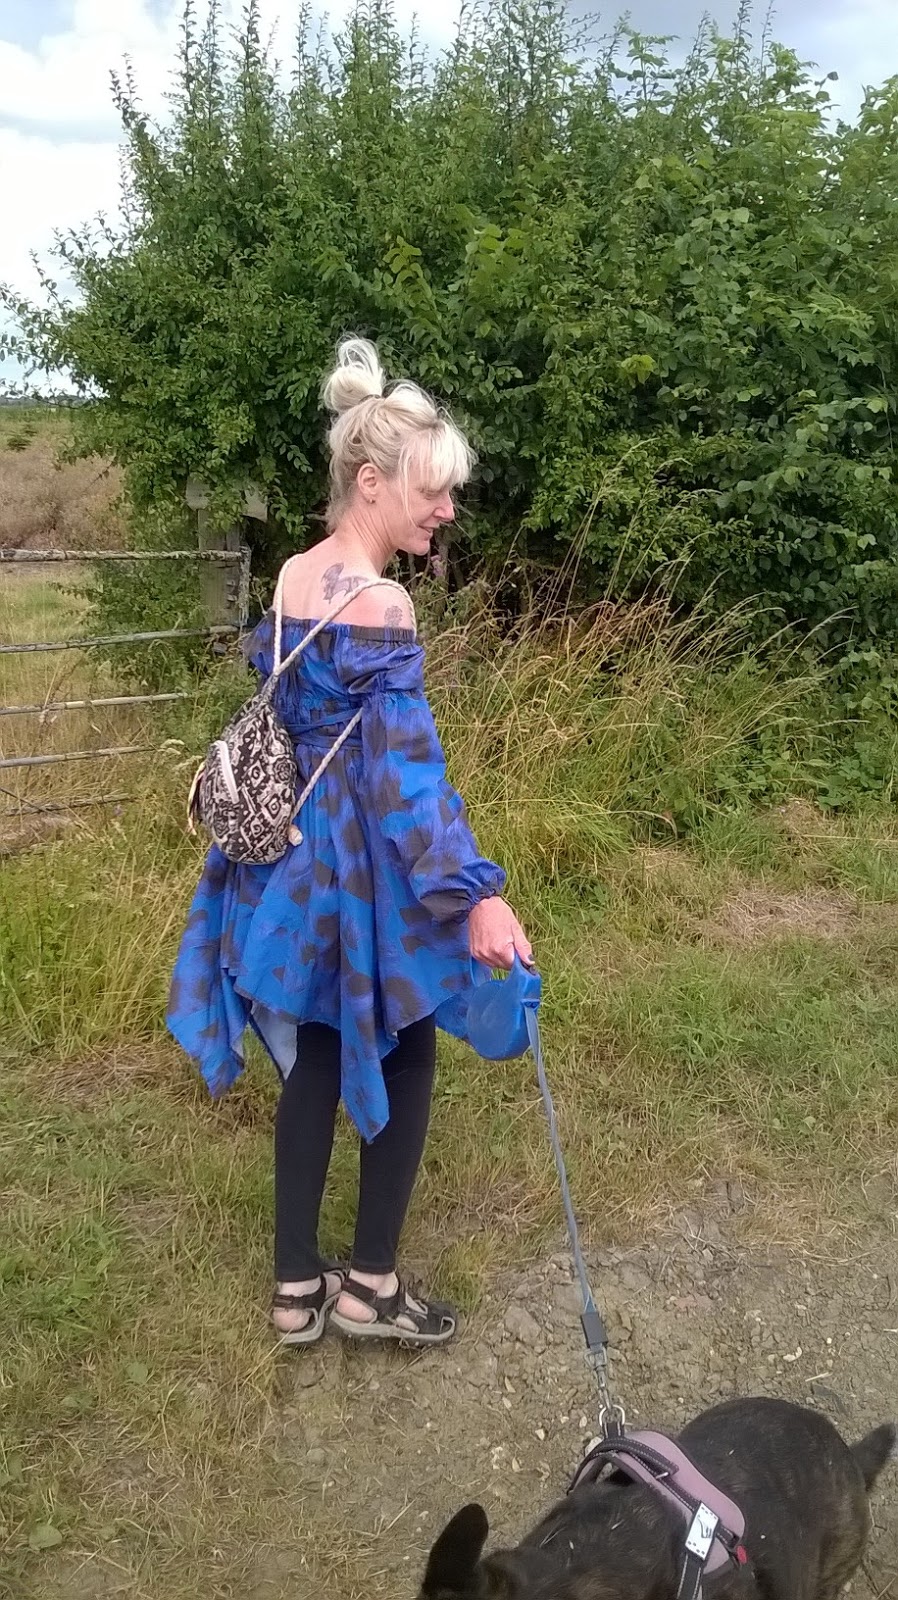
Buy Simplicity Costume Dressmaking Leaflet, 5363 Online at johnlewis.com I actually made a muslin first for this dress. Its a wearable muslin being my red dress shown here. When we moved into our current house, we sold the last house complete with curtains which meant we did not have any for this house so I went to a local Oxfam and bought three second-hand Saris which we used for temporary curtains until we got proper window coverage sorted out. They are probably polyester rather than silk. That was 9 years ago and I still had two of the three saris in my airing cupboard. Well the last few weeks I have been sorting out my wardrobe and also the airing cupboard since I am just hoarding lots of stuff and do not have a big house and really have no room for things we do not use. Then, I went to a festival a couple of months ago having realised these saris are still in my cupboard and of course at most festivals recycled sari clothing is everywhere which got me thinking. I had to use two of my saris for this since the pattern takes a lots of fabric since the skirt is actually circular despite being a handkerchief hemmed skirt.
 
Shame about the bra strap!


Then, I read about the August Monthly Stitch challenge. I had been hankering after making this particular pattern for ages but I want it be wearable not just a costume. I love hankerchief hems and so I decided first to make my muslin/ costume for a festival dress from my recycled and now well used sari fabric. That gets rid of it out of my wardrobe and provides a nice festival dress for any other events we go to this year or even for next spring. Having said that it has turned out very wearable despite being a costume pattern and made from scrap fabric.

The pattern is easy to put together although to be truly honest I gave the instructions a quick read and the just did it my way. I did use the pre-marked channels for the elastic and the front and back skirt panels and front and back bodice panels are slightly different so you do need to join the right way up. When I changed the pattern for the black dress (see later) I moved the skirt around so it is actually slightly longer one side to the other. It does not notice but if you are a real stickler for perfection it would be easy to correct this. I did not bother. 

I had already decided to make a summer dress from this fabric here: Blue leopard spotted fabric.  This dress took most of one 3m piece so there are still two peces left after making this.

The red and blue dresses are really nice to wear. In both I folded the edge of the neck over to form a channel rather than make a frill. I would say I am not really a frilly type of person but I do love my black dress and it IS frilly! I used 1 inch wide elastic for the neckline and under bust but thinner elastic for the sleeves in all cases.  The necklines stay where I want them by using the slightly thicker elastic. I have previously made similar tops but had problems keeping them either one or off my shoulders as I wanted. These work. Interestingly I prefer the red dress worn on the shoulders but both the others off the shoulders.

Each dress has different sleeves as well. The top is gathered on the red dress just above the elbow but the edge I made use of the border print and left loose mediaeval style. Then for the blue dress I elasticated both the edge and above the elbow. For the black dress I did frills because of having the lace edging. I left out the above elbow elastic as well for the black dress.


Shame I did not fill my white bits in with fake tan!

Dress number 3, I wanted to make so I can wear it this Autumn /Winter. I bought this lovely fabric for 99p from Ebay about two years ago now. It is unusual because it is quite heavy weight and is satin one side which I used for the inside of the dress and matt the other side. You can see the satin on the pointy hem bits which gives a nicer effect. It is not crepe on the other side though as seems to usually be the case with satin backed fabrics but more like lightweight canvas. I got about 6m for 99p so have been waiting to make something lovely from this. The fabric was very creased but I did not iron before cutting so was a bit worried about how it would all work out. Recently, have managed to melt some really nice fabric so I was not risking this. Once I finished the dress which was over a week ago and hung it up all the creases miraculously hung out so its now really crease free.

For this dress I altered the skirt. On the first two dresses I followed the pattern and the side seams join up to the bodice side seams giving two front points either side of centre front and centre back, but on this one I moved the pattern around so that the skirt point ends centre front and centre back with two side points.  This black dress also has a seperate petticoat of unlined black lace. Its simply the same skirt pattern with 1 inch wide eastic sewn around the waistline. Since the dresses are high waisted this petticoat hangs quite a bit lower than the rest of the points but it looks really nice and gives an extra interesting layer I really like. It has no lace frill either which the dress does and that seems to near enough compensate for the slightly longer length due to the movenet of the waistline on this piece back to natural waist. It also makes the dress a bit longer. Depending on how I put the petticoat on I can either line up the points with the dress or better still have them in between the dress points. Hopefuly that will make sense.

I used wide stretch lace all around the hem and sleeves as well as the neckline and made this a frill. I also used the wide lace as a channel for the elastic so this version the channels are on the outside whereas the other two they are all inside the dresses.I also missed out the straps/ belts that are meant to zig zag down to the waist. The first two dresses have these.


I am very pleased with all 3 dresses but especially with the black dress which I can quite honestly say is the nicest dress I have made or owned for around 20 years. I love it! I cannot wait to go somewhere to wear it since its wasted wearing this for every-day life. I suspect I will wear this over Christmas.

I realised whilst writing this and waiting that you cannot see my satin backed pointy hems or the lace petticoat so I took some new pictures.

neckline showing satin inside with lace edging

Satin inside with matt outside on my pointy hems

more pointy hems with sleeve insides

My lace petticaot

Close-up of elastic waistband

The skirt pattern is actually a circle inside a square making for a pointy hemmed circular skirt with hole in centre for the waist - hard to show due to lack of table space


Petticoat on Harriet


Thanks for visiting my blog
Bracken