Tuesday 31 December 2019

Short sporty sequin sided skirt

Its New Years Eve and I decided to make a short sportswear type of pull on elastic waist skirt. I used the same fabric as my trousers and added some sequin trim down the side seams as I did with them.

Unlike the trousers I made from this fabric, the skirt did not need this to hide the imperfections of my pattern matching because this worked much better. I just fancied having sequins down the sides.

And of course this means I am now back to sewing again. I can't say everything is perfect or easy to do yet but I am certainly on the mend. I suspect half the trouble is in fact due to not having been sewing for nearly 3 months, meaning I am well out of practice.

I shall put the practice part right over the next few weeks!


I was inspired by these skirts from H&M:


I really like the college look but I do not want to buy anything that I can easily make and get something unique rather than run-of-the-mill RTW. Especially when it takes such a small amount of fabric!

So I set about finding some kind of fabric from my stash that I might like to wear as one of these types of skirt. Now my hip is done I want to be me again. No more hiding behind old lady clothes with skirts down my calves.

I can walk!

 I always, all my adult life, like either very, very long skirts or very, very short skirts. I reckon at 55 I will not wear quite so short as I used to but I can still do this sort of short so thats what I am aiming
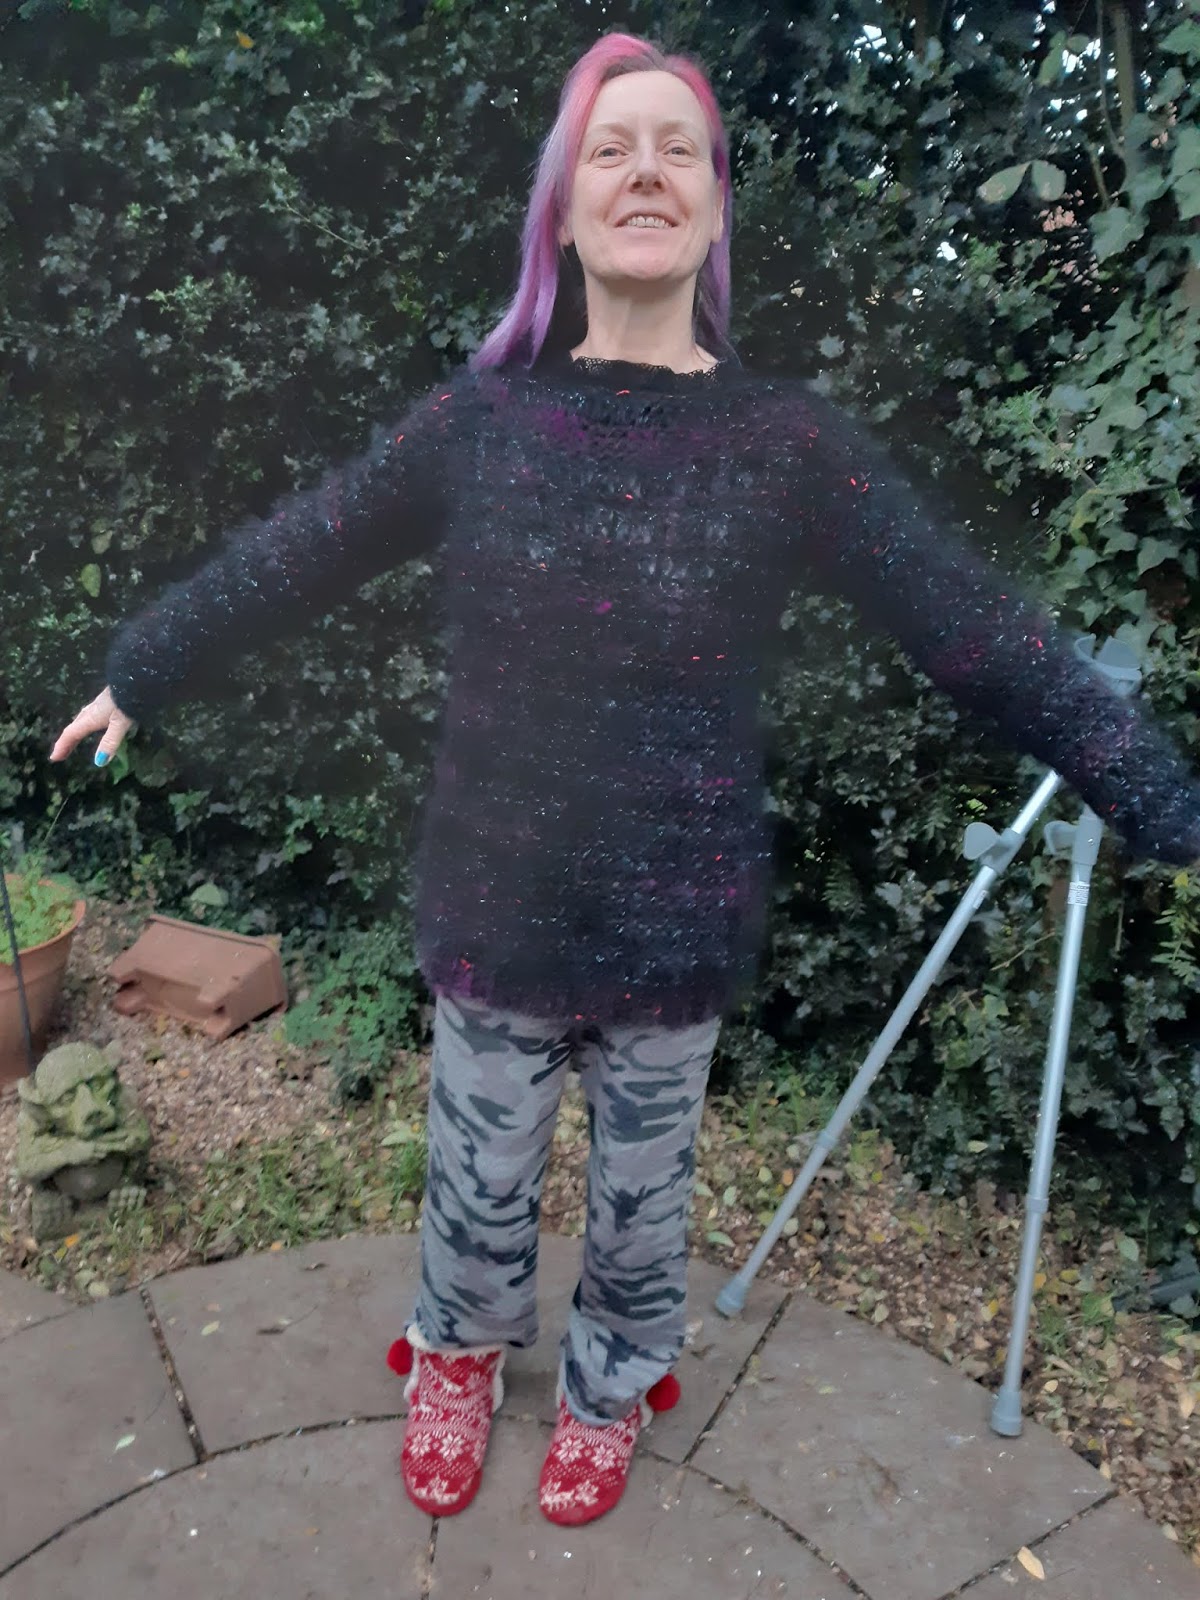
 for.

By the way, how do you like my new blue dip dyed hair?

To be honest its an accident. I used dye remover to get rid of the rest of my pink and purple colour for an interview and it left me with blue ends. No idea if I got the job yet😊


Back to this skirt: I have quite a bit of scuba fabric in my stash and never found a use till the other month, when  made my flares - with the OTT sequin trim that is.  I made them before my op. Now I am managing to sew at last so I am thinking why not also a short skirt?

This time I actually managed to almost pattern match too so just added the side stripes for the hell of it if I am honest. And why not. I buy all these trims when I see them but never seem to use them. Well now its time to make the best of life, the most of life, and live what is left to me properly.


And it seems at the moment that include sequins!

To hell with what others think. Its my life and if I want to wear sequins then thats how its going to be. So this skirt has happened and I reckon summer or winter this is going to be a nice little skirt with a bike jacket or a denim jacket. And importantly its meant to be an every day ( not obviously work day) skirt rather than a party skirt.


And also at time of writing its now New Year's Eve and of course this adds a little bit of glitter and sparkle for the party season so very apt for now clothing. I do expect to still wear this skirt come the warmer weather though. I think this will transition nicely. Theres not too much sparkle - if its possible to have too much😊

This is also an enjoyable venture into copying RTW clothing and I have a new skirt from the same pattern as my fluorescent green summer skirt:
https://brackencrafts.blogspot.com/2019/09/my-first-attempt-at-v-neck-t-shirt.html

Except this one is about 4 inches shorter than the green skirt which I need to chop before I wear it again I think. Just look at the wavy hem as well! I actually wore that.

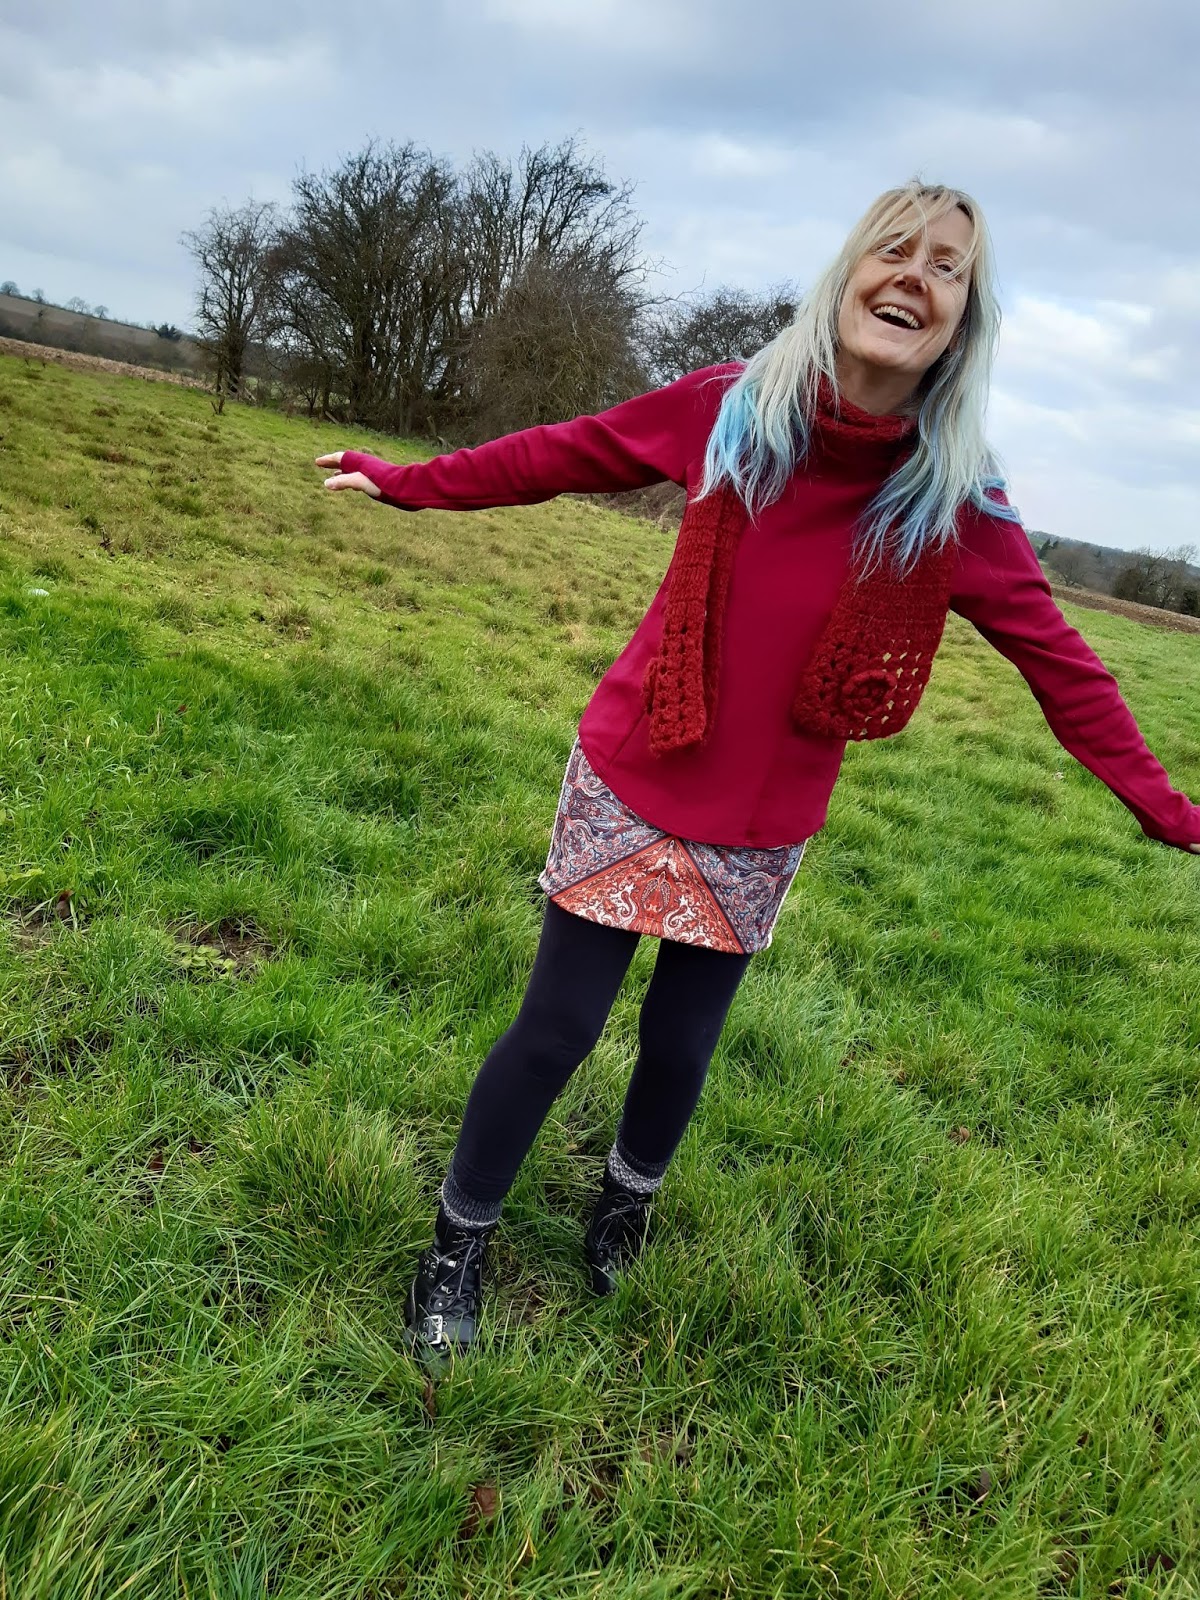
This is certainly more me!


And no wavy hem tho' thats partly down to fabric choice I think.


The red top is a sportwear pattern and made here: https://brackencrafts.blogspot.com/2018/10/view-b-mccalls-m7261-sportswear-pattern.html

Thats a very successful make because I wear it loads. I really should make a few more of these.


I reckon now I am back sewing I should make a camo version of this as well. 

I love the camo version on the H&M site and have some camo fabric left over from my dress and track pants but had no more time today to get that one sorted.


So, as well as getting back into sewing, I am now starting my New Year's resolution list for my next years sewing.

I am not sure if I managed to make all of 2019's intended makes. I will have to have a look back once 2020 is upon us and see what I did or did not achieve.

Also, what else do I need to put on the 2020 to-make's list?

I am sure I can think of several items straight away having been sitting unable to sew and just dreaming for the last loads-of-weeks. I will post the list once I know what is on it, as much for me to keep track of, and look back at, as for the world to read.

Happy New Year to you all........
Bracken

Thursday 26 December 2019

One sleeve tops for layering - Burda Style 102 04/2015

 I have fancied making this one sleeved top since the Burda magazine first landed in my inbox back in April 2015. Or it probably actually arrived in March. Anyway this is 101/102 04/2015.

The top is 101 A & B: and there is also a dress version which is 102. The top is actually in two lengths because the uder top is shorter. I am not so sure thats the way for me to go though and maye two tops the same length works better for my own style. You can see the shorter version top lower down this post.


These two tops - orange and cream are in a double knit fabric which I think is good for this pattern because its not too stretchy and has lots of body, but both are slightly too big for me. I would not feel comfortable wearing either alone which of course you are meant to be able to do. I think they would just slip off and expose my boobs if worn alone. I will have to try making a smaller size next time - there will be several next times for this pattern I am sure because I am very inspired by the possibilities here.


Just think of the colour combinatons as well as plain options and each one also a seperate one shoulder top as well!


As it happens since I am after a two layered look at the moment, it being winter,  so its fine in this size and these turn out to be wearable muslins really, but next time I will be making the next size down. I am also going to make some of these with full length sleeves because I prefer my sleeves very long as in over my hands rather than three quarters like these are. Though at least these are all the same so wearable together.


You are really meant to make a shorter version of these as in the black top


 and the longer top goes over it. You should be able to also wera the black short top as a cropped top but to be honest at the age of 55 I really do not feel comfortable wearing this outside the house. I suppose maybe at pilates or on a beach but not to Sainsbury's or Aldi or the like. I am simply too old.

However, for younger women / girls this pattern has the cropped top as well, so giving various looks because why not mke two cropped tops? or lots in different colours.

The black top is in dancewear/ fitness grade fabric and seems to fit better. Maybe then its not a sizing problem but rather my fabric choice with the slightly too big orange and white tops?

I decided after making a plain black shorter top, why not just make the longer tops? I will be making more black (long) tops in the future so I can have a black two sleeved layered top but right now I just have this one short version.

It does though give me two more "looks" with my orange and cream tops.Here is my black top with the cream:


Defo a bit large I think!


Possibly this is all my own fault - the size of the tops.

A couple of days ago I wanted to look up italian sizes since it seems they are different to the EU sizing I am used to, and I own several italian sewing pattern magazines.

In the process of looking up international size charts, I realised that in fact German sizing - ie Burda - is a smaller size to eg New Look, H&M, Pimark, Next and also to French sizing which is the same as the UK versions of EU sizes so I have been making Burda size 36 when I am probably really Burda 34.

I am H&M, Next and New Look 36 - and this goes along with French sizing but not German. Its all very confusing but does expain why Burda is usually a bit big for me.

So now I know!


Its does not matter for these tops anyway. I will probably not be wearing them singly. I made because I like the multi - layered idea.  Being a little large will not matter then.

Its does explain the problems with a dress I made using this pattern though - more on that later if I ever get it to fit me!

Interesting also how my hair colour has faded over a few weeks. The orange and cream tops were photgraphed a couple of weeks ago. I did not realise how much the colour had faded until now. Of course all the tops were made prior to my operation. I still have not sewed since then but am inteding to try to see if I can control the sewing machine this week.

Wishing you well,
Bracken

Wednesday 25 December 2019

Gold Christmas Top


Finally I have sewn something and here is my Christmas top. Normally I would say very badly made but bearing in mind its my first sewn item since 16th October I am very happy.


I sewed with my left leg not the normal right (operated leg) cos I seemed to have more control. Interesting! You would expect the leg below hip to work normally. It does not quite as yet.


I had a very wavy seam on one side of this top where really there is a bit about 1cm deep missing from one seam where I wobbled because its the first time sewing using my left foot to operate the pedal etc, but never mind.


The twin needle hems were a nightmare. Everything possible went wrong including breaking an expensive twin needle, re-threading with a new needle only to immediately break the new unused needle. Note to self: order twin needles 3 packs off ebay from China, cos they take ages to come, and so far once you actually get them they are really good and about a third of UK prices, but you have to wait up to 3 months to get them! I have just one new twin needle left now.

Then, I ripped the edge of my top which luckily you cannot see, when the needle decided to tangle the thread. Normally my Brother is always perfectly set up for twin needle sewing. I use the Janome which is newer by about 30 years for everything else and leave the Brother set up. It just works fantastically tho does seem a bit wasteful sometimes. The Janome does not do twin needle tho. With knits I use it constantly. But I have been using the Janome for my walking foot experiments - leather skirts etc just before the op, so I have yet to put it back to normal so seemed easier to use my Brother to start sewing. I did not begin by using knits but tried sewing up a summer dress. This proved too much so I agve up but had changed the settings on my machine. When I came to do twin needle sticthing I am used to it just working. Well, it needed a few adjustments which I never expected. Ah well, you cannot always have successes and in the end this is wearable so not a total failure.

I do feel Christmasey!


The very forgiving fabric does not show the problem and the lace covers the missing bit from my seam wobble, and with the very last bit of my lace now used its the end of an era and a look.

I seemed to have a never ending stash of black stretch lace but its finally run out. I will have to start watching out for a bagain. It does look good at wrists and neckline on this top tho.

Thats a Christmas top if ever I saw one. I never had enough to do the hem but reckon never mind. If I found this in a shop I would love it.

At least for me it also means now I am sewing again so am defo getting better.

Fabric stretch gold stuff (no idea of fibre content) made previously

into leggings
https://brackencrafts.blogspot.com/2018/12/gold-leggings-inspired-by-tom-ford-rtw.html

and dress
https://brackencrafts.blogspot.com/2018/12/gold-dress-for-christmas.html

and its McCalls M6612
 https://blogger.googleusercontent.com/img/b/R29vZ2xl/AVvXsEg2YdgSF7WZgu0d0aoF12Gzeo4nfGB49LtnbMhE-Q7sUWocPLYRMXs0CpJoKHLw13uLhrhh804G_1n7vehtoEJX_AqB_hagCWC7MKrA6hA42gSiGhEZuI6-5CqBLJp7ukOd2OopgsH-X8Tb/s640/WP_20181104_08_53_07_Pro.jpg

I reckon despite the deformed seam its very OK as a new Christmas top and its always nice for something new to wear to the party. Now I have vacate the table for Christmas day.
Have a wonderful Christmas
Luv
Bracken
XX

Thursday 19 December 2019

Knitted punk rock holey jumper


As a 15-16 yer old I really wanted a Johnny Rotten style holey jumper. Angie's in Oasis in Birmingham used to sell them for around £20 each. 

Bearing in mind this was 1979-1980 this was Extortionate! 

My mum was a brilliant knitter but refused totally to knit me one. My Grandma had a clearout of all sorts of yarns and ends of balls and I decided to knit one of these myself - for nothing. It took a few weeks - fast then for a novice knitter - but I was so dedicated to this you would not believe. I used the biggest knitting needles I could get hold of. They were size 000 which is about a 9mm or 10mm now. I am so amazed these huge needles have become so popular again in fact because they make for rubbish loose knits but as a starter project they were then and remain now a brilliant way to begin to knit. I never knew how to rib then either so the beggining and ending were just plain knit. I did do stocking stitch for the main part of the jumper tho.

Its stretched and stretched but still I wore that thing.

I still, after all these years, love a holey mohair jumper, but want something a bit more stylish now and that I can actually wear to work, so this is my first proper knitting design which I am publishing but you are fine to copy and even sell but please credit me with the design and if you do want to republish this please link back to this blog.

Its not as holey as those 1979 Angie-in-Oasis jumpers but it still has holes. To achieve that effect you would use the yarn single not doubled but it will not last long and will go out of shape fast. Thats why all those years ago my mum would not knit me one.

The doubled yarn makes it much warmer and instead of knitting stocking stitch this time I have designed a reasonable proper pattern stitch - though still very easy. I think it should stay in shape pretty well and the metallic thread lends to work wear in winter if not in summer. Nice with a pencil skirt I think!

Please also note this is not a very well written pattern because its my first attempt but hopefully it will make enough sense and be easy to follow. Please feel free to contact me with any queries and I will try to help.


From underarm to underarm this finished jumper measures 57cm so 114cm ( about 45 inches) circumferance. You could make this as long as you wanted. It would work well for cropped tops too if that is more your style.

The pattern is all plain knitting so very very easy. You need size 8mm needles but could get away with 9mm or 10mm. This will just make the holes bigger and be aware the size of the finished jumper will also be much bigger if you do this. I used 2 strands together of a medium gauge mohair so meant to be knitted on 5.5mm to 6mm needles.

The entire jumper is just rectangles although I did add some increases to the sleeves to shape them. This is easy to do.
Hard to get good pictures due to the rubbish winter light!
I used two colours in stripes because as explained in my previous post I am using vintage 1980s mohair and most people only had 300-500g of this at most to sell in any one colour. I used a total of 360g for this jumper ( I weighed the final jumper) so about 200g of black and silver and 160g of black and purple.  If you have around 200g in 2 colours it should work. For a cropped top you probably only need 300g max. The quantities needed are just an estimate though. If doing this with odd bits think of how much you will need to do the 4 parts - front and back and sleeves and try to match them.

My colours are: black with metallic silver threads; and black with purple and metallic red threads. I do not have enough yarn to knit this all in one colour. The colours sort of mingle so its hard to say they are stripes rather than a colour changing yarn but it works well either way. I fact I am very pleased with how this turned out. You could just as well though have something like a pink and black or red and blue striped holey jumper. It will be much easier to knit in a lighter colour than it was in black.

I did not worry about a gauge because I have no pattern to follow and just knitted and hoped. I cannot easily measure this either because the black mohair makes it very hard to see. A beginner might prefer to knit this in a lighter colour infact because it will make it much easier to see and keep count of rows and stitch patterns.!

 FRONT AND BACK PATTERN:

Using 2 strands together of my black and silver yarn I cast on 76 stitches and knitted 6 rows.

OR you could rib here because I ended up picking up all around the bottom after sewing this up and adding ribbing on to make it more professional looking but it still works if you do not want to do ribbing. Hence, ideal as a beginners knitting project.

So having knitted your 6 rows (or however many you decide to have as your border) you then start a new row.


LOOP STITCH


*Now knit the next row but wrap the yarn round the needle twice for every single stitch you knit.

It now looks like you have twice as many stitches.

Once you have finished this row knit back but allow the second loop of yarn to "drop" so you end up with the 76 stitches you started with.

Knit 4 rows. of normal knitting.**

***Change colour to the black and purple yarn. Again use this double and knit the loop stitch again. Follow with 2 rows of plain knitting. ****

Then use the black and silver yarn. Keep repeating the pattern from * to ** and alternate with the second colour from *** to **** in stripes.

If you make a mistake for example knit too many rows in one colour just make sure to do exactly the same on your front so it matches. I made two mistakes with the pattern but it actually makes the final jumper more interesting. You can of course rip it back and then pick up all those sticthes again to make it right but with this sort of pattern you ca get away with just adapting to the mistake. And I hate unpicking!

Once the back ( or front) is long enough cast off straight across the end of the knitting giving a large rectangle.

Make an identical rectangle for the front.

SLEEVES:
Using yarn double as before cast on 14 stitches. Knit either ribbing or a foundation of several rows of plain knitting then using the above Loop stitch and stripe pattern start to knit in rows as the front and back pieces.

However at each end of every other row increase into first and last stitch by knitting into front and back of stitch. Continue until the sleeve is around, 50cm (19.5 inches) then cast off. I am not sure what my final stitch count was but make sure your sleeve is wide enough that when doubled it will fit your body - so measure round your arm at the top where it will join the front/back and allow for a bit of room to go over T shirts and for you to move in it. Remember this is just rectangles so has dropped shoulders.

I sewed up using a large eyed needle and matching yarn and I crocheted round the neck to finish it off. After sewing my jumper up I actually then decided to add ribbing round the bottom edge. It would work without, but will last longer I think with ribbing and since it turned out rather well I want this to last as long as possible. If you decided to knit with ribbing in the first place obviously you wouldn't need to even think about this.

This is a very in-exact knitting pattern but its also very easy hence you do not really need a pattern at all.
Bracken

Thursday 12 December 2019

Festival skirt with applique silver stars


I am really getting into this upcycling lark. I made this before I had my operation. I am thinking it will be a fun Christmas skirt.

This is based on the Zoe Karssen star skirt. You can see the real thing currently on UK Ebay here for £39. That one though is leather. It works perfectly in upcycled pleather though. The original skirt is in my opinion flawed as well since it only has stars on the front. If you make one of these thats your choice. I put them on both sides.


The original is leather but no reason not to use faux leather and its much easier to sew than the real thing. Also there are plenty of very cheap ( as in 99p + postage) skirts on Ebay for this kind of project. You could have any colour combination here as well. I went with what I had available which is pretty similar to the original but this could work in any colour-way really. In fact my stars are metallic and glittery like tinsel.
I think on the original skirt they are just plain pink so argueable mine is better😀 Also you could do this with a different shape - eg flowers or hearts. I may have a go at that later. It feels more a Spring project.

I had a silver skirt from a previous Christmas so decided I could use this and update it by using the offcuts from my Flame Applique Skirt. I bought the materials for the Flame skirt very cheap from Ebay.

Originally I was aiming to make the Flame skirt as just copy the RTW versions ( so black, gold and silver) but I ended up doing a totally different colour way of that skirt because I got hold of a metallic red fabric which was really nice and it inspired me to do my own thing instead and I had some of the red metallic fabric left over from the Flame skirt so I used a cookie cutter to draw round to make stars. They are not very perfect stars but then it is hand made:)

 There were a few scratches in the silver coating on my old skirt so the stars cover these pretty well.


 I think perhaps this may have been better if I had put the stars on more regularly spaced but at the time I did not really want them like that so I did them random.

I am still not sure about this but there is no going back with leather or faux leather types of fabric cos it makes holes when you sew it so if they get moved it will show and look amateurish so best left alone now its done. I added a dab of fabric glue under each star to hold it down long enough to be able to sew it, then, as previously with my Flame skirt, I used a walking foot to sew these and went very slowly because I had to turn at each star point.


To sew on the stars I also had to ripstitch around the bottom of this skirt because it was lined with the lining attached to the bottom to give an invisible hem. If I had not detached it I would have had to sew through it which besides looking unprofessional might have made the lining twist and be uncomfortable.
It was very easy to use a stich ripper to detach it.  Instead of re-attaching which would have meant hand stitching - even if I managed to do that it could have looked really rubbish - so I glued the hem back up and seperately sewed a new hem to the lining fabric. This was a lot easier that trying to re-attach to the (p)leather which may have then ripped because it can only be sewn so many times.

 I very much like this. Its a great new skirt for Christmas this year and I reckon I will aim to wear it lots because its not really very wearable the rest of the year.

Or maybe for festivals?

Could be a bit much for summer tho so it could be a very short term useage, but for the price of some scraps from a previous project, which was also made using very cheap second hand Ebay skirts, its a great way to update something.

I think it would also be quite easy to do this to an old black pleather skirt with any colour you find in a charity shop or your wardrobe and since so little fabric is needed for the stars you might even squeeze enough out of an old handbag.

I already owned the silver skirt but have had a quick look on Ebay and found a similar Zara basic silver skirt in pleather for £1.10 and with postage this cost under £5 and the red skirt the stars came from was £3.90 including postage and bearing in mind this was previously also used to make another skirt, its a very cheap upcycle really.  And I really enjoyed making this.

I certainly could not buy the fabric for less anyway. And since I already used the red skirt fabric for the red flames on my Flame skirt, I kind of think of this one as a freebie. 

See you next week,

Bracken