When this week of "Anthing but Clothes" began I was intending to make a
bag. I even cut out a small rucksack pattern which I found for free
from SoSewEasy and I really think I may have to get round to finishing
that at some point because its a great little pattern. The problem
though is I use a rucksack - as in a proper small Karrimor rucksack for my
everyday life and I really virtually never use a bag so it seems a waste
of effort.
Then on Tuesday evening I decided instead to make the free corset belt pattern from Scarlet at
https://www.corsettraining.net/project/shop-vixen-corset-pattern/
First
though I needed to check with the editors if this counts as an indie
pattern company and they agreed it does which is brilliant.
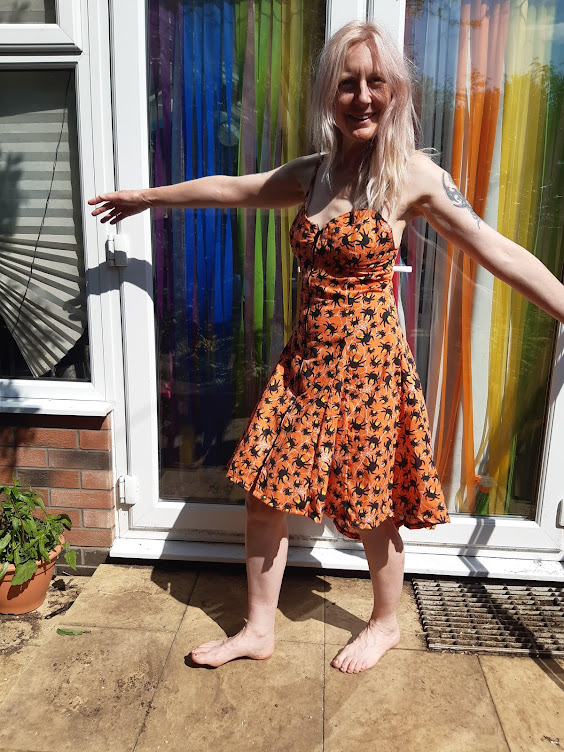
Unfortunately, after I made this I had some issues taking photos because really most of my clothing that will go with this is dark and it does not show up well so I ended up trying several outfits with mixed success but I think it shows the belt anyway.
Ideally I now need to make a dress to go with this I think.
I have been intending to make this for years. Really about 5 years I
think. I downloaded and printed it out years ago but never got round to
putting it together or even looking at it until now because what I never
realised is the pieces are so small you do not actually have to stick
anything at all together!
The belt is made
from scraps as well left over from other projects and when I say scraps I
really do mean that. The satin is so lovely I thought it might be a
pocket, collar or something or a covered button cos the pieces I had left are
all small. I still have loads of scraps but all the reasonable sized
bits are gone. I ended up using selvedges for the edging in fact which
should be bias cut but I did not have enough.


Its really not a proper corset because I only had plastic
rigilene bones and two sizes of these so the sizes vary around the belt.
Its meant to be made with metal ( steel) bones. I decided to go ahead
anyway because its a good practice to make a muslin and this is a
wearable muslin and right now I am between jobs. I
temp and am waiting to find a new placement so money is not really
available for anything and I must find what I need from my stash. My
stash is pretty big tho so its not really a problem but does inhibit me
sometimes.

So this is a muslin really. I will, however,
definitely be
making another with proper boning. Luckily Scarlet gives three different
versions of where to put the bones so I made a mash-up of these to make
it work. The channels are green bias binding. Some of the channels have
an extra row of stitching so I can have two bones side by side in one
channel because the thinner bones need to be doubled up else they are
too weak. I also have two channels up the front (or back) because its
wearable with lacing front or back depending on how you want to wear
it. I had 1m of each of two widths of rigilene and I have about 10cm
left of each size so it uses quite a lot of boning.
I used grommet tape because I did not have grommets as such and this is left over from a dress I made a few months ago.
For directions I used the instructions from Emerald Erin's blog
http://emeralderin.com/2015/07/corsets-with-scarle.html
Construction
is completely different to clothing but its very straight forward and I
would definitely recommend making this if it appeals to you. Personally
I have no interest in tight lacing at all but just want an unusual
belt. I think next time I will also make a bigger size because its meant
to reduce your waist. I usually like to wear loose comfy clothing but I
really need a belt to go with a dress I am making which is very sack
like so this is a big adventure for me.
I could really
have sewn the rigilene straight onto the fabric but decided to make this
exactly how I will make the steel bones version in the future because
its a good practice.
Its got 3 layers, not two, as in the instructions because I did not have
any Cortil. The outer is fragile satin backed cotton type but of
unknown fibre. I made a dress from it previously for the
3 Dresses from one pattern TMS challenge. The inner is 100%
cotton shirt weight fabric which I also made a dress from and sandwiched
between these to give strength is a layer of canvas. You should really
use Cortil but I do not have any so for now this will surfice. It seems
to work but I suspect this belt may not last long. mind you it s also not something I see myself wearing every day especially since I need help to put it on!


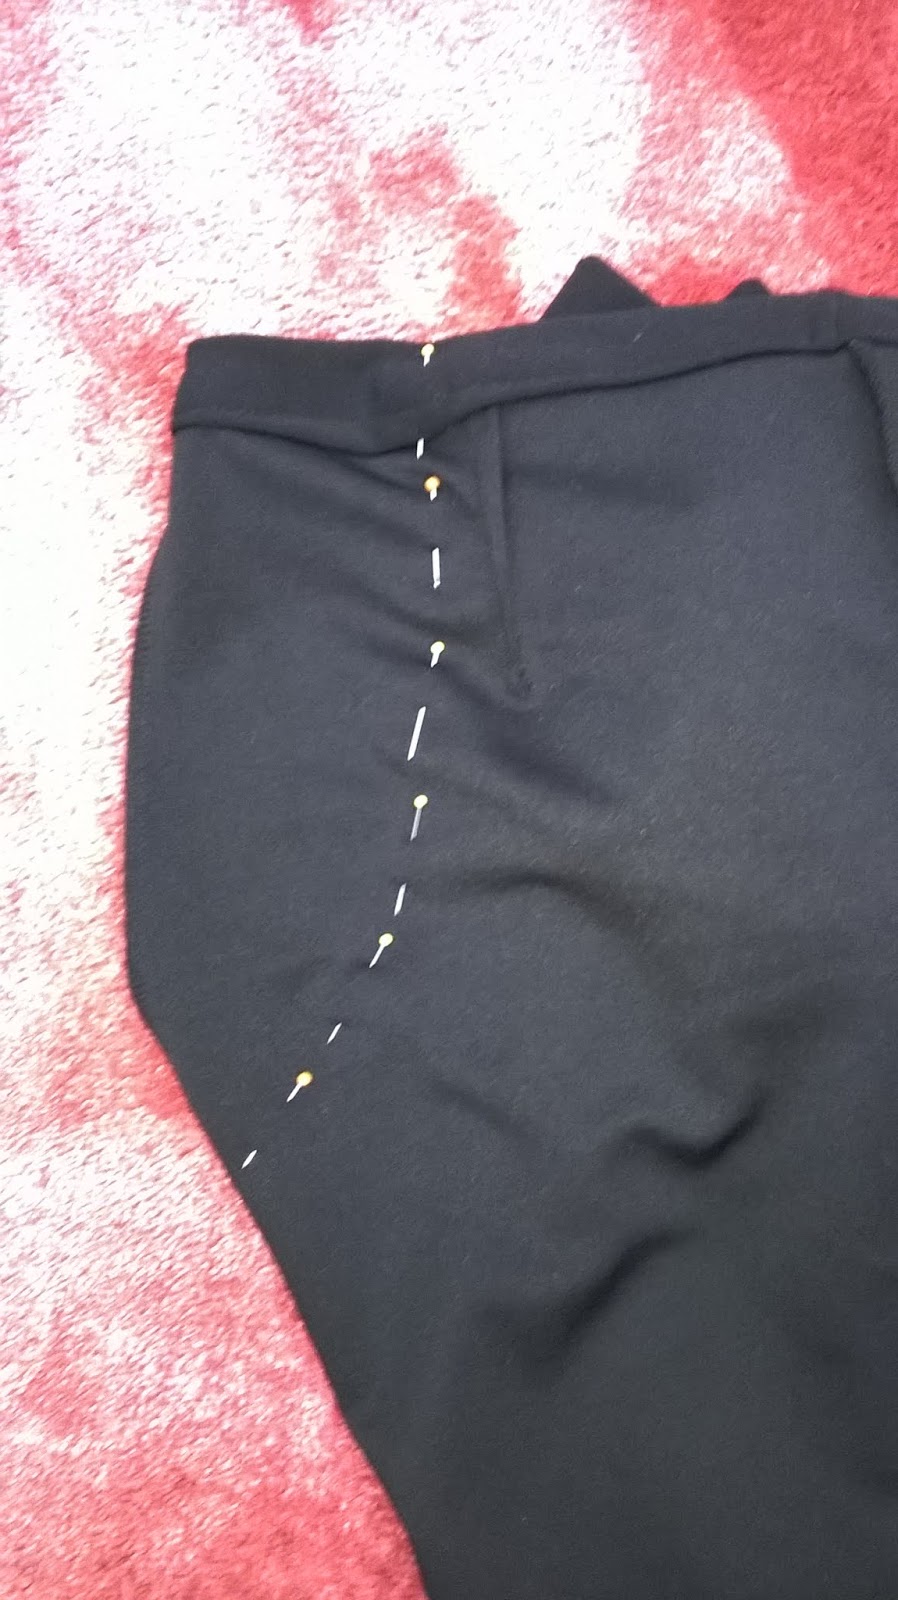
The white lines you can just about see on the lining are chalk where I was working out where to put my front boning channels because they are slightly different to the pattern.
I do not yet have proper lacing so am using ribbons. I started off with two different coloured ribbons and this is much easier to lace yourself because you can see in a mirror which ones you are pulling.

Its a big
difficulty putting this on and I need help which is not ideal tho when laced at the front its obviously easy to do. Did I mention its reversible so you can lace front or back?
You are meant to be able to
do this yourself! Maybe with proper lacing it will be easier. I may have
to buy some. Scarlet reckons you can put this on yourself either way and a full
corset too. It may then get easier with practice but who knows.
Its a fun project either way so thank you
TMS because this is reallymaking me step into the unknown and
do what I have thought about but probably would never have actually got
round to without IPM.
Anyway I am happy how this has turned out despite it not quite working with my current wardrobe. That however I can easily fix and as you can imaging my ideas of what to make to go with this are seriously flowing now.
So here are the photos:

This is definitely a fun item to add to your wardrobe and I may even make one of those Burda Dirndle patterns I seem to have hundreds of😊
Thanks for visiting
Bracken

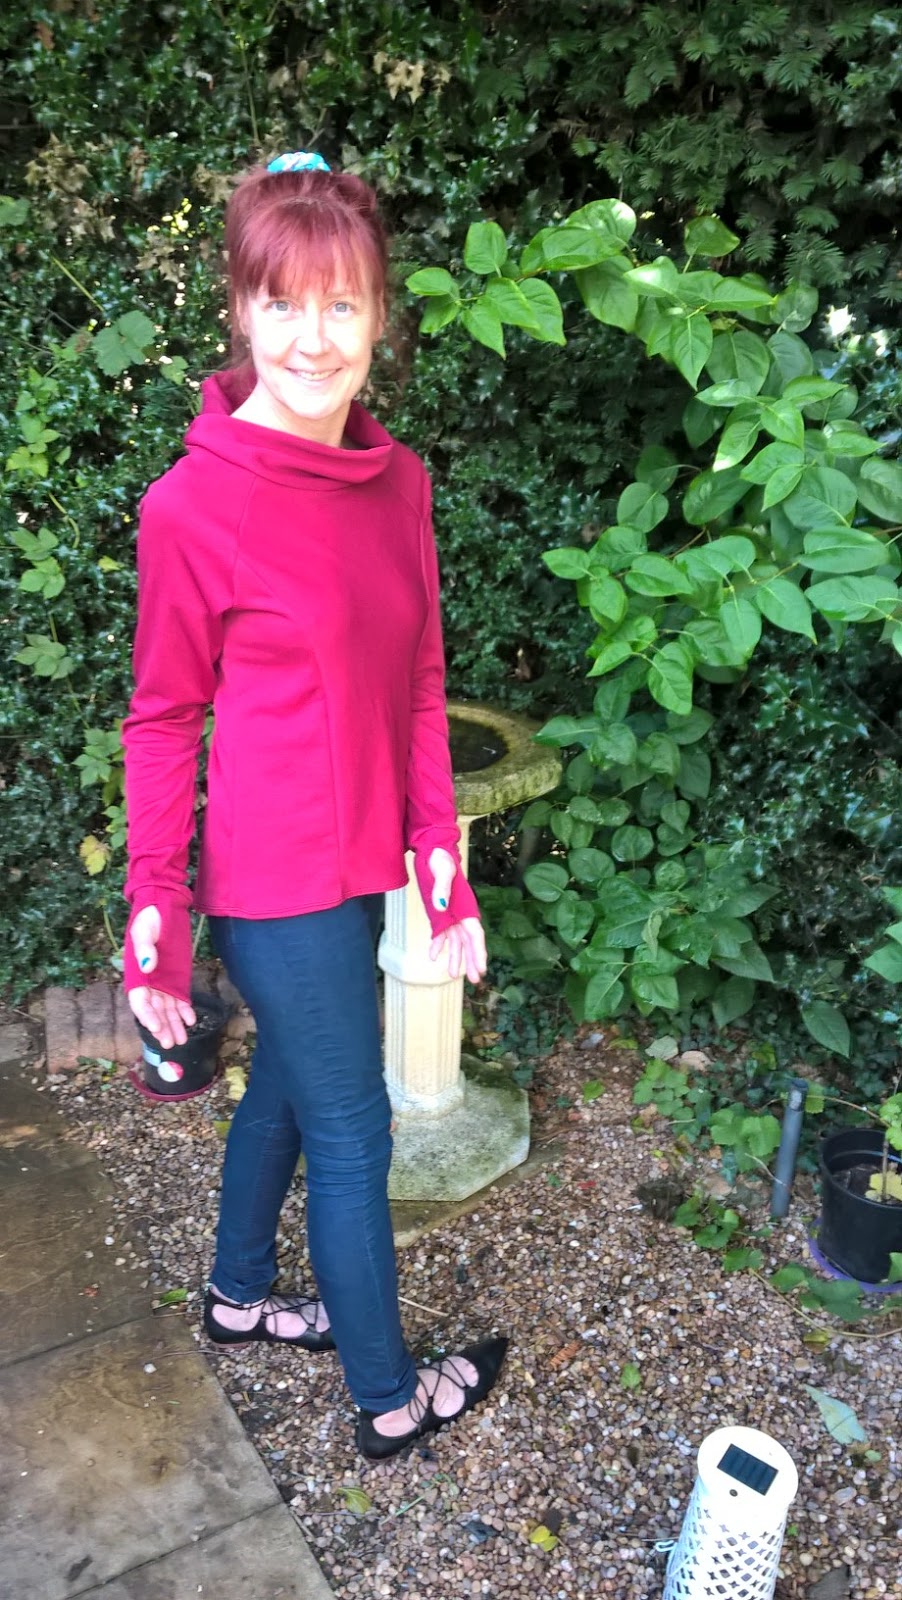
 Its a nice warm top and I am intending to make a few more. The collar is actually meant to be centre front overlapped but I pinned it on at the side by accident and liked it so left it.


 Thanks for visiting