Monday 31 October 2016

70: Shaman cape for halloween

I had the idea to make this over a year ago when I bought two Ikea rugs for the conservatory.

The rugs are cheap at £20 each and are shaped like an animal skin but 100% synthetic. They do not stand up well to hoovering but do wash very well and look really good. The last time I searched for them they are not in the online catalogue but are for some reason only available in store. At one point I thought they were discontinued which was a great disappointment because that was Halloween last year so I abandoned this project then but then they got more in so I bought two of them and have stored them since in anticipation for this project.

I was just messing around one day and realised they would make a brilliant cape but then I saw various faux taxidermy projects so I decided to make this. My Halloween Shaman’s Cape.

First I used a free internet pattern from Charming Doodle which is actually a reindeer faux taxidermy pattern. http://www.charmingdoodle.com/2013/11/tutorial-make-fabric-deer-head-or.html


 I thought it would be too small but made a quick mock-up /muslin out of some brocade. I did not bother with horns or ears for this model because I just needed to know the actual size it made up into.


 The second picture is me trying it for size on my head. Then having found 
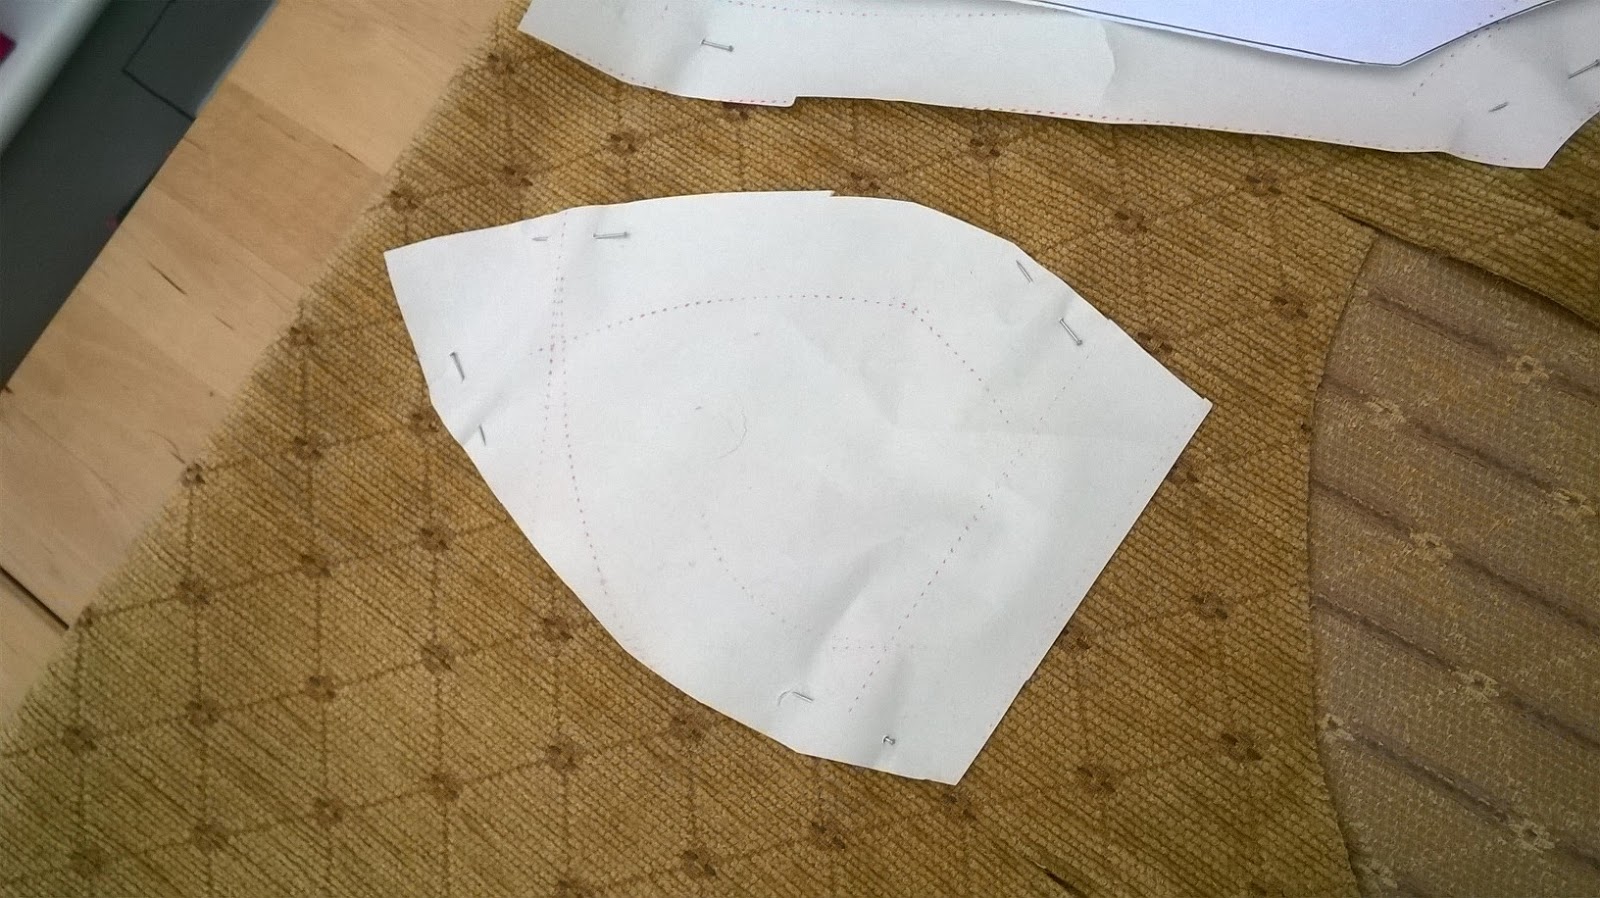
it very small indeed I used my clover tracing wheel to trace at maximum distance which I think is 3cm all around the edge of each pattern piece. I made the ears a bit longer as well. 


I then grafted the hood pattern from Burda 01/2016/ 101 onto my new animal head pattern. I accidentally traced two of these when I made this so it has been hanging around for ages now and is a bit battered.


I filled in the gap where the hood joins the deer head with extra bits of paper and taped it for further use just in case I decide to make a second version or even a large sized taxidermy head. 


Then I decided I do not need a back on my head/neck since it will be part of a hood so I chopped a few cm off at the body end of the head gusset.


This is how it measures: I cut 23cm off one side and 12cm off the other. Of course you put the long side onto a fold of fabric when you cut.


 Now I made a second muslin. This I decided was OK size wise but I did not like the ears. So I cut about 1inch off the bottom but left the top intact. They are now completely different in shape to the original deer ear.


I sewed the ears first then attached them to the head but further back than the original design.

I also could not get them to stand upright at all!


Predator or Prey?

I spent ages then annoying both my dogs trying to work out how their ears attach because predator ears are different to prey. Deer of course are prey but that is what my pattern is and I really want a wolf head or similar since I think most self-respecting shaman tend to wear power animals like predators. Well I am really no expert and at this point in my construction I decide well its going to be a bit too zebra-ish anyway so who cares. I am making a mythical animal head now. I still aim to make it more predator than prey though.


I am feeling a bit guilty at this point because while I am playing around with faux animal patterns, my other half is busy trying to do the plastering in the lounge in time for Christmas where it all fell off a few months ago: Life!

The guilt will not win though because its over a year since I started to plan this. I should have begun the project a week or so ago but only then came back from holiday and had loads of washing to do so I have been too busy with real life to actually do any of the sewing for this project. By now it was about 3pm on Sunday 30TH October and if I really want to complete this in time for Halloween tomorrow I need to get a move on.

 So I decided to go for it. I cut the centre of the head piece out of the middle of the rug so it is very dark and patterned and to get a contrast. No going back now because I have recked my new rug!

I then cut the head with hood out of the pale bit with the edge of the rug becoming the face of my animal. It means I get a good contrast in fur colour.


Then the ears from two legs so the fur there has a kind of edge. The ears are actually about 2.5cm shorter on the bottom edge than the ones I made for the second mock-up.


At this point I was panicking about the time this was taking so I stopped taking photos. Sorry about that but I have no real rules or plans to follow so it was all just a bit of luck and "magic" that was guiding me.

The head sewed up really easily and actually fed well through the machine which surprised me. I do have leather needles but never used them. Even when the thread ran out and I re-threaded I found the hard bit was actually getting the very thick 4 layers ( where the ears joined and were folded into a tuck to give shape and the head gusset and head were all being sewed at once) under the foot. I ended up sewing from the edge and into the old stitching line at an angle because while it was impossible to manouver the fabric under the foot I could get it to feed from the edge of the cloth no problem. An unusual sewing experience! The sewing is far from perfect but you cannot really tell and it is just a costume after all. I also had a problem with the Ikea label which I could not remove so I made sure the leg it is behind is not seen when the cape is worn. Obviously if it was at the bottom edge/side you would have seen it as the cape hangs but it is hidden behind the arms/ leg bits that wrap round the front so only seen by me. Going on my experiences with this rug label in fact it is a right nuisance it is there because it comes off in the washing machine and leaves a sticky patch you cannot remove which sticks to the laminate flooring.  You can see here where I washed it off the one rug.


I tried just to peel off the other but that also does not work. So I reckon if you use these rugs for anything even on the floor then you are stuck with this label. Its hidden and I must just live with that.

Finally my hood/animal is together so I split an old cushion for fibre filling because I never remembered to buy any. I stuffed and added some lining fabric to hold it in place.

To attach the hood to the body of the cape, I use the actual shaped edge of the other rug as it is and cut nothing off because its kind of neck shaped anyway and attached the hood here. It is at the centre of the rug on the side where the label goes. It would look just as good the opposite way up really but you would then see the annoying label that Ikea must put on there.

Then I tried it on but the hood bit is just huge so I got my partner to pin it into a kind of collar all the way round and sewed a line of stitching to hold this in place. I think it actually looks more “designed” with the collar so I am pretty pleased with that.

So here it is:


Unfortunately, I never thought to buy any stuffed animal eyes or noses and I have decided to use it tonight as it is but to add them later. I did mess around with buttons and bits of fabric but I want proper hammer in glass or plastic eyes and a nose so I need to order these. It does mean I have a rather blind shaman animal who has no sense of smell tonight but never mind. I want to make this perfect and it is still complete enough to wear as part of my Halloween costume regardless. I will probably eventually add a fastening with a buckel and some faux leather at the neck to hold it closed  if I get time before tonight but it is useable for a party just as it is.

So what do you reckon?   Predator or Prey?
Here is me attempting a shamanic rain-dance in the back garden:

Predator or Prey? Does it really matter?

Thanks for reading and for visiting my blog,
Happy Halloween
Bracken


Thursday 27 October 2016

Holiday in Yorkshire


We finally got to go away. I never told anyone because ....well you just tend not to advertise on your blog that you will not be at home - just in case. We have not had a holiday since October 2013 so his was very welcome although a bit cold at night in a touring caravan. Our caravan is circa 1985 so pretty old and no mod cons at all. The dogs both wore coats to sleep at night so you can guess the temperature. I have been too busy to get away before though I have decided I want to try and get away in summer next year. That would make a lovely change. It was fun though. We stayed on a small caravan site near to Scarborough in Yorkshire. I have to say what they say about Northerners is true because everywhere we went everyone and I really do mean everyone was so very friendly. As a Midlander you tend to just accept the grumpy nature of your co-inhabitants but there is no way to deny the lovely friendly nature of the yorkshire people.

I want to move to Yorkshire. I probably will not be able to until I retire and that is assuming we have any pension at all by the time I hit retirement and they do not make me work till I just drop dead. I would not be at all surprised if that was the case. The retirement age for me as already risen I think to 68 and is even older for younger people. As it stood before the most recent changes I already had enough NI contributions for a full pension despite spending years in education. I suspect now I no longer have that without a further 20+ years of contributions.

Anyway a bit less gloom and doom needed I think. On the journey back I heard that old song " Don't worry, Be happy" and I just keep thinking of it since. Must google who sang it in fact! It has to be the way to go forward in my life. So from now onwards that is my new motto in life!

Since my partner took his driving test years after I did, I have what is sometimes called "Grandfather rights" to drive all sorts of vehicles. We do not yet know if he is legal to tow a caravan so I have to do it all. We did ask DVLA and the local police but it seems a bit of a grey area so until we find out I am stuck with all the towing which I can honestly say I do not enjoy. Anyway, he gets to drive my car with dogs in the back and I get the caravan on the back of a van cos that is loads better than blowing up my small car's engine.

Well the journey was long but OK and it only rained for one day when we were there so that was good. My two old dogs really enjoyed themselves but we had to pay for parking lots. Usually we park for free and walk but the lads are just too old and they both have bad legs that tend to give way so we paid - lots. It was great fun though. We visited Whitby ( with me all gothed but not OTT just black like I enjoy in winter. In summer I am a hippy, in winter I am a goth!) and Scarborough and Bridlington. I found Scarborough to be the best. Whitby was very crowded but I do love the whale jaw bone arch. I wanted to see it since I last visited at age 13 so that is one ambition fulfilled at least. Took me nearly 40 years to do it but at least that is one crossed off my "to-do-before-I-die" list.


Whilst walking along the North beach we found this statue of a man called Fred sitting on a very large bench. He was involved in freeing the prisoners from Belson at the end of WW2 so quite a local hero I think.

The statue is very larger than life as you can see here. My partner is over six foot and he also looks like a kid!

When I googled it he comes up as :

Freddie Gilroy and the Belsen Stragglers, Scarborough

‘Freddie Gilroy and the Belsen Stragglers’ is an outsized steel sculpture by Ray Lonsdale.  It is situated on North bay in Scarborough and was gifted to the people of the town by Maureen Robinson after it had been on temporary display in late 2011. 

The sculpture is of an elderly Freddie Gilroy, a retired miner friend of the sculptor, who, at the age of 24 was one of the first soldiers to relieve the Bergen-Belsen concentration camp.
The inscription on the sculpture's plaque reads:


‘They said for king and country
we should do as we were bid,
They said old soldiers never die
but plenty young ones did.’


Quite moving I thought. The horrible things this man must have seen. Though what a hero to help to free those poor people in the concentration camps!


As for crafting: I did very little over the last week. I did do a bit of knitting to try and finish my long ongoing jumper which I now need which I started back in february: 18: Wonderful people and easy knitting bat wing sleeved jumper or sweater

and promised to finish as part of my Me Made May pledge - and failed!
ME MADE MAY 2016. 
I still have yet to finish it. Well I did say I am not a fast knitter!


We did establish that my bought waterproof jacket is not as good waterproof wise a my partners that I made here: 66: Finishing the UFOs - waterproof jacket so although it is far from perfect it works. I need to make another one for me! I got soaked on the one wet day we had and he was nice and dry and toasty warm!

I have done no sewing this week though. Since I got back which was on Saturday evening, I started to make some new curtains for the conservatory which will hopefully make it feel warmer this winter. We do have heating in there but when it gets really cold we tend to evacuate. That leaves me with no-where to make anything since the house is pretty small.

I have a theory you see that the reason the room feels cold is not really the temperature of the air, since we have heaters, but rather the fact everything is white so if I can add some extra layers to keep in the warmth and also to bring some colour into the room then maybe we will not have to totally move out of it this winter. So I am making the lightest weight curtains I can from cotton sateen which I happen to have lots of in a bright sunny yellow. There are two types of yellow I will need to use because I do not have enough of either one. Mind you it will clear out about 30m of fabric which will give me lots of space. I acnnot actually see me wanting to wear either of these fabrics either so a good way to use them up. I really must stop this random fabric buying! This is what the fabric looks like. One is a print sateen and the other a kind of brocadey cotton but not heavy.


 I have only just started the endless overlocking!

I decided to simply overlock all the edges and then hem along the top so we can thread onto curtain rods and hold these up with ikea kitchen hooks.

It works well for adding christmas lights etc as well which I did last year and means we do not need to drill holes in the UPVC. There is a rail aroung the top windows which you can hook things onto. By not having proper linings and hems hopefully the curtains will weigh much less and so will not damage the UPVC walls etc. Or thats the theory anyway. I will see how well this works later.

Thanks for reading,
Bracken


Wednesday 19 October 2016

69: upcycled black velvet pencil skirt


This skirt started out as a £5 dress made from cheap stretch velvet bought from Asda in a Christmas/January sale. As a cheapo going out dress for New Year it was ok when I had nothing to wear but is far from comfortable and never fitted well. Chop the top off though and it becomes a wearable pencil skirt for very little effort. I am getting into upcycling things into velvet skirts at the moment it seems. You can see the last one here: 67: Upcylced velvet skirt.
They make for a very fast easy addition to my wardrobe and I am slowly getting rid of badly fitting RTW and either throwing it out ( in the direction of charity shops) or if the fabric is nice upcycling into new stuff I actually like to wear. I love the term upcycling! A few years ago now when I was younger people looked down on using old clothing to make something new. I am so glad the world has moved on because it is and always has been a complete waste to throw clothing away.  And why not change something you do not want into something you love especially when it is fast and easy to do?


 You can see the join in the eleastic which I placed at one side in the left photo.

All I really did was chop the top off my very basic vest dress, sew some wide elastic together in a circle to fit my waist and then overlock my elastic to the cut edge of the skirt.
I think possibly I should have made the waist elastic a little smaller but it is very comfortable as it is so I am happy with it.

I was toying with adding a stretch lace edge to the hem but I seem to have been adding black lace to everything recently so managed to resist. I may yet add it later though!

I really like this skirt and have found it very wearable. Possibly that is down to it being black velvet and a pencil skirt as well so kind of classic.

Thanks for reading
Bracken

Wednesday 12 October 2016

68: Joe Browns inspired Upcycled tunic or top


I have had these swing dresses in my wardrobe for about 3 years now. Originally from AX Paris online ( you can see them below). I bought them in a sale (The most expensive was around £6) and they never fitted very well. They are too tight accross the shoulders. Having measured the sleeves on a variety of patterns that fit me I can see why. They are tiny next to normal sized clothing. Interestingly they are actually a size larger than I usually need to buy in RTW. I went up a size thinking they would definitely fit then since I was unable to try on before buying due to being bought off the internet. I decided to keep them because you have to pay return postage with AX Paris so I would never buy off them again as it happens. Or not online anyway. In fact I kept one which I do not even like because it was cheaper to keep it than send it back! That one I have not yet cut up because it does not go well with these being as it is made from velour. These are similar to activity/performance fabric.

These dresses have gone into my charity shop bag so many times but I keep rescuing them. Last time was right outside the shop before I donated everything else in the bag. I just like the fabric and the patterns so much that I need to make something I can really wear from them rather than just keep them in my wardrobe in the hope one day they might really fit me.


Excuse my decorating it is still ongoing after I started to strip off the paper and half the paster fell off:
Life!


I cut up the zigzag striped dress before I thought to take a photo of it but it is exactly the same as the other three. I just cut each one appart at the seams so I could lay my pattern pieces on top of each bit.

The thing about these dresses is they are all a similar fabric which is a polyester/lycra blend and they are all really nice patterns. If I had known I was going to do this though I would have bought the largest sizes available rather than what I thought would fit me.

Still I thought then that I would like them!


The dresses when laid out are shown below and are simple A-line swing dresses.


So I took the decision to cut them up but what to make from them?

I really love the Joe Browns look and their multi fabric mixed up tunics and dresses about at £28 upwards I simply cannot afford them. I get a leaflet sent to me every season. No idea why because I never ever bought off them or signed up to receive the leaflet but I usually keep it because it inspires me to make things. Currently thes new season tops and dresses look like these:

Winter Warmer Dress: Go Anywhere TunicSassy Suedette DressMixing rich knitted fabrics in beautiful tones of purples, this sweet little dress is an essential for the colder months. Simply pair it with our basic leggings for an instant autumnal outfit. Approx Length: 90cm Our model is: 5'8"

There are even more similar designs saved to my pinterest page here:
https://uk.pinterest.com/brackentracy/sewing-inspiration/
I spent ages trawling through online pattern companies - why I do not really know because my pattern collection has grown so big it is a problem storing it. I then decided there were no patterns exactly like I wanted  even after sitting for two evenings scrutinizing my Burda collections so what to do? In theory I can pattern hack but I am not confident drafting a new pattern so would rather start with a ready made pattern. I ended up going back to my old favourite free raglan pattern from Its Always Autumn
http://www.itsalwaysautumn.com/2016/02/15/long-sleeve-raglan-sweatshirt-free-pattern.html

First I cut my dresses apart as shown above. Then I cut two front pieces and two back pieces from my back pieces from my cut-apart dresses. I did not put the CF or CB on a fold but instead added a seam allowance and cut them as two halves. This gave me 4 pieces which I sewed at CF and CB. Then I cut the sleeves. As already stated the original sleeves were tiny so I used the back dress pieces for this. I deliberately widened the sleeves so as to waste as little of the fabric as possible. I also wanted to have flared elbow length sleeves. It worked surprisingly well. I aligned each sleeve on the fold and cut with an extra "flare " to give wider hems or "witchy" style sleeves. Well Halloween is very close and I was just inspired to make the best use of my fabric and cut as little off as possible.


Once the top was sewn up I decided it lacked something. I never took a photo here so will explain as best I can. I needed to make my front CF seam look more "made" rather than just bits of different fabrics sewn together so I decided to cut it appart again - it was overlocked so no unpicking here especially since I was not sure anything would eventually come of this project. I cut up CF and then cut a rough triangle of a different fabric to the two front halves and inserted this and overlocked it back together again. Now I have a top but wanted a long tunic or dress. Going by a few of Joe Browns tops I then cut two frills for the bottom edge. The bottom frill is made of several bits from the wider bottom edge of the original dresses. However whilst playing around with the fabric I decided I did not want two frills so in the end only used the one which I angled so its a slight high low hem with a dip at the back. It looks offset on the pictures but is actually longest at dead centre back.

Then to finish all the edges I decided to use black stretch lace. First I sewed with twin needles two rows on each side of my front insert. Then I overlocked all the edges including the neckline with stretch lace. However this did not lie as flat as I wanted so I then twin needle stitched it down. It is not perfect and there is some tunnelling. I also ran out of both overlocker thread half way through and then the top bobbin thread when twin needle stitching due to not paying enough attention to my threads rather than concentrating on my new top which was by now evolving into something surprisingly wearable.

this is my frill made form offcuts of the hem of the original dresses

One things for sure I like it much better than the dresses I cut up and I have enough fabric left to make at least 3 more tops especially if I mix a different fabric in with it like maybe black lace or fishnet which I have some of both left from other projects. 


Thanks for reading and for visiting my blog and feel free to comment or send me an email.
Bracken