A few days before Christmas 2024 I had a small package containing this fabric sent through my letterbox. I opened this package and my immediate thought was this is not mine!
I never sent for this.
The address on the package was mine and it was addressed to me. Then inside I found a letter and a calendar for 2025!
Well when I read the letter it was from Pound Fabrics and they had sent me this 2m if lovely cotton fabric as a gift for being a faithful customer. I was so shocked. I have been sewing (and blogging!) for years. No one has ever given me fabric before. I have won a couple of competitions but might have done that if I had not been blogging about my sewing.
One was with the
Monthly Stitch which I was an avid member of for years and the other was
Minerva Fabrics. I think there was an element of luck both times really. I still wear the garments made for both these competitions.
Anyway, this is my very first gift of fabric and thank you so much Pound Fabrics for thinking of me.
I have been buying fabric online since probably about 2010. But not large quantities of fabric purchases until the last few years when I began to blog my sewing adventures so since 2015 really I have been regularly buying fabric. Wow! 10 years!
Anyway, I found pound fabrics after a particularly bad experience with one of their competitors (Pound-a-Meter - steer well clear of them if you don't want to get ripped off is my advice!). But Pound Fabrics have been reliably brilliant. Even then I never expected to get a Christmas present from them
Perhaps really I should have written publicly about this closer to Christmas. I did say a personal thank you at New Year, but wanted to wait until I found something to make before writing a blog post about this.
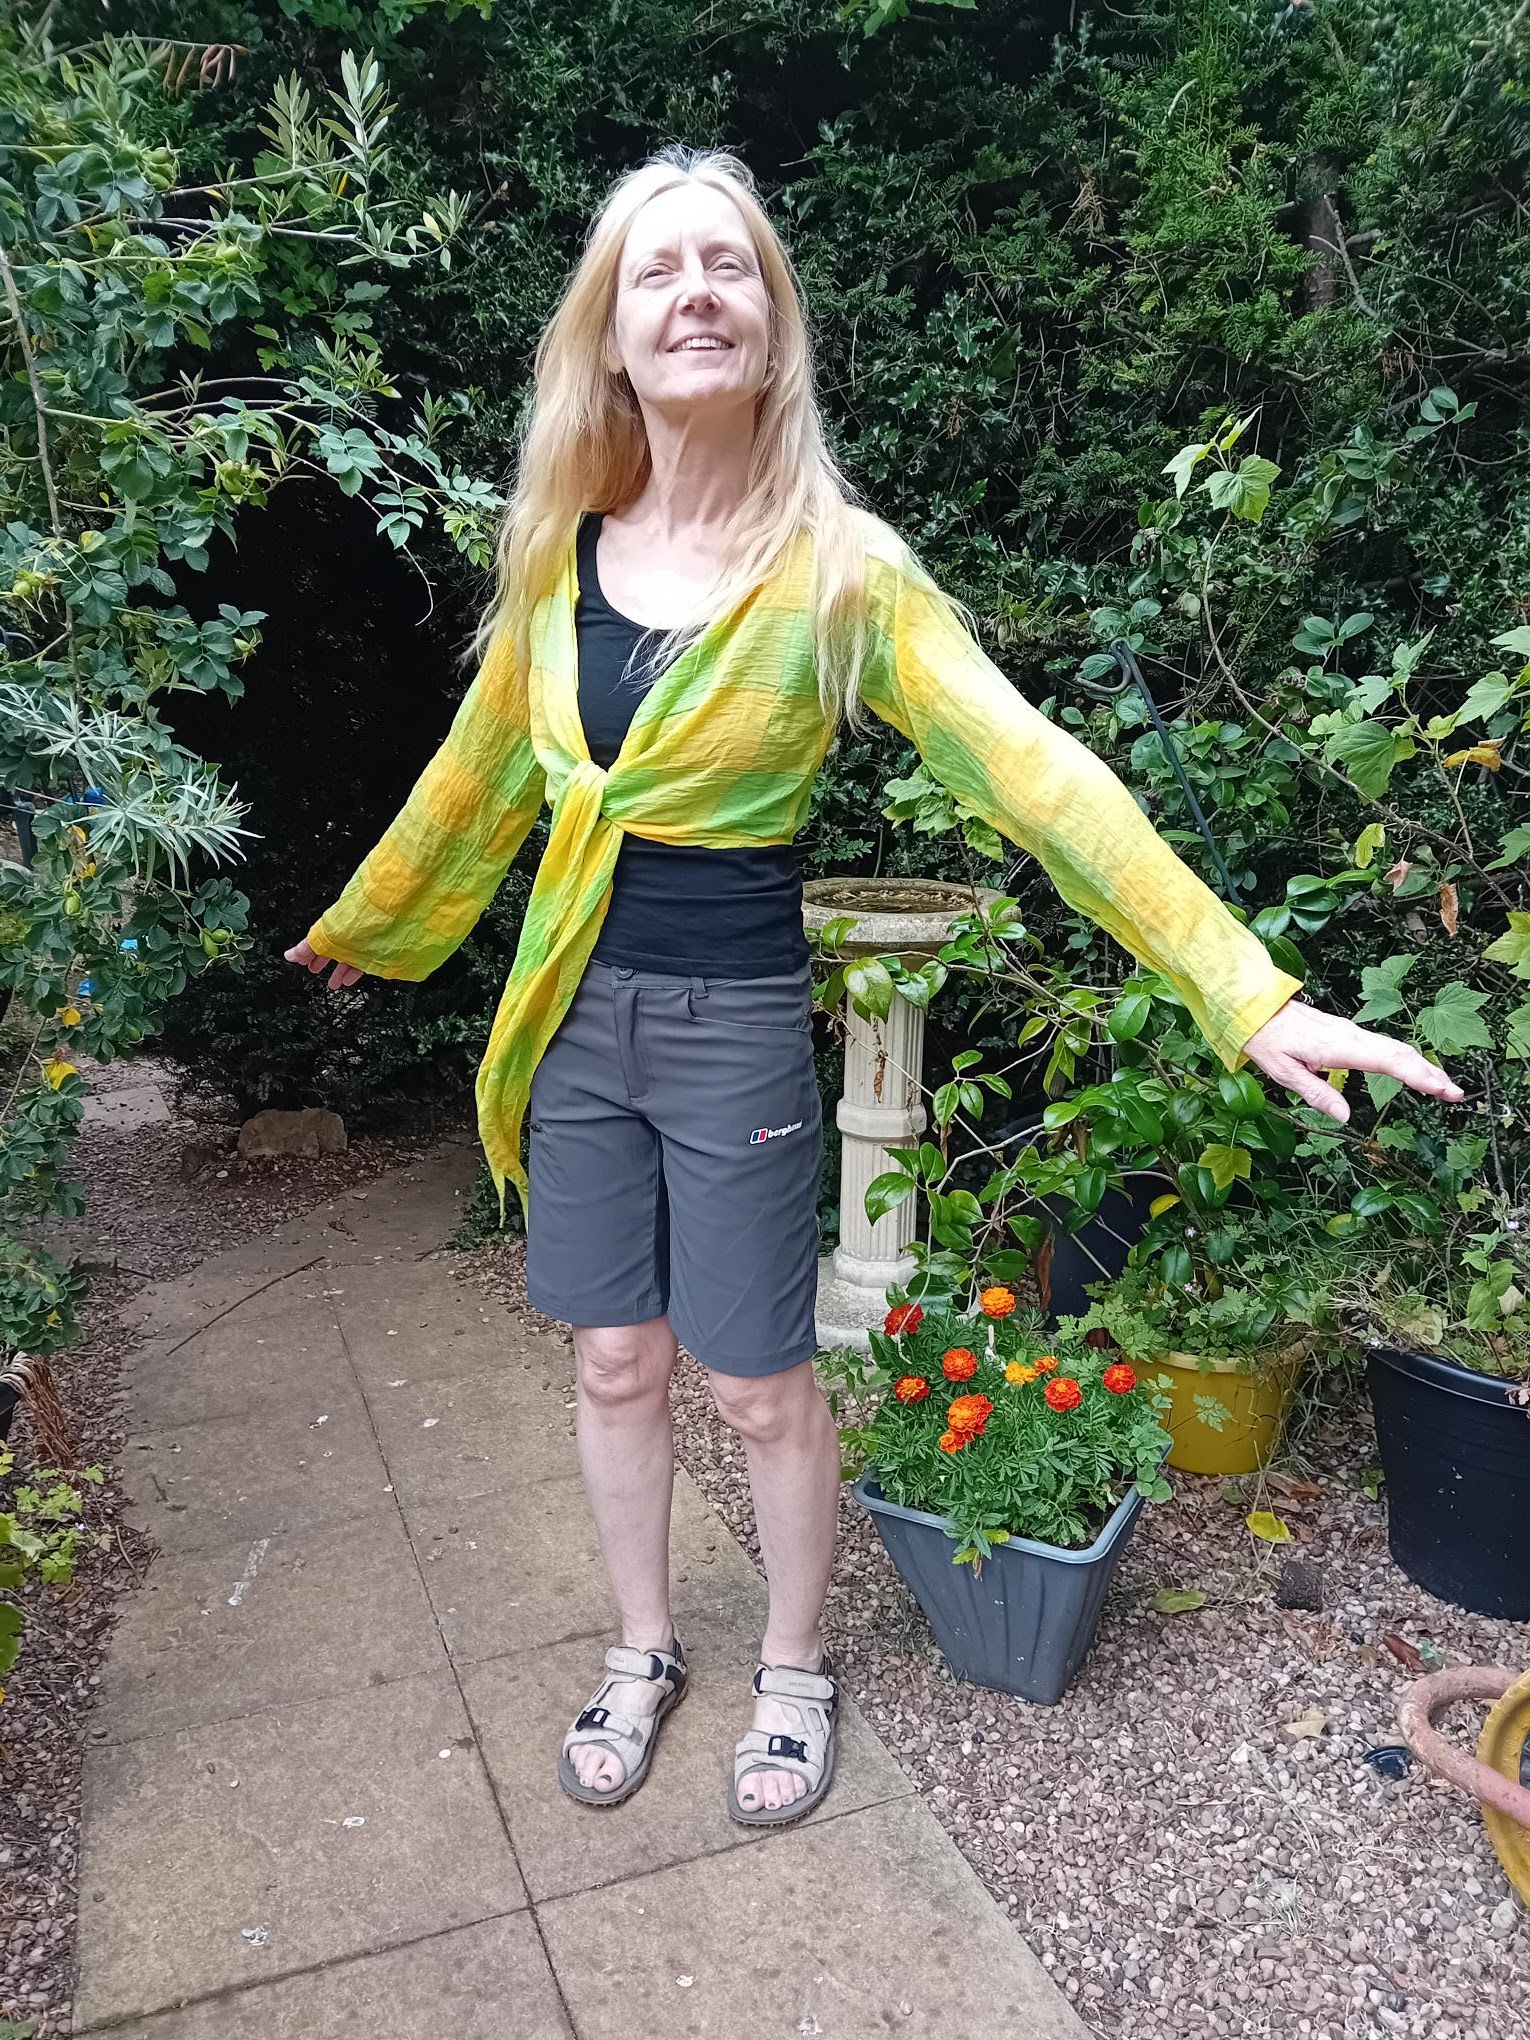
Well this really is the perfect fabric for this project.
I have been planning to make a pair of these trousers since 2008 when I came across the ( then free) instructions for the Easy Breezy Wrap pants from Laupre who I think may now be on Etsy.
Whenever I considered making them I just never had the right fabric. Until I was gifted this that is.
And the thing about these is they are super simple to make and wonderful to wear. I have plans for a few other pieces of fabric currently in my stash in fact because now I know how to make these I want more.
You can wrap frontwise as these are or backwise for a different look. I will be going with the easiest way which seems for me to be frontwise wraps.
I did do a couple of alterations to the original pattern - I added a channel to the top of the front and back panels and then made straps to thread through and so mine have pullords rather than sewn on straps. I like this better. Its more adjustable than sewing the ties to the tops of each piece. I also made these much more gathered than you perhaps could do. Laupre says a 12" overlap. I have much more than that but will just adjust as needed depending on my fabric because you might as well use all the piece if you can. That stops small pieces ending up for years in my stash and makes for a nice loose fit with lots of overlap and therefore modesty. I do not fancu flashing my knickers to the world when the wind blows but thats just my own feelings on this.
I have to say also the instructions are great and if you wanted to make these I would recommend this seller. There are also some YouTube videos on these as well if thats your preferred method of making.
So here I have a double thank you to make to Pound Fabrics for the 2m of lovely fabric and to Laupre for the generous sharing of the pattern/ instructions back in 2008.
Have a great week and thanks for popping by my blog.


.jpg)


.jpg)
.jpg)
.jpg)
.jpg)

.jpg)


.jpg)
.jpg)
.jpg)


