Friday, 27 November 2015

Top preparations - piping

I want to use this Butterick pattern to make a warm top. I need to make it fast because I have been very cold this week. I have some black quilted fabric similar to sweatshirt fabric but with diamond quilting.
I decided I wanted to use some reflective fabric I have for the piping on my quilted top on the raglan sleeves, but I was unsure exactly how to make it because I have not done this in about 15-20 years. I found an excellent explanation here:

http://www.makeit-loveit.com/2012/01/sewing-tips-how-to-make-use-piping.html


I used nylon string and cut my fabric on the bias.

To make piping:
First, measure how much piping you are going to need. Then add a bit on to that measurement. I added about 10cm or 2" to each end so about 20 cm (4") in total.
Cut your strips of piping fabric on the bias so they are as wide as your string plus the seam allowance of about 1.5cm then double this. Fold over your fabric and ideally you iron it in half. I couldn't do this due to using waterproof plastic coated fabric which the iron would have melted. That made the whole job a bit harder.


Put the string inside your folded fabric. Sew close to your string using a zipper foot and hold the fabric tight as you do this. You should end up with home made piping in the fabric of your choice.


Unfortunately I did not take a good photo of my finished piping but you can see it in the next post when I make my top.
Thanks for reading and hope you come back soon
Bracken


Monday, 16 November 2015

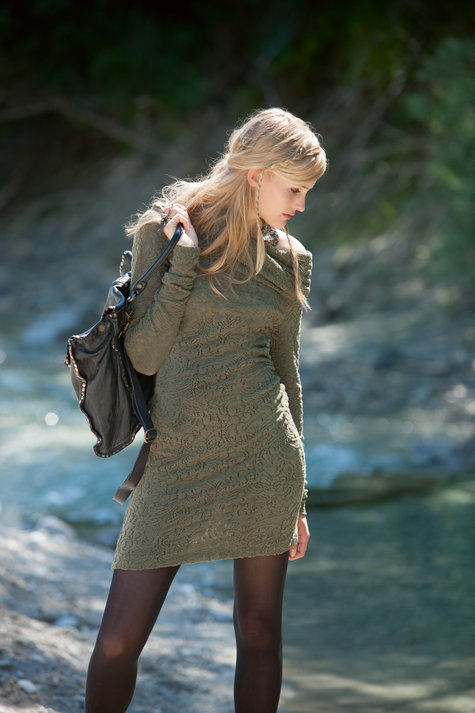
5: Burdastyle dress- Lace Cowl Dress 12/2014 #121


 I made the original purple version of this dress about a year ago when I first got the magazine. The purple one is totally made using a  zigzag stitch. The red lace one is made using a serger with a twin needle hem.

Please excuse the messy house. I was still unpacking when this was taken.


Unfortunately I had the idea it would make a lovely winter dress/top so I made it using two purple IKEA fleece blankets. Also because it has a fancy cut hem I did not need to hem it. At that time I had a machine that struggled with stretch fabrics and this was made using just a zigzag. The final dress looks great but is really not that wearable. Firstly it is not very comfortable and tends to "ride up" possibly because its tight and fleece. It is really good when its very cold because I do not need much on top of it and have worn it in winter over jeans. Generally though the UK is not that cold and so far it is simply too hot to wear it indoors most of the time. Also because its fleece if I wear for example a Tshirt under it when I get hot and try to take it off the Tshirt comes off with it so it is not something I feel comfortable wearing somewhere like to work since I dare not take off my top layer in public!

The burdastyle dress was also made in lacy so maybe that is why it my newer version works so well.
This is the pattern:


121-122014_large


Anyway, since I bought this lovely dark red lacey-acrylic stretch fabric from Yvonne at Weston Fabrics, UK, I decided it would be time to have another attempt at this pattern.


I can honestly say I am very pleased with the final garment. I do have a few issues though. Firstly the elastic ruching at the side did not work as well with this fabric as with the fleece which was perfect. It is just not very ruched. If I do another one I will probably put in two cords so I can just ruche it by hand and tie it to where-ever I fancy. Then it would also be adjustable so giving different looks to one garment. Though to be honest I may just not bother with ruching at all if I made this particular design again since I also like it just with a straight side seam. Also I had yellow and green cotton in my Brother sewing machine which I had set up to do twin needle sewing and to be honest having finally sorted out how to do this I was in two minds as to risk un-doing the threads so I was lazy and left them so they do not match the colour of the dress. I thought it would be a contrast but to be honest it was a mistake and I should have changed to a darker coloured thread ideally red so it didn't show as much. Other than this though I love this dress so much. Considering it is lacy and light in weight it also seems quite warm so will be ideal for the next few months. I now need to make some slip dresses to wear underneath with this type of fabric. 
Thanks for reading
Bracken

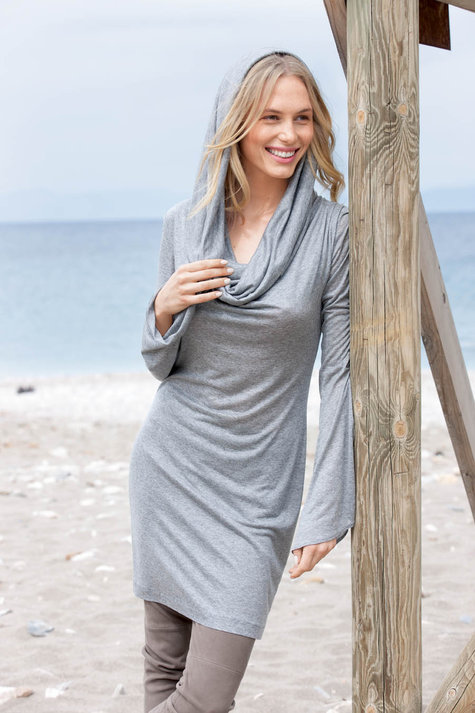
4: Burdastyle 09/2015 hooded cowl neck dress or top - my trials


Well what can I say? This was the most frustrating thing I have made in ages!
Now it actually looks reasonable despite my having hacked it appart several times and resewn. Also I do mean hacked appart. I started off quite normally using a seam ripper but I had overlocked it and it was not at all right. I sewed the back on inside out, I didn't join the hood together so ended up with a huge "collar". You name it I did it. Then because I actually cut it all appart  (several times!) none of the pattern pieces are actually the right shape or size to what they should be.

I tried to sew with my Janome sewing machine and it ate the fabric so then I reverted back to the overlocker. I then changed to my older Brother PX100 sewing machine in frustration with the overlocker which I broke a needle on, but then that jammed up too. Finally when I got it together in a similar way to what it should be ( I think) the sleeeve did not fit right so I again overlocked that to take it in. I think perhaps this problem though is the shoulder seam not the sleeve. And if I wear the collar/hood/cowl over the left hand side a bit you cannot see my dodgy sleeve! I have given up trying to alter it. Considering all this it is very forgiving and is actually wearable. Though I have not hemmed it at all and ended up just overlocking all edges. To be honest by the time I finally made something vaguely "normal" I had had enough and just wanted to wear it. I may do a proper hem later. Although I love the flowing sleeves. I suspect a hem will make them a bit less flowing.

The fabric was bought off Ebay from Weston Fabrics in the UK. Its some kind of synthetic mix I think. Possibly it is a bit heavy weight for the hood since you end up with two layers, but it will be a warm addition to my Autumn/Fall wardrobe this year and probably my Spring wardrobe too.
Unfortunately my desire to do everything properly and let the fabric sit to relax overnight in order to try to be a good seamstress all got scuppered right at the start when my first pattern piece had to hang over the table since my table was not big enough to accomodate it. I also do not really have much free floor space since it is a small house I live in and my two dogs have a habit of walking on my pattern pieces whenever I have tried to use the floor so the table was my best bet. At least that way I do not get holes in my pattern from the paws and also avoid most of teh dog hair that they deposit as and when! Ah well! I ended up cutting it out immediately since leaving it overnight would probably have made it stretch more out of shape than having it folded had already done. The end result is actually not so bad anyway.


In the end its a kind of wearable musin I suppose since I now intend to make a second version which hopefully will be  more like the original pattern. I have worn this out and about and it is a very comfortable dress. In fact I truly love the design. Anyway it is based on this dress pattern from Burda Magazine 09/2015:
120a-092015-b_large

http://www.burdastyle.com/pattern_store/patterns/hooded-cowl-neck-dress-092015

I did eventually end up with something very similar to what it is meant to look like but that was after probably taking it appart, cutting it appart and feeling like binning the offending thing before I got there.


And heres the rest of the photos:


Because of my problems with this dress I am now making a second one and I intend to attempt a tutorial for anyone else out there who has similar problems with this pattern. Hopefully the second version will be perfect, so here goes with my tutorial over the next few posts. I hope it may help somone else who gets frustrated with this pattern.

Apologies if there are already any bloggers out there who have already covered a tutorial for this dress. Now onward to my second attempt. Does it count as a seperate garment if you make two from the same pattern? Or would it be cheating if several of my 100 garments were similar? Ah well for now I think it will count but maybe when I get to 100 garments then I might make make it uncount so then I can sew some more. Right this minute 100 is seeming like a great deal of sewing. But I already have two more items cut out! And neither is this pattern so it is still going to happen I think!!!
Thanks for reading and hope to see you again soon
Bracken

Tuesday, 3 November 2015

2: Remodelled fairy/halloween dress part 2

The fairy dress finally got finished the day before Halloween. Only then I decided it was too pretty - or not ghoulish enough for a Halloween party so wore something else instead. Anyway the final dress is actually the original short dress with a petticoat or slip under it. It seemed the most sensible way to finish this project since then I can still wear the short version with leggings and a bike jacket but can also wear it as a fairy dress for next summer's festivals.


So here are the photos:

This is how it started after my first post


 And this is what I ended up making it look like:


The slip/petticoat is simply a layer of navy blue mesh which has been spliced quite roughly to give it a zigzag hem, over a satin layer which again is zigzagged and under it all is the chifon layer which was the top layer of the original dress before I decided to start hacking and sabeurtaging it into this new creation. I left the hemline of the chiffon intact. The waistband is made from the original lining fabric and has 1 inch wide elastic in it and is all simply overlocked together.


I love it. Now I just need some wings!


Thanks for visiting and come back soon
Bracken


Wednesday, 21 October 2015

Twin needle progress

Follow my blog with Bloglovin


I have always intended to use a twin needle at some point. When I bought my new machine I was well aware my Brother PX100 which I have owned for around 15 years had the option to do this but until I saw this link which I found wonderful for aleviating my serious fear of twin needles I never got round to trying this.

A Stitching Odyssey: How to use your twin needle

Well I can only say I never realised how easy it is. I also looked at So sew easy

http://so-sew-easy.com/how-to-use-a-twin-needle/

where there is a video showing how to do this. I am now happy to say I can use a twin needle so on with the next project.


I really just practiced with a scrap of fabric from my next project where I am hoping to use this technique. Anyway I am very pleased with the result and can only thank the world of sewing blogs for helping me to have the confidence to try this out.

Thanks for reading and hope to see you again soon..............
Bracken


Saturday, 17 October 2015

3: Lekala pattern for Sport trousers

I actually cut these out last winter but due to endless DIY I never got round to sewing them up. Well it has been cold the last few days in the UK so I decided to have a go. I did them entirely using my serger except for a bit of finishing hand stitching on the fold back cuffs. They are made from red sweatshirting with a fleece back and plain knitted front. They have two very deep pockets which are brilliant. Usually I find womens clothing has rubish small pockets but these are great.

The instructions are very vague but I made it through them. I did reinforce the front shaped bit with iron on interfacing. Turn back cuffs are doubled and sewn on the bottom. The pattern is from here:
http://www.lekala.co/catalog/women/pants/5277

It seems you now have to pay for this but I got it for free a year ago. They still do lots of free patterns though so worth checking out. Its the first Lekala pattern I have used and I am quite happy with the results despite knowing the trousers are far from perfect. Thats my lack of expertise though and not due to teh pattern. Still I have learned that I cannot make a pair of trousers entirely using a serger. Or at least not just yet. Maybe when I have a bit more practice.


To be honest if I make another version which is likely since I love them I will NOT be making them entirely with my serger because its hard. I think much better to just do the inside seams and then to use a twin needle or even a stretch zigzig stitch or some other stretch stich to make these. Mind you I broke a needle on my serger and had to learn to thread and re-thread so it was all part of my learning curve so not a wasted effort. Also I have yet to work out how to use a twin needle. That is my next project since serging alone was very difficult for this. I know you can trun off the cutter bit but I did not do this so I ended up with uneven seams and having to redo the cuffs several times which made them shorter because I cut them off first time by accident! That did not matter since I found the pattern is quite generous in all directions. Being someone who wears their clothes loser rather than tighter this suited me but if I make a very fitted garment using Lekala I will make sure to do a muslin first I think. I hand sewed the sides of the cuffs to get a decent finish else would have had the serged edge showing and a gap where the cuffs are meant to join with a slit opening. They look great now and I really enjoyed wearing them.
My dog is Reggie. He was enjoying a walk on the Ridgeway at Weylands Smithy in Wiltshire.
Thanks for reading and see you again soon

Bracken

2: Remodelled fairy/halloween dress part 1

I found this dress in a thrift/charity shop in Rugby, UK. It was pretty dirty but only cost me £5 so was a bargain. I washed it regardless of it saying dry clean only and it came out perfect. The original dress is really lovely but not something I could ever have the occasion to wear and I bought it to chop it up and re-fashion into a fairy dress to wear for next years festivals. 


Please excuse the half finished floor! You get the idea with this dress. Looks like either a Bridesmaid dress or a ball gown. I am not too sure which but for £5.00 it is I think a bargain. Perfect for a play with anyway!

However Halloween is looming so I decided to start the remodelling into a fairy dress now rather than later. After all it can always do for next years festivals anyway. I actually started this one morning before rushing out to work so it has taken me a while and quite a lot of thought to decide how to do this.


First of all I hacked the bottom off around 6 inches below the waistline. The waistline is lower one side than the other and decorated with a fabric flower that matches the dress material. I added small bits of fabric cut from the hem of the original dress to the flower to give it "tendrils" - see flower close-up lower down.


Excuse my messy living room please. I really must tidy up before taking photos!


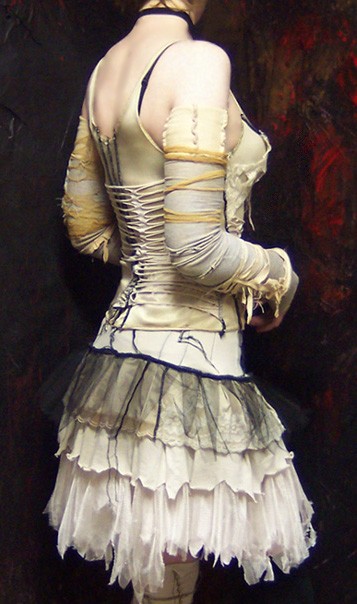
My original intention was to wear this now short dress over leggings. I gave it a zigzag raggetty hem. My inspiration is from these dresses saved to "Sewing Inspiration" on my Pinterest page:


WD Archive .83 by wearydrearies.deviantart.com on @deviantART:


I am not too sure what I will do as yet. I may wash the dress again to make the edges fray a bit. Though that may then mean it just falls apart so probably I should wear it first a few times and see how I feel about it. 

 
Anyway, having hacked my dress I then decided it would be better longer. Also the back seems a bit shorter than the front when worn as you can see above.  

At this point I decided I had made a terrible mistake so I added the chiffon layer back onto the dress. I am now aiming for something more like this dress from Pinterest originally found on Etsy:  
At this point I attempted to do some designs.
As you can see I am not really very good at fashion drawings! You get the idea tho! I reckon I eventually need to make a sort of over-shirt or under-shirt. Similar to a dirndl blouse to wear with this dress since although it is lovely with a corset top it will be far easier to carry off during the daytime with a top under or over the corset. Also the UK is often pretty cold and I do actually want to wear this at some point possibly for Halloween which is often very rainy and cold. So then I set about making the skirt longer.


 The original dress had three layers of fabric. A chiffon layer, a satin under skirt and a lining so I decided to re-attach them but make them different lengths. First I attached the chiffon on its own just to see if it would look ok. Instead of just re-attaching I changed where it is joined because it has a longer bodice on one side than the other the original dress has a shaped lop-sided skirt. If re-attached with the short bit at centre front the seams will not quite meet but I do not care because by the time I have added other layers and chopped it zigzag fashion you will hopefully not see the miss-matched side and front seams so I now have a high low hemine. It seems a bit more fairy tale like this.


I also cut a new layer from some navy blue mesh. It is the kind of mesh you can use for lining jackets and I have loads of it in my fabric stash so it was time to play with some of it. I am thinking I can make a hoody maybe with a pixie shaped hood similar to the one in the last Pinterest inspiration picture above. Also when worn over a T-shirt as in my picture of the shorter version above it gave the dress an added very wearable dimension the bustier top would not give. And will be far warmer on Halloween in England!


I have lots of the navy blue mesh so whatever top I do eventually make will be made from that as well. 

 
I cut two pieces of mesh roughly the same size and shape as the original skirt bits and added a zigzag chopped hem to them. One piece is intentionally longer than the other with a view that the long bit is for the back of the skirt. I originally intended to join them into a proper skirt but then decided maybe just to overlap the pieces and sew them to the bodice because I am after a raggetty look for this dress after all. 
The original skirt was lined satin. To add onto the length of my dress, I had to cut off the hem of the lining pieces in order to separate them, and this left me with some thin bits of fabric strips which I tied around the flower. They look like tendrils.

 
Close-up of flower with my added "tendrils" of raggetty fabric strips cut from the double layer of dress skirt hem. Probably I will need to use a few stitches eventually to secure them in position but right now I am still not too sure exactly what I am doing to this dress since it seems to be evolving.

The satin layer also got a zigzag hem. After cutting the hem off the two bits of fabric became separate so I hacked about 6 inches off the satin layer but decided to leave the lining in tact for now.


Because I have a few days left till Halloween I have yet to decide my final version of this dress.

I now have a chiffon layer with intact hem, which I have removed again from the dress, a mesh layer and a satin layer. I also still have an unchopped bottom layer made from lining fabric if I decide to use it.

 After trying on the dress with the shorter hem above I am now deciding whether or now to add a permanent long skirt onto the underside of the chopped zigzag hem of the short dress or should I just make a separate petticoat which means I can keep my options open as to wearability and have a short dress as above but with a long underskirt to be worn as and when?

Thanks for visiting and come back soon when I will have another post on the final version of this dress..........
Bracken