Friday 31 March 2023

Baby chewable fabric books


These are a kit you can buy from Spoonflower.  https://www.spoonflower.com/en/fabric/2163354-chewable-books-x4-bonus-book-by-debsch

So what you get is a preprinted piece of fabric which you cut up and then sew into pages and eventually sew into 4 separate baby books. I thought they will make a nice gift.

Since I bought these I discovered Spoonflwoers actually do loads fo other fabric books but I have not bought any of them so far. Maybe next time. You get four different books with the link above - Wheels, Vegetables, Fruit and Flowers. I have yet to work some of the flowers out. They are on the designers website though so I will have to go and check them out sometime. The other books are easier - flowers are not my strong point I am afraid.


The first book I made from this was simply sewn as directed. Second and susequent books I added crinkly cellowrap inside one page of each book. It seems to work well. The only thing here is if you do decide to do the same you need to check the cellowrap is non-toxic to children. There are several craft shops and online sellers sell the right kind. Kids do seem to love that crinkly sound though and most commercial fabric books seem to have it inside at least part of them. I added to just one page in each book.


I attached cellowrap to the page first then sewed the page front to back enclosing the cellowrap. I had to double check this bit since I nearly ended up putting cellowrap on the outside not inside of one page!

Ah and instead of fiddling around with the very narrow printed red strips meant to be used for tieing the book to a pushchair or similar I just used nice ribbon. Thats was much easier.

But really so long as you concentrate this was a very easy project and made a nice change from making clothes!

I have yet to see how baby enjoys these but his parents liked them.


Have a great week

Bracken


Friday 24 March 2023

Feyr Trade Track pants - sort of

These were meant to be an exact copy of my much worn and loved track pants made last year. However my sewing tends to be a little unpredictable!

This is last year's version:


Its the same fabric - as in left over from the first pair so the exact same fabric. Different coloured zips but they were bought as a multi-pack from amazon so exact same zips ( though this time orange zips not pink), the same sewing pattern - but here I cocked up.


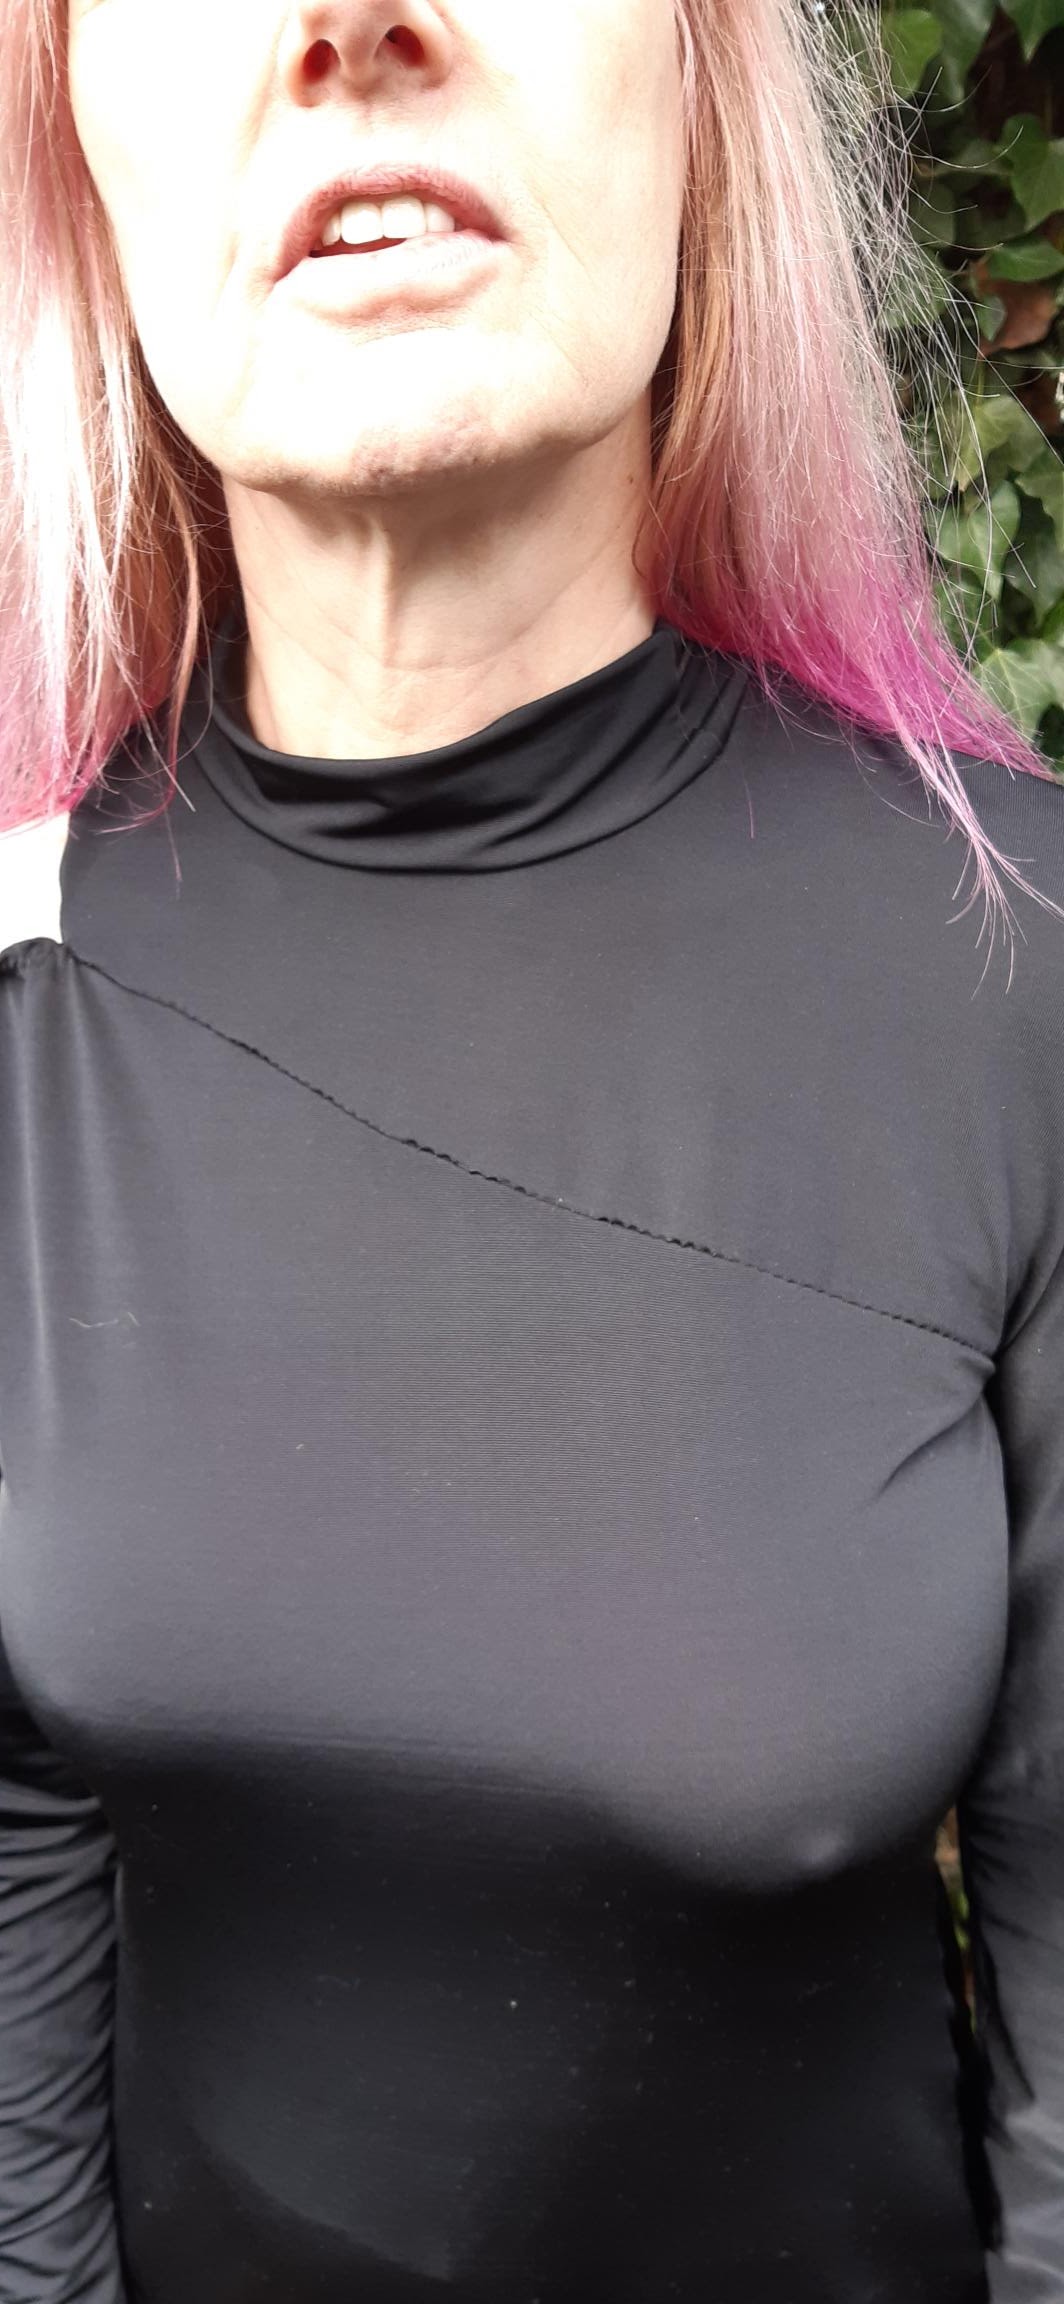
This second version are much tighter.You can really see it on the back where they are very leg hugging. I do not think on the photos its as obvious from the front but in fact they are tighter there as well.

For ages I just could not understand what I did wrong to make them a different fit because they do fit, just not as I intended.

Since I love the first pair I really wanted these to be identical. They are not!

And to be honest there is quite a lot of sewing and so "work" involved in making these though I do find they fulfil my feeling of having achived something creatively both times I made these. 

They are not a fast sew though and took several sessions over a few weeks of spare moments to make these. 

I tend to have a difficult-ish project on the go at the same times as copping out and making more simple items. The simple ones fulfil my "fast fashion" needs ( though many last me years) whereas the harder to make items fulfil the need to improve my sewing and to challenge my making. These trousers are certainly better made than my first attempt. Though both are wearable.

And because I need to really concentrate when doing things like adding the zips and then the mesh panels etc and so working out how to make these is something that I take time to think about how to construct them. I also had to unpick a few bits and thats hard with this fabric. The fabric is a good warm fleece with a shiny outer and fleecy back and once made it wears and washes well but does damage easily with seam rippers and scissors. It reminds me of the 90s sheen suits fabric though is warmer and the back is more fleecey.

Its taken me wearing them 3 times over several weeks to get into these but in fact they are not only wearable but also nice to wear once I got into them. They fit more tightly than the first pair, yes, but actually thats not all bad. 


I also made these too long so cut half the bottom zip off to make them the right length. I just then overlocked the edges and hemmed which will hopefully stop me losing the zip end/ runners ( the pulley bits on zips) when I undo them. 

I could have redone the zips but was unsure I would be able to unpick the fabric without damaging it when the mesh panels were also already attached - so loads of rows of stitching - all zigzagged or zip foot stitched - and really the bottom zips do not need to be as long as they were. They do now really need to be there to get these trousers on and off though, so now they are not just for decoration like on the first pair. They serve a needed purpose. These almost fit as tight as leggings especially if the bottm zips are completely done up. I actually like them with the mesh panels showing at the moment but I do have that choice. 

 Of course I eventually worked out what I had done wrong to make them much tighter, though I needed to go back to the book and work my way through the instructions. Then it was easy. 

Having previously successfully made some trousers from the book ( Make Your Own Activewear by Melissa Feyr) I thought (wrongly) I knew what I was doing - but no I did not. I should have just double checked before I cut them out.

I know I cut the same size as before because the same cut lines were there and I changed nothing as far as I could see. But, the pattern for these is a basic block not an actual pattern. You are meant to use it to make several different designs and to eventually make your own designs if you want to.

I never added the seam allowances! 

They are not included in basic blocks - ever - because its harder to alter them to get a good fit or change the pattern to make different designs so they never have a seam allowance on the blocks, but I forgot that.

So the moral here is read the instructions and refresh your memory before you cut!

Really I am lucky I cut out the baggy loose fit trousers not the tighter fit block used to make the leggings because they would not have fitted had I done that. I feel these fit more like old style ski trousers from the 70s ( I have a couple of old Burda pattern books from that time) and thats not necessarily a bad thing, it just took a while to get my head round the fact they are not quite what I had meant to make, but still the fabric is not ruined as I had originally thought when I first put these on. My mirror showed them as OK and wearable, which they are, and because the fabric contains lycra its OK for them to be tighter. 

And this being my 3rd wearing I have now got into these because they fit nice actually and are warm and cosy for nasty rainy March days in the UK.

But I do still want to make second pair of last years baggier version so I need to find some suitable fabric for that at some point. Mind you for this year and this years planning I may just stick with these now and move on. These do work. They serve the purpose and really its probably nice to have a change. I learned something valuable as well here - check the instructions and do not just trust my own memory. 

And after all I planned for lots of different projects this New Year and I would very much like for once to actually be able to get to next New Year in 2024 and tick a few off. 

Thats something that does not often happen and usually I still have loads I never achieved, so this  year I need to make an effort and move onto the next thing on the list. 

Also its March and the daffs are in full bloom now and tulips are up and will soon also flower, and its officially the spring, so time to think of warmer weather and less mud and going out places and not just keeping warm and cozy. 

It takes me quite a while to make things - that may not show on the blog because I try to post every week but often thats because, like now, I have loads of easy "unworn-so-far" TNT ( tried and tested patterns) makes that I can talk about while making the more difficult makes. I think there is a pile of 4 or 5 different things I have yet to even wear let alone think of taking photos of. Its all stuff that happens between the challenging makes. I just make the odd item here and there ad finish and then eventually wear it. Or I visit a shop and see something I can easily copy.

But it keeps me happy because its nice to feel you have managed to make something even if its a straight forward make you have made a hundred times before - ok a slight exageration there! I do not think I yet made 100 of any one thing. But those TNT patterns really do make me stay happy. I also virtually never waste fabric when using them. Like most people, I love a new top or pair of leggings, and its so tempting when you go shopping to buy something, and making easy fast makes, well it stops me spending hard earned cash on cheap rubbish from supermarkets or high street shops, when I know at home I have X number of unworn new pairs of this or that yet to be worn. Or I have this bit of fabric will make the same item and it will fit me better than that shop bought model and cost less than half as well - though usually I already have the fabric, but that fabric did cost and weirdly I often remember exactly what that bit of stashed fabric cost me. So by making the faster stuff I save money, and satisfy the need to create. And also the need for fast fashion I suppose. Though I live outside the normal fashion world and have done now for many many years. Thats one thing I achieved when I started this particular blog. I stopped buying clothes. 

In fact so far since this blog began back in October 2015, I have bought oly a very small number of "new" items of clothing - just some underwear and one coat which is a winter ski jacket bought in a sale and was cheaper than I could have bought even the outside fabric for let alone the lining or zips and its unlikely had I attempted that make that even now, I could not have made it as well as the one I bought. There are limits to how much I can really make myself. But most every day clothing can be made easily, more cheaply, and better than that available in high street shops. And by making your own clothing you are in essence opting out of the status quo in a small way. I like to think that anyway.

But to do that, you do need a stash of fabric. Thats because to achieve this you buy when its cheap and when its available not when you probably want to use it. For example glittery, party fabrics are usually cheapest in summer, when you want to probably use that fabric at Christmas. Or swimwear fabric is often cheapest in winter. And so you get a stash. (So now I justify keeping my stash!) Its a much smaller stash than it was a year or so ago though, so I feel less guilty to own it. Though I am still aiming to reduce the more traditional cottons and wovens further this year. I think the knits are pretty much now under control.

But anyway, still I need a new challenge for the spring and to fulfil my New Years resolutions for 2023.


 Take care and have a great weekend,

Bracken

Friday 17 March 2023

Burda Style black cut out top


This is just the trial or muslin for the top I want to make so its very cheap and not very substantial fabric its made from, but it does help me to work out how the thing goes together. 

I cut this out in January and only just finished working out what goes where. So this top has kind of been going on in the background when I have been making some much easier and more boring ( though very wearable!) stuff.

My pattern is in German and Google translate did not on this occassion do a very good job so its taken me a long while to work this one out. I had ideas to make a velvet version of this but I already used the fabric for a different project so unless I make from scraps - which could look good - I will need to decide what fabric will work best from my stash. Or heaven forbid actually buy some new fabric!

My fabric buys being 99% online  means I always buy lots due to having shipping costs so its best I don't look right now.

Unfortunately I never got a good photo atthe front showing the cutout bit on the shoulder so I need to get some more photos done on this one. 

These are the line drawings for this style which is 109, 09/2017 - Burda Style magazine.


I omitted the back zip since my fabric was very stretchy. I think its a good choice.

Not sure about that CB seam. - Might be twisted so I will need to get another photo to check that. Could of course though be the way I put this on! Of course in a thicker and more stable fabric it may not be an issue.


You can see the yoke better on this photo- I have ideas for a Star Treck inspired top.............

Well construction did not go very fast and was very difficult with loads of pining and changes and really me not having a clue what was meant to go where.....................

So I started by just pinning to Harriet - my dress form which is a vintage 1960s hence the rather disintegrating state of her outer layer but she does work really well and I do like vintage things.
Shoulder strap - I think the bits eventually went together right but I am still not 100% sure of that.
It kind of looks like the Burda pictures though
CB seam looks straight on Harriet so maybe its the thin fabric and me making the earlier photo look wonky?
In fact if anything it bends the opposite way to what it does on me.


Well I pinned, unpinned, repinned for about 2 months and then sewed it up.

My conclusion: well several pattern pieces could be joined together to make the whole construction process much easier and neater. I just have to remember which bits I want to join up then redraw them and try a second version of this top. There is also a dress version. 

Mostly this is sewn using a zigzag stitch rather than the overlocker because I did not want to cut off the seam allowances until I knew for sure what should be positioned where and that was this time a very good decision because some seams were sewn several times despite my careful pinning.

I have been saying for months that I should try something more challenging and this top was definitely that!

So my aim now is decide on some more stable fabric and make a better version of this. 
 If possible with fabric from my stash.

Hopefully also the thicker, more stable fabric I think I ought to use for this type of construction might be a bit more flattering on me cos this thin stuff really showns my defects ( bodywise that is) in a not very attractive way! 
Still no doubt about it this top being even finished is a big achievement and I suspect it might actually be easier to make if the fabric was less silky and slippery. First though to join together some of the current pattern pieces - the shoulder parts - and see if this is easier to construct and I suspect it might even look neater both inside and outside. 
Its also great to finally get some more serious sewing done and try something difficult finished - at least difficult for me, because its probably not at all difficult for some sewists.
Have a great weekend,
Bracken

Friday 10 March 2023

Pixie hat/scarf and matching Very easy upcycled Padded Gillet


I was going through my numerous patterns, many of which I have never used - I have had this pattern for years..  Its a Faery costume pattern and its even got wings if you wanted to make some. I do like costume patterns because they tend to be considerably cheaper than similar styles in more ordinary looks - you need to check out the line drawings - and often they are half the price of "normal" clothing patterns yet really have the identical designs just different fabrics.
 

So I collect costume patterns because it often tends to be cost effective next to their normal counterparts but the bonus you get with a costume is all the tiny accessories such as hats and bags that you find the same line drawn pattern in the conventional pattern collection does not have.  Though with this particular pattern I think perhaps thats actually not the case since I have yet to see a bolero like this one either.


I really bought the pattern for the bolero jacket but so far I have never got round to making that. Its probably a good one for spring.  I am not sure how well it will work for every day wear but I must make that. It could be nice for going out somewhere so I will be keeping it in mind for the next few months.

But after the success of my pixie hat which I made for a friend's baby I got inspired to make this hat/scarf which is sewn not knitted but its very simple to make from scraps I had from last years hoody and sweater cape tops.

Anyway its the hats that struck my interest. I rarely get round to making accessories but decided I should try making at least one hat this winter. There are two different hats on this pattern. Thinking about it, I actually made the other hat for my Christmas elf/pixie hat. That was just a it of fun though. I am wearing this one and the attached scarf works really well. For some reason despite the local radio station tells me its now Spring, but the temperature here has plumetted the last few days.


Accessories are a really good way to get rid of smaller bits of fabric and also to make your other clothes more stylish and thats as well as keeping me warm now its getting much colder.

And after all this year has, besides being inspired by Faerie fashion, been very much about using what I have rather than buying even more fabric and I have to say despite I still have enough fabric to go another year (at least) without any purchases I have still been successful in this. 

I never used to understand sewists when they went on about reducing their fabric stash - well now I honestly do get it. If you are not careful it gets well and truly out of control. Its also quite satisfying to realise you are spending nothing because the money was in most cases spent several years ago, and using up what you have. Having a  stash as big as mine meant I was  almost part of the fast fashion industry or more than I want to be. Buying more every week or month is not viable.


Sewing for me is a way to make my fashion cheaper, more original and to waste less because I tend to keep even smaller left over bits and find uses for them. Just increasing the fabric stash week after week is really not helping with any of these aims. I also found I was buying and dreaming rather than actually sewing things up. Now I am actively sewing again though as ever my head is full of more ideas than I will ever get round to making!

Back to this hat - if you happen to own this pattern and like me never get round to using it then go for this one. The built in scarf not only gives it that little extra fashion-wise but its also so easy and fast to sew this up, as well as being practical, and I have to say I found this a very satisfying make. I made the largest size but will go down a size next time because its just a bit too loose but otherwise this is a great hat/ scarf.

I am even now trying to decide what other accessories I can make. Before this I have always knitted things like hats but sewing is much faster and I could do with ringing the wardrobe changes with some other hats. I need to search through my patterns and see what else I have because hats are not something I really buy patterns for, they just kind of come with other things. Well accessories in general in fact.

So then the Jacket/ Gillet/ Cut Off - well the neame seems to change every 10 years or so. Not sure quite what these cut-off coats are meant to be called so I will go with the medaeval Gillet.

Sewing wise this is a complete cheat garment. This is upcycled so takes minimum effort and skill to make.

Having said that its exactly what I wanted to make, so its saved me in money, and in time and effort. So nothing wrong with that.

I decided a few weeks ago I need a cut-off or gillet for over my jumpers when dog walking so I can keep the wind out. Its all I need to be warm most of the time so I originally wanted to buy some quilted fabric and make this. 

Then my partner had a clearout of his wardrobe for a charity shop that was collecting and amongst what he was throwing was this rather horrible jacket. It seemed more like the lining out of those 2 or 3 in one jackets than a stand alone garment.

Sadly, I never thought to take a photo of this original jacket before I cut the sleeves off it, but probably you can see what it was like from this anyway. 

 I did not want to unpick the sleeve seams which normally I would have done because of the stuffing that makes this padded. I want to keep all that padding firmly in place. The sleeve seam is therefore still intact around the outside of the arm-hole.

We think he got given this jacket one Christmas years ago. Its never been worn so is actually brand new just old and has been taking up room for several years.

I decided that although its a much larger size than I usually wear it will go brilliantly over my larger winter jumpers. These are the ones I tend to wear for dog walking. That is when its cold but not rainy. Jackets tend to feel more constricting so I do like this kind of cut off.

And bonus: inside this jacket there is a very large pocket big enough for an extending dog lead!

So all I need to do to make this work is to bind the raw edges on the arm-holes. 

Voila!

I have lots of left over fabric in my stash but due to my rehash of the sweater cape this fur was near the top so easy to find. It also looks much better than some offcuts I tried so thats what I used. Of course I am also clearing stashed fabric here which is a bonus. So I decided to use the offcuts off faux fur used for updating my sweater cape to cover up the armholes where I had cut off the sleeves. Simple strips of faux fur worked perfectly for covering the cut off sections and covering up the raw edges. There is no shaping to the furit is just a wide strip of fabric sew first onto the front edge togive a nice neat edge to the outside and then folded under and sewn down inside to get rid of raw edges. Ziz zag stitch used for both. Also since there is no shaping to the strips of fur they actually stand out slightly to give a kind of short sleeve  which I like. Gives a slight bitmore style  think.

All in all I am pleased with this gillet / cut off jacket and its exactly what I wanted to make. Being upcycled has advantages other than the effort and time to make it in that it is great saving something from going to landfill - although maybe it would have gone to charity and been a fund raiser? 

But in this country its a sad fact that our charity / thrift shops send huge amounts of clothing to landfill due to the fact they simply cannot cope with the amount of stuff people send them. So I feel no real guilt depriving them of this one garment especially since we sent 4 large bags anyway ad have even more stuff to sort out and probably will get rid of some more. Its amazing how much you collect if you do not get round to having clearouts for a while.

And it did not cost me anything in cash, and not that much in time really. The main time costs were in working out if and how to make this wearable and if I would still want it afterwards. I did spend about a week considering this. The actual sewing was probably about 30 minutes. 

So this is a cheat when it comes to sewing but I do feel some satisfaction for reusing something that was otherwise just being thrown away. And importantly it serves my purpose perfectly - I am also not so sure any patterns I own would actually give me this same fit which I get from a mans coat and its what I was envisaging when I thought about making this. 

I tend to be a bit boring really and mostly use "women's" patterns for me and "men's" patterns for my partner. That in itself is something I should probably address from now on. It widens my choices by quite a lot!

Its hard isn't it to get rid of this gender conditioning, that we nearly all have, even when you are well aware of it being an issue?

I did consider re-covering the collar or adding strips of fur down the front edge but in the end I think the amount of matching fabric bits I still have of this fur fabric will make some kind of coordinating item to wear with this so thats my next aim. Besides I actually quite like the simplicity of just the armholes having faux fur on this gillet.  Its all too easy to go OTT with this kind of upgrade and the hate the results. I have done that before several times. 

Now I am going out with my dogs to wear my new gillet over a warm jumper and stay warm.

Thanks for visiting my blog. Have a great week,

Bracken 


Friday 3 March 2023

Green Camo Hoody Cowl with mitts

 Well yes another version of a hoody cowl. This dress has ruched sleeves - mainly due to the fact I needed to use a seperate piece of fabric for the  lower sleeve section due to this being made from offcuts from other garments. 


I quite like the sleeves though because they are completely different to all my other versions of hoody cowls. Also being winter I do want long sleeves.

Must admit its now at the stage I should really try something new because I have loads of these and similar tops and dresses with hoody cowl necks. There are a couple ofdifferent patterns in my collection but they are really very similar. But I just love wearing this style so its a shame to take a risk on my usually much liked new fabric and make something I might hate.

I find this style so very wearable and it works over track pants, jeans and leggings and as a dress as well.  These leggings are old now. They were made usig coated woven stretch fabric - so not quite usual legginsg beinga  woven but the fabroic is very stretchy. I made several different coloured ones years ago and only have a couple of pairs left now. I suppose being green I wore these less than the black ones which have all died now.The link to that old post is here if you want to check it out. I was amazed how much younger I look there! But then that was back in 2016. Perhaps I should go back to having a fringe? 

It took me my whole life though to fially grow the thing out because its always so annoying when hair is in your eyes so I ended up always cutting it again.  It was only having an operation caused me to actually grow that fringe out. My Mum always insisted I have a fringe and I never got the thing to grow out until I was imobilised and unable to either cut it myself or visit a hair dresser. I have been quite liking not having a fringe but maybe I do look better with one?


Back to this dress then. 

Its got a hood or loads of different necklines as you can see depending on how its worn. Its the same with all of these tops and dresses and thats why I like them so much. 

Also which I never thought to get photographed but the neck also works as an off the shoulder Bardot neck too. I tend not to be so adventurous in winter though. Bare skin when its cold is something for people younger than me. I prefer to be warm nowadays rather than expose my shoulders in winter, but this pattern does also work off the shoulders so in summer thats a look worth playing with. I will try to remember to get another photo of that look next time I wear this dress. 

This hood has no added lining because the back of the fabric is acceptable so why line it?

Its just a plain black. I like the fact the hood weighs less as well. Its always a pain when a lined hood adds to overall weight making the hood pull back at the neck or in the case of hoody cowls at front when worn as  cowl. In most recent versions of this pattern though I have used powermesh or lace as the hood linings. The first two dresses I made were lined with cotton jersey or self lined and it was far heavier to wear them and they just never worked so well as the more recent versions. But then I suppose that is the point of making a muslin or trial version first. You get to check not just the fit but also how well the design works as a garment. I no longer own either of the original two dresses having sent both to the recycling last month as part of my wardrobe clearout. But I suppose they were my trials because they taught me what did and did not work and also what size I need to make since both were a little too large. I was new to Burda then though so did not know my size. You can see both of the original dresses here.

And of course I added mitts from the pattern in the Feyr Trade Make your Own Activewear Book which I have used lots. I am currently just in the process of pre-washing some fabric for a pair of trousers from that book - thats for another time though.

So the sleeves are really 3 pieces - top bit which follows the pattern from the narrower sleeved dress Burda Style 12/2014 #121 whereas the hoody cowl is actually Burdastyle 09/2015. The on the end are the mitts from the Make your Own Activewear Book. It works though.


I am really pleased with how this version has turned out though , because its genuinely made from weird shaped scraps that I kept but did not realise I could get something so good from them. I had to cut slightly at angles so most of the pieces are not on straight grain so this may go baggy or something but right now I don't care because its a free top/dress from scraps so from a environmental view this is a brilliant garment because the offcuts would normally either go to landfill or at best become pocket linings and believe me I have tons of offcuts to make pocket linings already.  

It might of course also mean the side seams twist as well being as its all cut at odd angles but its quite a stable scuba fabric so I have hopes it should be wearable for a while. It will eventually pill ayway being a knit so if I can get a couple of years out of this that will be really good for offcuts I might normally just have stored indefinitely or thrown away.


I have just one more hoody cowl cut out now - I cut all this years at once in one day - so I will sew that up and then I really think its time to try out a new style. Not too sure what I am going to make yet but something I have not made before is the aim. I will have to go back to my New Years planning and see which item I fancy next because this year I am really trying to stay on track and also to use my stashed fabric rather than add loads of new fabric to the rather large hoard I currently have.

Thanks for popping over to my blog, See you next week........

Bracken