Tuesday 28 April 2020

Black top with back lace insert


This top is really a cheat. I made the top a while ago. It was one of three basic black tops I made. This is the low back version which, as I wore it, was not a success. It kept falling off my shoulders. I suppose the opening was too wide at the back. I did not have a patternso hacked a normal top pattern. It was not a great success. It seemed fine when I made it but as worn just was not comfortable. I want to be able to live and move and not worry about showing off everything. So how to fix that.

Well in my stash is a ready made black lace V insert. I bought this ages ago. Its was sold as a front V insert but no reason why it must be for the front, and to be honest that is really not at all my look. These come in various designs. I even saw a skull lace version, but never bought that which I now regret, but at the time I had not found a use for this, and had owned it probably 3-4 years. It was from either Amazon or Ebay international sellers.  But for the back.............now that is very much my look.

So that was possibly a good idea. The top then sat on my sewing table along with the lace piece waiting. Lockdown is good for some things I suppose because its making me get round to all those small jobs I just do not get time to do. I spent probably an hour or so pinning the insert into place then zigzagged it oto the back of the top. Then cut off the excesss fabric. It could be neater if I had sewn it ontot he back piece before construction but of course this is repair really. I cecided not to cut the excess off before sewing and I think that was the right way to fix this. It took away any likelihood of me cutting off too much fabric.
 
It even works with racer back bras!


The fix works really well and I am very happy with the result. I wore this top all day yesterday in fact and it definitely works so it is well worth buying one of these inserts if you see one for sale. I think the V insert cost me at most a couple of UK pounds from a chinese company. It took a while to arrive but for the price its a great way to fix a problem such as this on this otherwise nice basic top.

Of course its no longer as basic a top now but this would never have been a work top anyway with such a low back. It makes a disaster into a very good fancy top which looks brilliant with both jeans and fancier bottoms.
Stay safe
Bracken

Tuesday 21 April 2020

High Low skirt - self drafted


I cut this out 3 years ago as an A line skirt but did not like it, so took it to bits.

Then it went in and out of my stash every season it seems until last winter when I decided to cut it shorter and using the bottom of the skirt where it is wider to add pleats. I liked it better with pleats, but still could not decide what to do to finish it and it was not quite right so I stuck it back in the stash.


The fabric is very thick striped upholstery fabric - like the stuff found on bus or train seats - which I love but its so thick adding things like hems is very difficult and my machine simply will not sew this.

I added a normal lapped zip rather than an invisible due to the problems with sewing the very thick fabric. This went in quite easily maybe due to it being a  heavy weight chunky zip - the type generally used for jackets rather than skirts.


I have yet to decide whether to hand sew on a hook and eye. The zip seems to stay closed when its worn - I walked the dog in it today so that means it can stand up to moderate exercise and not come undone anyway.


Side view showing high low

Then I found my green crochet lace which has been hanging round for ages whilst making Micks T shirts ( you can read about them in previous posts) and decided to stick some on the hem. This will mean I can avoid a folded up thick hemline and I do not really want either a raw edge or overlocked edge showing so I need something to finish it off.


So then I was playing around with the green lace and it suddenly hit me this would work well with a high low hem so I went for it one evening and whilst wearing it added pins to check where to cut then I just chopped the bottom off. Yes risky but it was now a good length for work or play and I overlocked the edge and then added the lace with the fabric staying flat to avoid bulk. The lace is very unevenly pleated but it seems to work.

 To finish the waistband I used some scrap bits of black satin left over from this top.

I knew those bits would come in useful. I have a large bag of these satin bits. There is not a single bit big enough for anything other than trims but I have hung on to these ( yes even more rubbish in my stash!) and in this case it was the right thing to do. This proves it. I am still now keeping the rest of the satin bits just in case. They helped to make this skirt. I again left the skirt fabric flat and just bound the egde with the thin satin. I overlocked the inside edge of the strip so it minimised the thicknesses.


It reminds me of clothing from the early 2000s where it seemed everything was trimmed with random scraps or miss matched buttons or lace bits. Anyway I do like this skirt very much in the end and it was worth waiting for the inspiration to get this one right. I can see me wearing it a lot.
 

There's a kind of steampunk feel to this whilst still being suitable for everyday wear. A serious success I think for a couple of scraps of unwanted upholstery fabric.
And, far better than making the 2 bits of fabric I had into some boring cushions which was the obvious choice for this.


Well I am feel good right now because not only am I sewing new things, but I am finishing UFOs. And so far I am staying safe and well. And not getting too bored. Bonus!
 Stay safe
Bracken

Saturday 18 April 2020

The Partly Sunny Dress


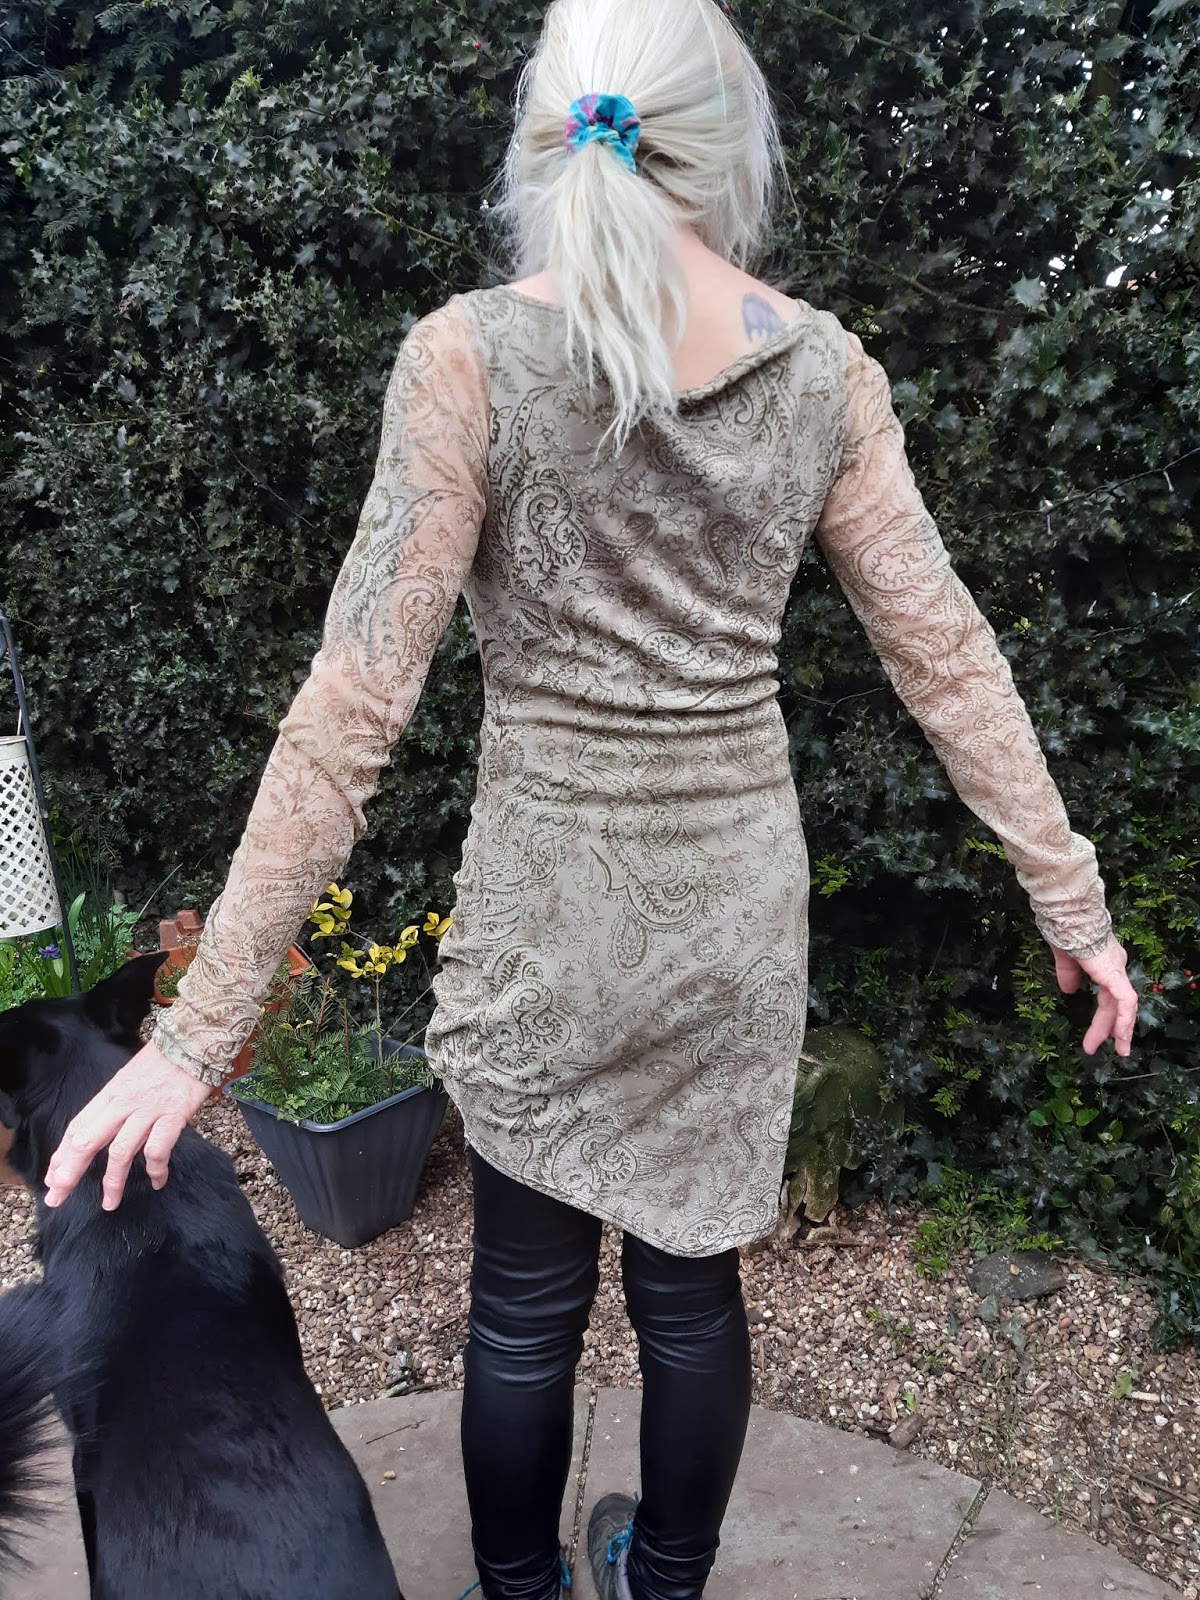
I was given the pattern for this dress via the old burdastyle.com website.


It was a free pattern designed by Grosgrain. I think that was probably back in 2013 when I really started to collect patterns in earnest. I only printed it somewhere around 2015 though so have had this one stashed for around 5 years as a paper pattern in my loft. I put it together earlier in the month when we began Lockdown for Covid-19. Sadly you can only get this direct from Grosgrain now that Burda destroyed their old website. Its called The Partly Sunny Frock because of the cloud shaped collar!


I have had the cartoon fabric in my stash for about 5 years as well. I have several times decided what to make from it and then decided this or that pattern will not work well. I think ths dress does the fabric justice and vice-versa.

The yoke fabric is not really ideal considering its a 4-way / all direction stretch powermesh attached to a 100% cotton non-stretch bodice. I previous made a high low skirt from the same powermesh.

 It kind of works tho I do have a slight pucker at centre front which I cannot get rid of. I think I stretched the fabric whilst sewing. Its not actually puckered in the sewing but just how it lies when worn. I decided to live with it because it was hard to sew this or at least harder than expected. The collar is 100% white cotton from Ikea. Since the cartoons also have clouds it all kind of works together.

Original dress by Grosgrain
I think despite this is not at all my usual style I will actually wear this once the summer arrives because its very much a summer dress and I love it. I am so glad I finally made something from the cartoon fabric and this design is perfect.


The original dress says it is a size 6. I think from the pattern its a UK size 6. I am not sure what that makes it in US sizes. It does not matter. I am a size 8-10 in UK sizes so it was going to be too small so I used the Burdastyle course on making patterns bigger to increase the size to what I thought was a size 10. That should give me room for adjustments. I then sewed the darts according to the pattern. Well it was obvious before even construction that was not going to fit so for a while I was a bit upset. Then I decided well it has very large darts so I took out the darts completely on the front and back waist. Then I redid them.

I did this by attaching the front skirt to the front bodice and found CF. The bodice was narrower than the skirt parts so it was the size defining part of what I had cut out. I needed to make everything as big as possible from what I could work out but I had obviously to stay within my maximums as defined by each cut out part.

Then I worked out where the original darts went by using the previous stitching lines on either side of CF and took the skirt in to match the side seams. I did the same at the back. It means my waist darts are now about 1/4 or even less of the original size and this is with already making the pattern larger!


 I kept the bust darts but made them much smaller. I realised the waist seam is higher on me but decided thats OK and I actually quite like it. I do have most of 1m of this left so could have recut some parts if needed but not all the dress. I did not need to. I am aiming for a much less fitted silhouette than Grosgrain's versions because I prefer my dresses with room to move so more like a basic shift dress. I love shift dresses.

I pinned the dress together and tried on and it fitted. At this point I am so relieved I cannot express it. I had been terrified I had just trashed my precious cartoon fabric.

I added the CB invisible zip which is really not very invisible due to the see through yoke but its the right colour and I already owned it and I cannot think what else to use instead. This is a very nice easy sliding zip off an Ebay seller. I used to buy from Jaycotts but the zips kept breaking.  I usually bulk buy in several colours at once even though I have no idea what I am making with them. I buy for the current item I am making and a few extra in random colours. That brings the price down lots. And of course also the postage charges since most Ebay sellers combine shipping on multiple purchases.


The original dress has piping trims but I decided to go for a slightly different look. I added self made bias binding round the armholes to tie in the bodice and stabilize my power mesh yoke.

I was very careful to ensure you cannot see any raw edges here.

I tried the dress on again regularly as I constructed it at each stage. This included pinning when necessary to check it still fitted.


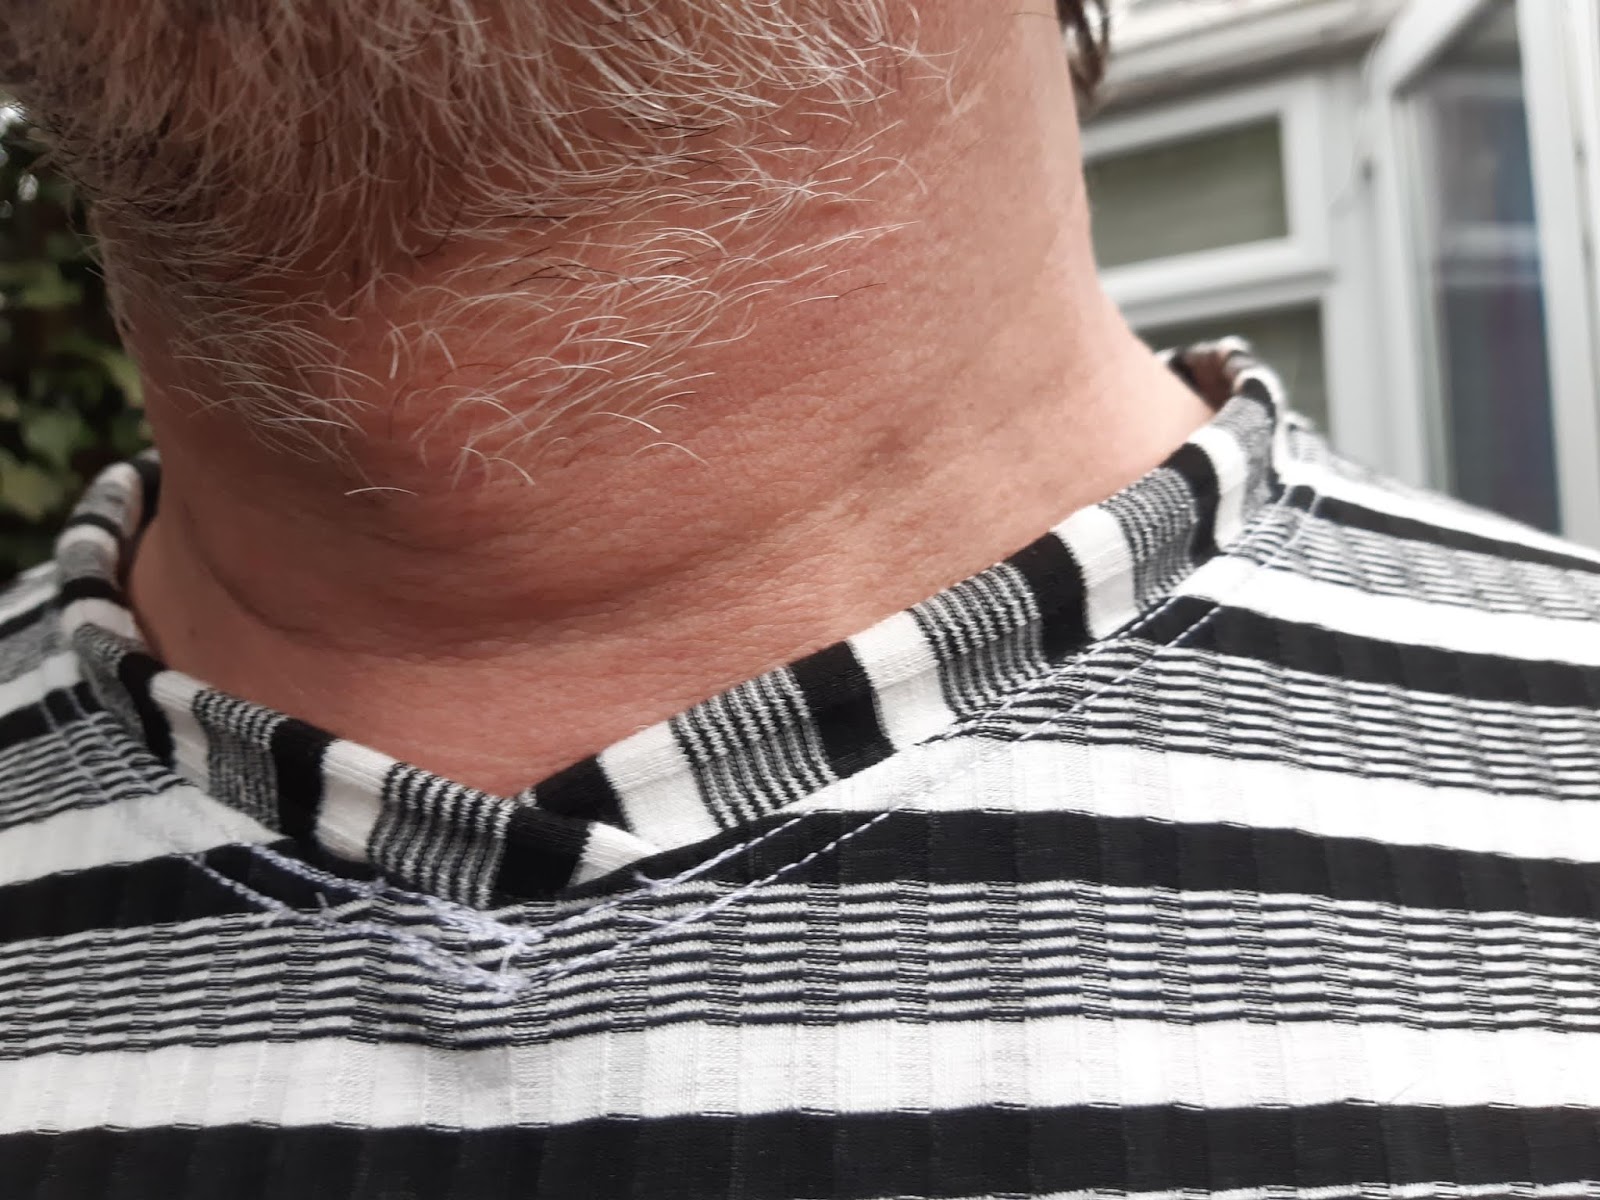
Then I did the collar. I needed to lower the neckline on the mesh yoke by about 2cm which is quite a lot. That could be due to my pattern enlarging skills since I am not at all expert at that. In fact its my first attempt so likely I have caused the neckline to rise a bit?

I first sewed the two collar parts. I top stitched in blue to match the rest of my sewing.  The inside of the dress is all overlocked in white as well.  I should have ironed the 2 collar bits at this point because I am now worried I will melt the power mesh so have not ironed the cotton so its creased.

Anyway it was a bit tricky getting the collar to fit probably because I lowered the neckline and made the neck hole larger. I had to and as you can see its not a wide fit even now but quite tight though not uncomfortable. I did not enlarge the collar itself which is a mistake. There was no way to get the collar to fit. According to Grosgrain's version it joins at front and on either side of the zip at back. Of course I could have recut the collar as a bigger version, but I just hate to waste fabric if I am able to make things work without.


So then I decided to use more bias binding to make a stand collar edge for the whole thing. That allows me to have a small gap at front centre which would really have been difficult to sew perfectly anyway due to the stretchy powermesh and on either side of the back zip I also have a very small gap. The bias tape colar also sort of ties everything together I think.


So the collar is not perfect but I reckon it will work. I pinned everything and it all looked great. But sadly when attaching the collar I managed to sew it so that the right side point (my right that is) is slightly longer than the left pointed bit. It was perfect when pinned so I think I did a slightly longer seam or maybe the powermesh moved?


I think it works though and most people will never notice my mismatched back collar points and I am still very happy with how this has turned out.

I usually wear my hair loose anyway so most people won't even see that.

Oh, and finally I shortened the dress by making a deep hem so its a length I will wear.


And now I can tick off another item from my very long " I want to make that" list. And not only have I used a very long ago stashed pattern, I have also used stashed fabric and learned how to enlarge patterns. Well that bit did not work too well, but I think I can work out what I did wrong, and at least I now have confidence to have another go at it when next I want to. Baby steps and all that.

I just need summer now....
Bracken

Wednesday 15 April 2020

Pink flares and Bixa version 2


What can I say about this outfit but I made it because I can!

Its taken me a whole month to get round to taking photos of this outfit. In the meantime I have not worn it. Mainly thats because of the colour and the sleeves which can be trashed too easily with housework and since lockdown I have done loads of that. In fact I think my house is as clean as it was when I moved into it and I cleaned everywhere before unpacking.

In the end though I want to wear the yoga pants to lounge around in so had to get round to taking the photos!


I bought the pink scuba fabric for 99p from Ebay about 30 seconds before the auction ended. It was advertised as that it had a small mark on it but was 6.5m in length. From the photos most of it would be useable anyway. Its not a colour I would usually buy, I have to admit, but for 99p I will try anything.

Cream Bixa
When I received it I washed it and the stain came out - bargain then. Still not any ideas for what to make from it so into the stash it went. Now I am about to start a new job ( assuming its still there after lockdown anyway) and want some new tops and I am bored so I decided to make another Bixa. Its was already on the To-Do list anyway and at 99p its a cheap risk. So I lengthened the body section because the cream version is a bit short for my age - or so I feel. You have to feel comfortable after all. Its not all about fashion.


Then I joined the top sleeve and bottom (under sleeve parts) together. I lengthened the top overlay to the same length as my new sleeve pattern. I then cut it all out from the pink crepe and the overlay is cream wedding veil tulle.


In the end I am not going to wear this top for work! 

Since the fabric was also huge (6.5m) I decided to cut a "matching" pair of yoga pants using the free pattern from here:
http://ifonlytheywouldnap.net/2015/03/06/free-yoga-pants-pattern/

I used this pattern several times before and I really like it. Its makes for tight slightly flared yoga style trousers. I do not however like "yoga band" waists so cut a proper waistband from some scrap leapardskin print fabric from when I shortened my dress which was about the same time as cutting this hence I knew where it was.  The dress now ends just above my knees and is worn far more than it was, which was never. The resulting waistband is a fake yoga band that has wide elastic in normal waistband with a second strip sewn on top to give the yoga band look. It works for me.


I also added 3cm to the width below the knee on each side of the front and back pattern pieces, which I graded down to the bottom hem to make the flares wider and just hoped they did not twist as a result. It worked and they did not twist. I really like them!

I sewed the trousers up with crepe-side as right side but the top as crepe-side inside. Crepe-side outside for tops for me feels very aging. I prefer a flatter fabric.

It was a bit tricky adding the overlay which turned out very full but with careful pinning it worked. As I went to sew it I also decided to add the ribbons. The ribbon addition was just inspiration.

Well what can I say? Its completely impractical so it really is a case of "just because you can". 


 Because the top is longer than my previous cream version you only see the waistband when I stretch or bend but thats OK. Its a nice touch I think.
 I just could not resist the ribbons. I own a Burda pattern for a medieaval costume top and that has a similar shaped sleeve which gave me the inspiration, but I has made it a top that I do not feel I will wear for work. This shade of pink and the overlay and the flares - well its all a bit OTT really isn't it?
Thats what lockdown is doing to me!

I am not sure the top will get worn much to be honest,  though for a day out somewhere, it has a place in my wardrobe. As previously though with the last Bixa top, this could be a good wedding guest outfit. Or a going out to dinner or a clubbing outfit.

The trousers though, I am aching to wear.  Surprisingly I even do not mind the pale dusky pink colour. I

Looking at these photos I am also aware I need to make some underwear (knickers!) that looks better in these kind of clothes! Its on my next list!


Thanks for popping by and stay safe,
Bracken


Tuesday 14 April 2020

Stretch Green paisley mesh dress


 I think this is the very first Burda Style dress pattern I ever bought - as in PDF download. That was in 2013. I have not managed until now to put the pattern together and make the dress. I actually now also own the original magazine this came out of since I got a copy from Ebay but never mind. All that matters is eventually I got to make this. This is 04/2013#127
Its stretch lycra khaki green ribbed fabric for the lining like the stuff used for the body of this
T shirt and the paisley power mesh I still have metres and metres of. I am sure I will find something else to make from it. I already have a wrap top which will be Ok over this dress if its cold, a high low skirt and another unlined mesh dress which I turned into a ruched sided T shirt top because I never wore the dress. I have yet to get a photo of it as it is now. Similarly I seem to have no photo of my paisley wrap top. Maybe in Me Made May!


I really really like this dress though not so sure I put it together quite right.

The picture does not have a pointy hem at the back. I quite like that though.


Also not too sure about the baggy back neck tho suspect that is my sewing.

Its possibly a bit off what it should be because I decided its so tight I would skip adding the elastic along the front.

Well yes, it works without, but in the end to keep the gathers even you do need elastic so I sewed that in after construction which makes it harder to sew it.


Also I omitted the back darts and the zip. Probably why its baggy at the neck?

I should have omitted the back seam allowance I expect. I was worried it would in the end need that zip, but it works as an over the head top/dress. I do not think it needs the darts and without the zip is always better than with, if its possible to do it without, in my mind anyway. 

Having a zip always means the zip breaks and the garment goes into the bin because its often too much hassle to fix it rather than just make a new version of the garment. I really dislike zips.


So almost the #127, 04/2013 dress. 
You know I really do love this even if its not quite like the picture. Its very "me".

Bracken

Saturday 11 April 2020

Stripey T shirt


Mick loves this T shirt. Its an almost exact copy of one he has from the mid 90s which is now going in holes and used to be his favourite top.
 I am actually not so happy with this as he is. I reckon the sleeves are a bit long for a start.

Mick though said they are fine so I have left them. Its an easy thing to sort out later if he changes his mind.

The neck though is another thing. His original 90s T shirt has a wrap type of V neck which I attempted to copy. Its not the best thing I have sewn thats for certain.

 You can see how I tried to resew it and then resew it again to get it right. 

Well I did not manage that very well at all.
Still despite this I have made him a top he seems to like - as in I wanted to wash it and he refused to let me and wore it an extra day so he must  be into it.

I made another top for Mick from this fabric ages ago. I realised when I made that, that this was just about and exact copy of the fabric of his much loved T shirt, hence I bought more of that stripey fabric for just this project. I was not sure how to make the V neck though so its taken a couple of years before I was confident enough to tackle this. I am still not happy with it, but suspect its better than I would have achieved two years ago.  Next time it will be better.


There is just one more T shirt I need to show you then this challenge is complete. Hopefully I will get photos of that one tomorrow.

For now here's another shot of Mick in his new stripey top
 
Stay safe everyone
Bracken