Showing posts with label #TMSIPM2018. Show all posts

Wednesday, 12 December 2018

Oki dress - Moon Goddess

I made this pattern previously for the The Monthly Stitch Indie Pattern Month 2018 but in stretch black canvas. I prefer the first version because until I made this dress I had no idea the grainlines on the pattern are wrong.


Its too late now because I have made this and I do still like it but its not right at all so I am pretty P**sed Off if I am honest because this is special fabric bought from Ikea as a limited edition a couple of years ago and I cannot get any more. 

 I did my first ever proper exposed zip on the back of this dress too. I am reasonably pleased with that although its defo not perfect but you have to begin somewhere and it does work so thats OK>


I never had enought to pattern match which is also a problem but the fact the grainlines are out - see the sleeves! is terrible and very disapointing and I spent a lot of time lining everything up to make it work out as best I could because I knew I would have some mismatches pattern-wise anyway but never realised when I made the black dress that the grain arrows on the sleeves are completely wrong. 
The sleeves are weird obviously because thats the whole point of the pattern so I never realised till I sewed it all up.
Its still wearable and I still like it but yes this is disappointing. Its what you expect from a Big Four pattern rather than an indie designer. Tho why I think like that I have no idea. But anyway if I want to make this pattern again I will only use plain fabrics as of now because I do not think my brain can cope with sorting this out with the weird pattern pieces.


So yes I do like this dress but its far from being a big hit with me. Its just too imperfect and the strange part of this imperfection is I expected to have it imperfect but that was down to me not being an expert with exposed zips and knowing it would not be pattern matched with this print would show( it does!) but its the best I can manage but to have the grain lines out thats just crappy! And not my fault.

Will I make another? Yes probably in a sweatshirt type fabric in a plain colour because I think it would work. Never again in a  print tho!

Thanks for visiting and I hope this post helps someone else with the Oki Lola pattern!
Bracken


Saturday, 27 October 2018

Two layer dresses for IPM 2018 final challenge.


I used the Teach me Fashion Layer Dress to make my Around the World- Inspired by Vivienne Westwood  dress and decided to go for a second dress using this pattern.


I find it a very wearable pattern and its a bit different to wearing just a shift dress because of that exra layer.

So here is my Eyeballs dress.

 I bought the fabric from Ikea as one of their limited editions ages ago. Its 100% cotton and it was just so very different.

As usual this fabric was not for Halloween but was actually part of the Ikea summer collection. Or maybe it was released in summer to allow people time to make for Halloween? Who knows?

It is a perfect fabric though for Halloween and IPM happens to have also fallen on that time of year this year so why not?

Having said that being me I will more than likely be wearing this all year round anyway😀. 

This version of the layer dress has the inner facing as well which makes for a neater finish than my last dress.


Again,  like my first dress the insides are all overlocked. The difference is I used me made bias to finish that dress due to lack of fabric to make the facings. The facings are certainly much neater and professional as finishing.


I did not both to pattern match because to be honest I was having difficulty working out where the repeats are. I do not think it matters anyway and it does also mean I waste less of this somewhat precious fabric. It only really shows as a problem at the back but I am still happy with this dress despite that.


I am finding this particular pattern is surprisingly fast to make up as well. I used a normal zip for this version since I did not have an invisible in the right colour. I also had difficulty deciding whether to go with red or a white zip and in the end red won. I am still not so sure white may have looked better.

As the Around the World Inspired by Vivienne Westwood dress I added a few inches in length.


Other than that there is not much to say about this.

I personally am very pleased with the end result.


Thanks for popping over
Bracken


Tuesday, 16 October 2018

Sew Loft trouser pattern - Around the World

I decided for the Around the World TMS challenge to make some practical and much needed trousers for work.

When I saw this pattern was free I was very excited. I normally use a Burda pattern for my narrow leg trousers. This pattern from Sew Loft / Spit Up and Stillettos has pockets!

You can get this pattern from here:
http://www.hoopesparkstudios.com/whatever-happened-sew-loft/


Well everything went together wonderfully although I found the instructions for the fly front very confusing and in future will do them the way I normally do this. There seems to be an extra step where you attach the fly facing whereas normally I would attach this at the same tme as the zip to make things neater, but never mind I sussed that eventually. Its probably jist personal preference as well.

The problem really came from the fact I am trying to do this quickly and never tried these on until after I had attached the waistband and then disaster.  Of course I really should have known better!


They are a full 7 inches too big!


 Most patterns seem to come out big first time making but I was not expecting quite what I got. I seem to generally need a slightly smaller size than I start with but I do not mind taking in and adjusting slightly. After all slightly big is still wearable whereas slightly small is thrown away.

Now going by the measurements I need an S or a size 6. Next time I will be cutting an XS or size 0 to get the right fit by the looks of it and even then the difference in size still means even the smallest size is quite possibly too big.  I am really not that small usually.

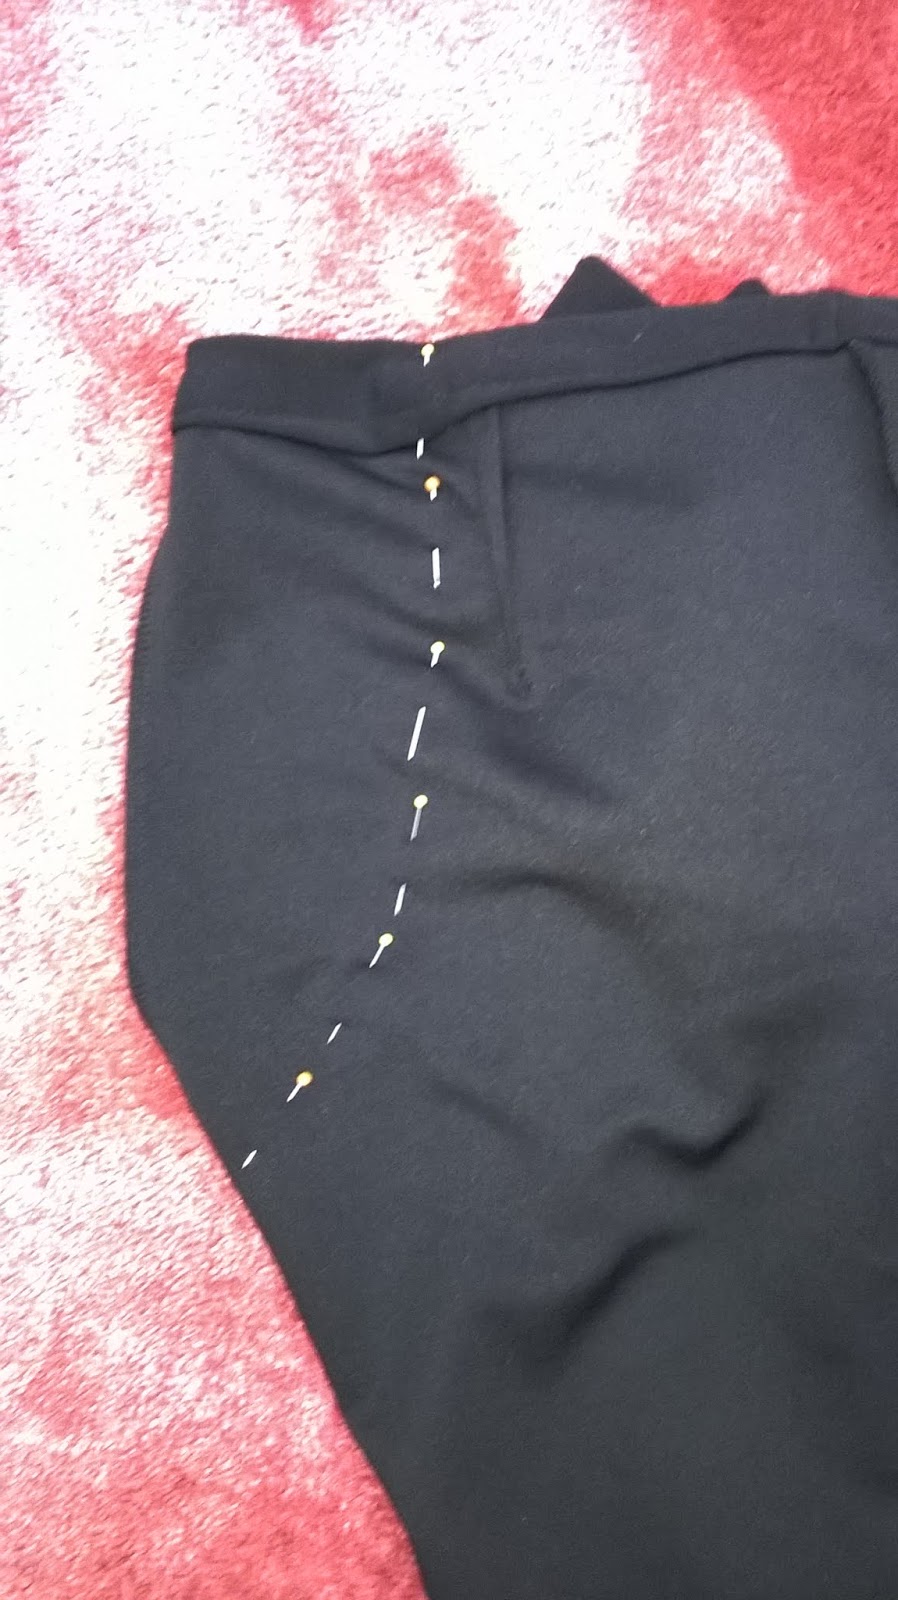
I started off by pinning the excess at the back. I did not realise yet just how much they were too big.


The problem was how, without starting all over again, could I put this right?

I really did not want to throw these away because I have no more of this fabric and they would be ideal as work trousers.

I toyed with just adding elastic to the back but it is not really the look I am after so decided to try and put this right by increasing the darts.

I started by unpicking the waistband and then tried to disperse the excess over the darts and the centre back seam. In the end I took them in by making the darts much bigger ( about 3 inches each at the waistband) and the back seam lost about 1inch. I did not really want to do anything with the front, the fly or the pockets because they are all working fine so I did this just by altering the back and probably that is not really the best way to do it. Perhaps I should have just ripped it all appart and started all over again.

Anyway I took a chance and sewed.


 To a certain extent this worked but my darts are now huge and bulky so I cut off the excess fabric from the darts.


They do now fit but to get the darts to lie flat they extend right over my bum. I am actually toying with extending them fiurther down the legs since it may look better. The legs are quite loose despite being pencil trousers but I like that so would prefer to just try wearing like they are ad in the end they are at the very least "different" with the very long back darts.


This also means I have slightly out of line waistband seams and the side seams are downright wonky.

Hopefully you can just about see that the side seams vere backwards at the top of the hip due to my taking them in by so much.

 Its a shame because its a nice pattern for work clothing if it worked out the right size and I love the pockets.


I could even suggest it was down to me cutting the wrong size but I have double checked and they are a size 6 and my hip measurement is correct for the size according to size chart but they just turn out huge.

And for anyone using cm, 7 inches amounts to 18 cm so this is not a small amount these came out big by and I really find it hard to believe I could cock up by that amount. Its 3-4 sizes different to what I was expecting according to the pattern.

The end results is a slightly messy looking waistband from being unpicked several times trying to work out how to get the side seams to all line up - they don't - they are definitely wonky side seams and a pair of trousers which in the end do fit me but I am slightly disappointed with them if I am honest.

I used a skull print fabric for the pockets to get a nice contrast and cheer me up at work.


I used a snap fastener on the front waistband because to be honest I have had enough of messing around with these and really cannot cope with a buttonhole going wrong as well.

They will be OK for work because I tend not to tuck my tops in.


 Thanks for visiting
Bracken


Saturday, 13 October 2018

Corset Belt #TMS indie pattern month 2018 Anything but Clothes

When this week of "Anthing but Clothes" began I was intending to make a bag. I even cut out a small rucksack pattern which I found for free from SoSewEasy and I really think I may have to get round to finishing that at some point because its a great little pattern. The problem though is I use a rucksack - as in a proper small Karrimor rucksack for my everyday life and I really virtually never use a bag so it seems a waste of effort.

Then on Tuesday evening I decided instead to make the free corset belt pattern from Scarlet at https://www.corsettraining.net/project/shop-vixen-corset-pattern/

First though I needed to check with the editors if this counts as an indie pattern company and they agreed it does which is brilliant.

Unfortunately, after I made this I had some issues taking photos because really most of my clothing that will go with this is dark and it does not show up well so I ended up trying several outfits with mixed success but I think it shows the belt anyway.

Ideally I now need to make a dress to go with this I think.


I have been intending to make this for years. Really about 5 years I think. I downloaded and printed it out years ago but never got round to putting it together or even looking at it until now because what I never realised is the pieces are so small you do not actually have to stick anything at all together!


The belt is made from scraps as well left over from other projects and when I say scraps I really do mean that. The satin is so lovely I thought it might be a pocket, collar or something or a covered button cos the pieces I had left are all small. I still have loads of scraps but all the reasonable sized bits are gone. I ended up using selvedges for the edging in fact which should be bias cut but I did not have enough.


Its really not a proper corset because I only had plastic rigilene bones and two sizes of these so the sizes vary around the belt.
 Its meant to be made with metal ( steel) bones. I decided to go ahead anyway because its a good practice to make a muslin and this is a wearable muslin and right now I am between jobs. I temp and am waiting to find a new placement so money is not really available for anything and I must find what I need from my stash. My stash is pretty big tho so its not really a problem but does inhibit me sometimes.

So this is a muslin really. I will, however, definitely be making another with proper boning. Luckily Scarlet gives three different versions of where to put the bones so I made a mash-up of these to make it work. The channels are green bias binding. Some of the channels have an extra row of stitching so I can have two bones side by side in one channel because the thinner bones need to be doubled up else they are too weak. I also have two channels up the front (or back) because its wearable with lacing front or back depending on how you want to wear it.  I had 1m of each of two widths of rigilene and I have about 10cm left of each size so it uses quite a lot of boning.
  I used grommet tape because I did not have grommets as such and this is left over from a dress I made a few months ago.


For directions I used the instructions from Emerald Erin's blog
http://emeralderin.com/2015/07/corsets-with-scarle.html

Construction is completely different to clothing but its very straight forward and I would definitely recommend making this if it appeals to you. Personally I have no interest in tight lacing at all but just want an unusual belt. I think next time I will also make a bigger size because its meant to reduce your waist. I usually like to wear loose comfy clothing but I really need a belt to go with a dress I am making which is very sack like so this is a big adventure for me.

I could really have sewn the rigilene straight onto the fabric but decided to make this exactly how I will make the steel bones version in the future because its a good practice.

Its got 3 layers, not two, as in the instructions because I did not have any Cortil. The outer is fragile satin backed cotton type but of unknown fibre. I made a dress from it previously for the 3 Dresses from one pattern TMS challenge.  The inner is 100% cotton shirt weight fabric which I also made a dress from and sandwiched between these to give strength is a layer of canvas. You should really use Cortil but I do not have any so for now this will surfice. It seems to work but I suspect this belt may not last long. mind you it s also not something I see myself wearing every day especially since I need help to put it on!

 
The white lines you can just about see on the lining are chalk where I was working out where to put my front boning channels because they are slightly different to the pattern.
 

I do not yet have proper lacing so am using ribbons. I started off with two different coloured ribbons and this is much easier to lace yourself because you can see in a mirror which ones you are pulling.

Its a big difficulty putting this on and I need help which is not ideal tho when laced at the front its obviously easy to do. Did I mention its reversible so you can lace front or back?

You are meant to be able to do this yourself! Maybe with proper lacing it will be easier. I may have to buy some. Scarlet reckons you can put this on yourself either way and a full corset too. It may then get easier with practice but who knows.


Its a fun project either way so thank you TMS because this is reallymaking me step into the unknown and do what I have thought about but probably would never have actually got round to without IPM.

Anyway I am happy how this has turned out despite it not quite working with my current wardrobe. That however I can easily fix and as you can imaging my ideas of what to make to go with this are seriously flowing now.

So here are the photos:


  This is definitely a  fun item to add to your wardrobe and I may even make one of those Burda Dirndle patterns I seem to have hundreds of😊

Thanks for visiting
Bracken