

Another jumper from second hand ( new unused balls!) off Ebay mohair. Bought in 2016 and since then just taking up room.
I have been wearing this jumper in various colours since I was about 22. Its just part of how I look now. Its the third or fourth time I have knitted this pattern but I really like to wear it. The first version in golden yellow was back in the 80s ( I do not have any photos) then again in the 90s though that bright green version took me 8 years to knit! I finally finished it in 2004.


Its been very well worn and is pretty bald now and tatty looking but I
still wear in the garden but the bright green is really ready for the
bin and I cannot quite imagine a world without this pattern of jumper in
the wardrobe so here is my latest version.

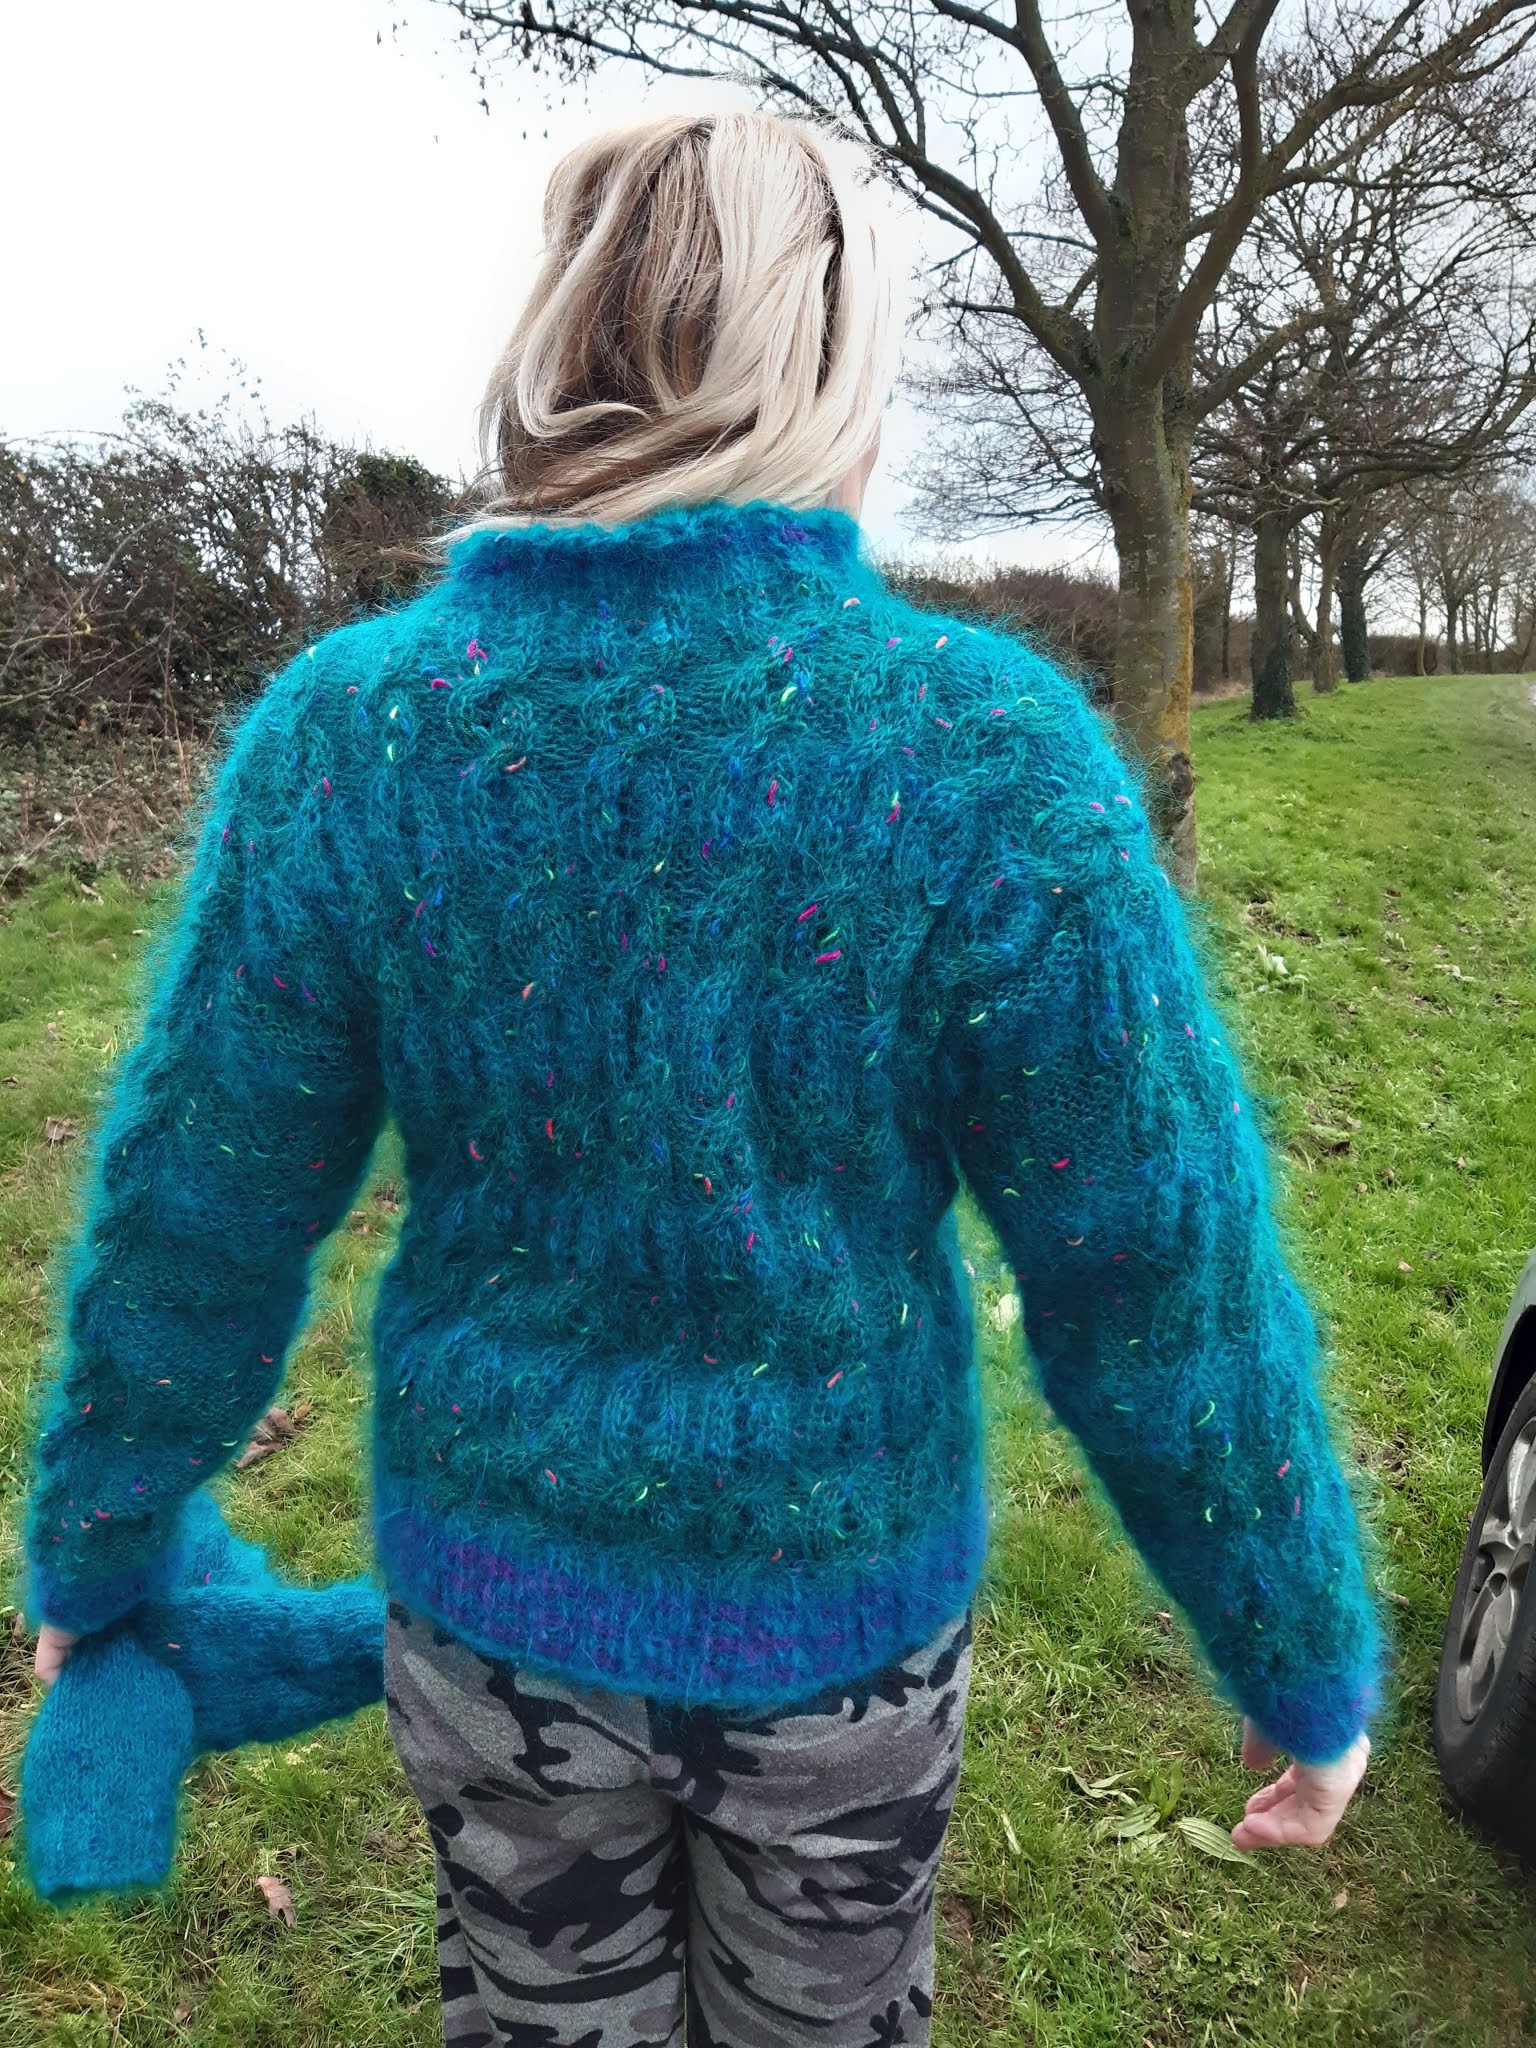
This jumper has a crew neck like the very first yellow version. I have no pictures of that one that I can find and they would be old fashioned prints anyway. The bright green version which is worn out now had a split neck a bit like a grandad neck but I never added buttons. I did make the button holes though!
I cannot think of a lot more to say about this really. I, as usual, made one cable thats small with a larger cable alternating, rather than all the same size as the pattern directs. I have always done this with this pattern and I like the effect. It also makes it slightly more interesting to do the knitting.
As usual I have taken a photo of the pattern and instructions in case anyone wants to try knitting this. Its from a magazine called Womans Realm. I think its about 1986 because it was the year I adopted my first dog. I remember having just knitted this when I had him in February 1986.


I knitted on the correct needle size this time ( though the pattern is actually for Chunky, but mohair equates fine if you buy the right gauge,) and except for doing double rib with stripes and doing one cable smaller than the other this is " as pattern". Oh and I did not bother with the back neck shaping they tell you to do but just did as I always do with no shaping on the back ( ie; a square ) and put the centre X amount of stitches on a pin to pick up later. I did for once do a proper neck knitted in the round though now I have my lovely double pins. I have circular needles already but just hate knitting with them. All my previous ( recent) jumpers have been knitted with a seam up one side of the neck. This is the first one I have done as my mother would want me to do it!
Then I made my second pair of mitts. These turned out a bit larger than the previous purple version. I may put a stitch in the finger part to make them more comfortable. They would be ideal over full gloves or mittens though as a double layer and today in the UK I wish I had one or the other because its very cold.

This was the pattern I used for the mitts. I decided because it was thicker yarn to go for a larger needle. That was the problem with my sizing so I think the original purple pair worked better. These are the next size up. Man sized? Still here is the pattern. Again these are made flat and sewn up so very easy to make.

The yarn used for the mitts is the unknown mohair type I used for the jumper ribbing and the darker green stripes are the main part of the jumper. They do tone together though and the mitts work for dog walking and are very warm.
Hopefully you can see there are 5 stripes of the main jumper yarn across the mitts. Its hard to see but they are there believe me.
You will have to excuse my messy work area. I will take some new photos of these once its daylight! Without my jumbled background mess.
Two stripes below the thumb, one at exactly thumb level so where you divide for the thumb hole and two above then the turquoise ribbing. Its hard to see in this picture but I have not managed to get a better one yet. Each stripe is two rows wide. One Knit row and one purl row.
 The second picture shows the back of the mitt. The yarn used for these is so fluffy you cannot really see the seam at all. I do not know the name of this yarn or the content but by the amount of very sticky fluff I suspect well above 80% mohair. Its hard to knit on normal sized mohair needles too though the yarn is not thicker when put beside a 5.5 -7mm needle type of yarn. Its just more fluffy. The middle bit where the stripes are is actually looking less fluffy on the pictures of the mitts.
Green shadow-striped mohair mitts:
With a 4mm needle cast on 34 stitches using aran cast on and doubled yarn.
Using single strand of yarn and the 4mm needles do k2, p2 ribbing for X amount. Mine have about 3.5cm of rib for the cuffs.
Change to 5mm needles ( I think this was my mistake, probably should have stuck with the smaller size or altered the number of stitches!) Knit in stocking stitch for 22cm including the ribbed edge. above the thumb measures 7.5cm more including ribbed edge.
NOTE: If you want to add the stripes you need to knit for 14cm (including the ribbed edge) then do 2 rows of contrast, 2 rows main, 2 rows contrast, 4 rows main, 2 rows contrast- divide for thumb after second row here:
To do thumb hole : K 8, put 8 stitches onto safety pin or stitch holder, cast on 8 stitches and complete the row.
Then change back to main yarn and continue in stocking stitch: 4 rows main, 2 rows contrast, 2 rows main, 2 rows contrast and change to main for the ribbed edge.
Ribbed edge: change to 4mm needles and do k2, p2 rib for about 3.5cm.
Cast off using doubled yarn and a 7mm needle to give the edge some stretch and not be too tight when wearing. If you do not like a loose edge use maybe a 5mm/ 6mm needle to cast off.
Using 5mm needle, pick up the 8 stitches held on stitch holder or safety pin for the thumb and in stocking stitch knit straight for 2cm then k2, p2 rib for a further 3.5cm and cast off using doubled yarn and 7mm needle. Sew up thumb carefully and then sew up back seams.
NOTE: for my purple gloves, which fit better, I only left 5 stitches for the thumbs and also I did the main part of the gloves in a smaller needle. I could not do that with these since the yarn was too fluffy. I should probably have also in that case have had less stitches rather than the larger needle. The purple gloves had 31 stitches but were a larger cabled rib. These are probably more woman sized though I have relatively large hands being a 5 ft 7 inches ( 170cm) tall woman. Watch this space though because I intend to perfect this pattern. If you do wnat a larger sized mitt this may well work for you - these measure 11cm accross the bit underneath the thumb and similar all the way up.
These are my purple mitts:

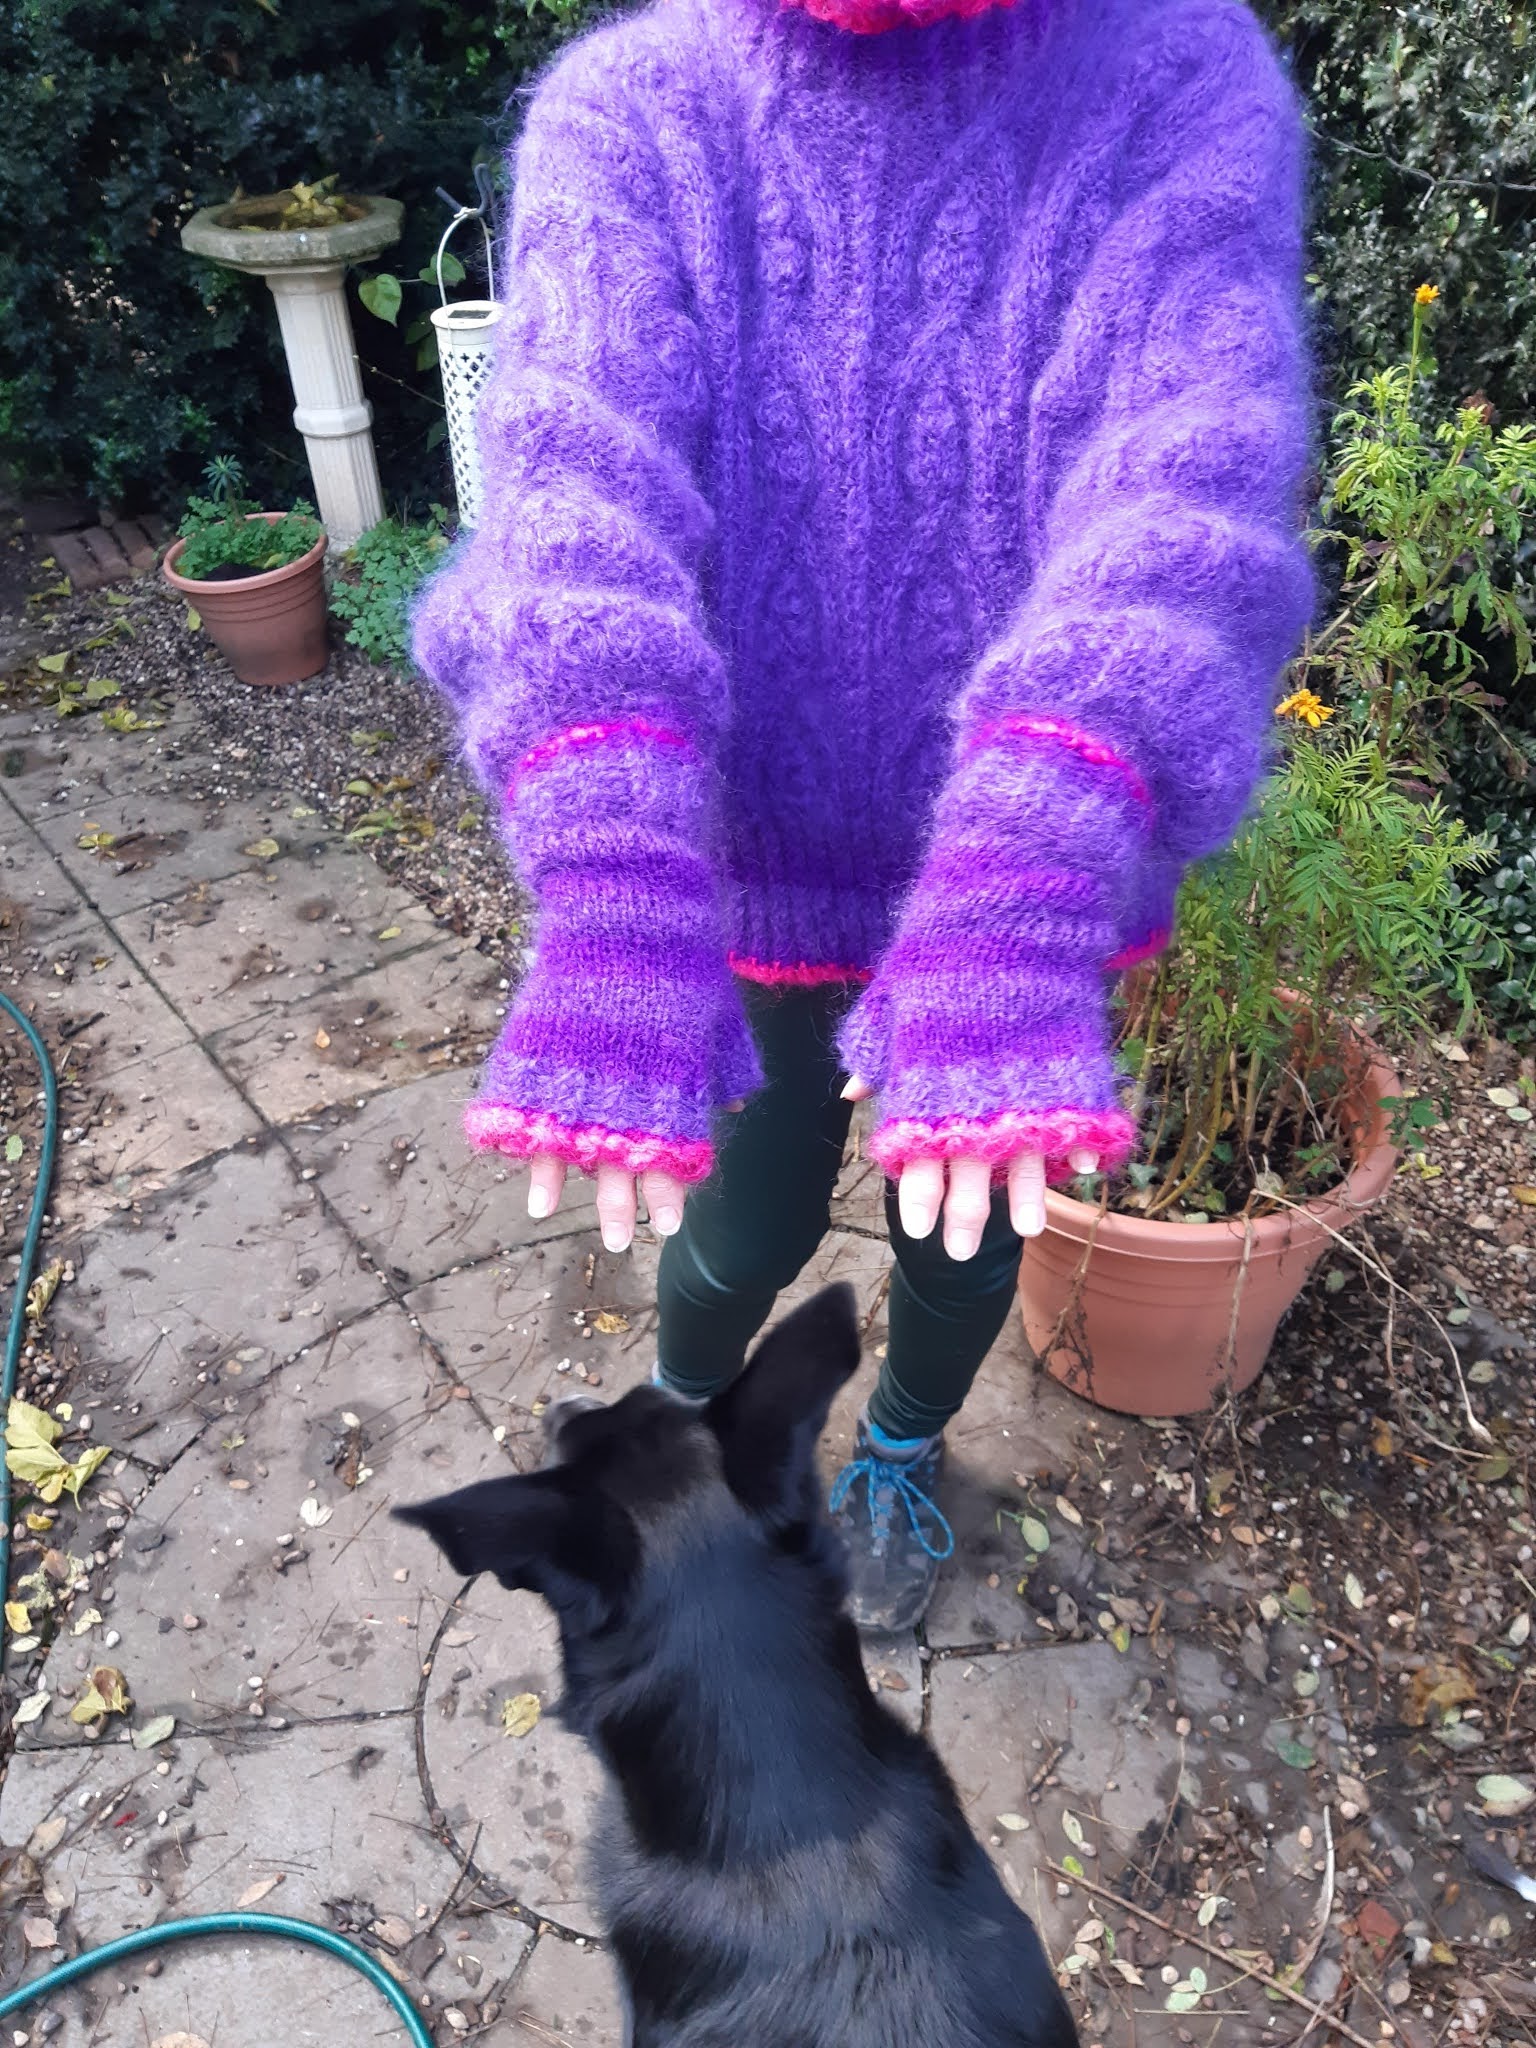
You can see the purple are tighter
See here.
https://brackencrafts.blogspot.com/2020/12/purple-mohair-mitts-free-knitting.html


I am considering making traditional mittens next. I will probably move on eventually to full gloves but I need to make it all work first and these are too big but as an over layer over mittens they would be brilliant. Otherwise I need to sew them together between the fingers and thats seems a shame. My partner hates mohair and real wool so will not wear them. He also only wears black!
I will post the next version once I decide what to make next mitts-wise.
Comments (or advice on knitting and especially designing of knitwear) welcome
Bracken
No comments:
Post a Comment