Showing posts with label Goth. Show all posts

Saturday, 14 July 2018

The Ginko Shirt - a Mood Fabrics free pattern

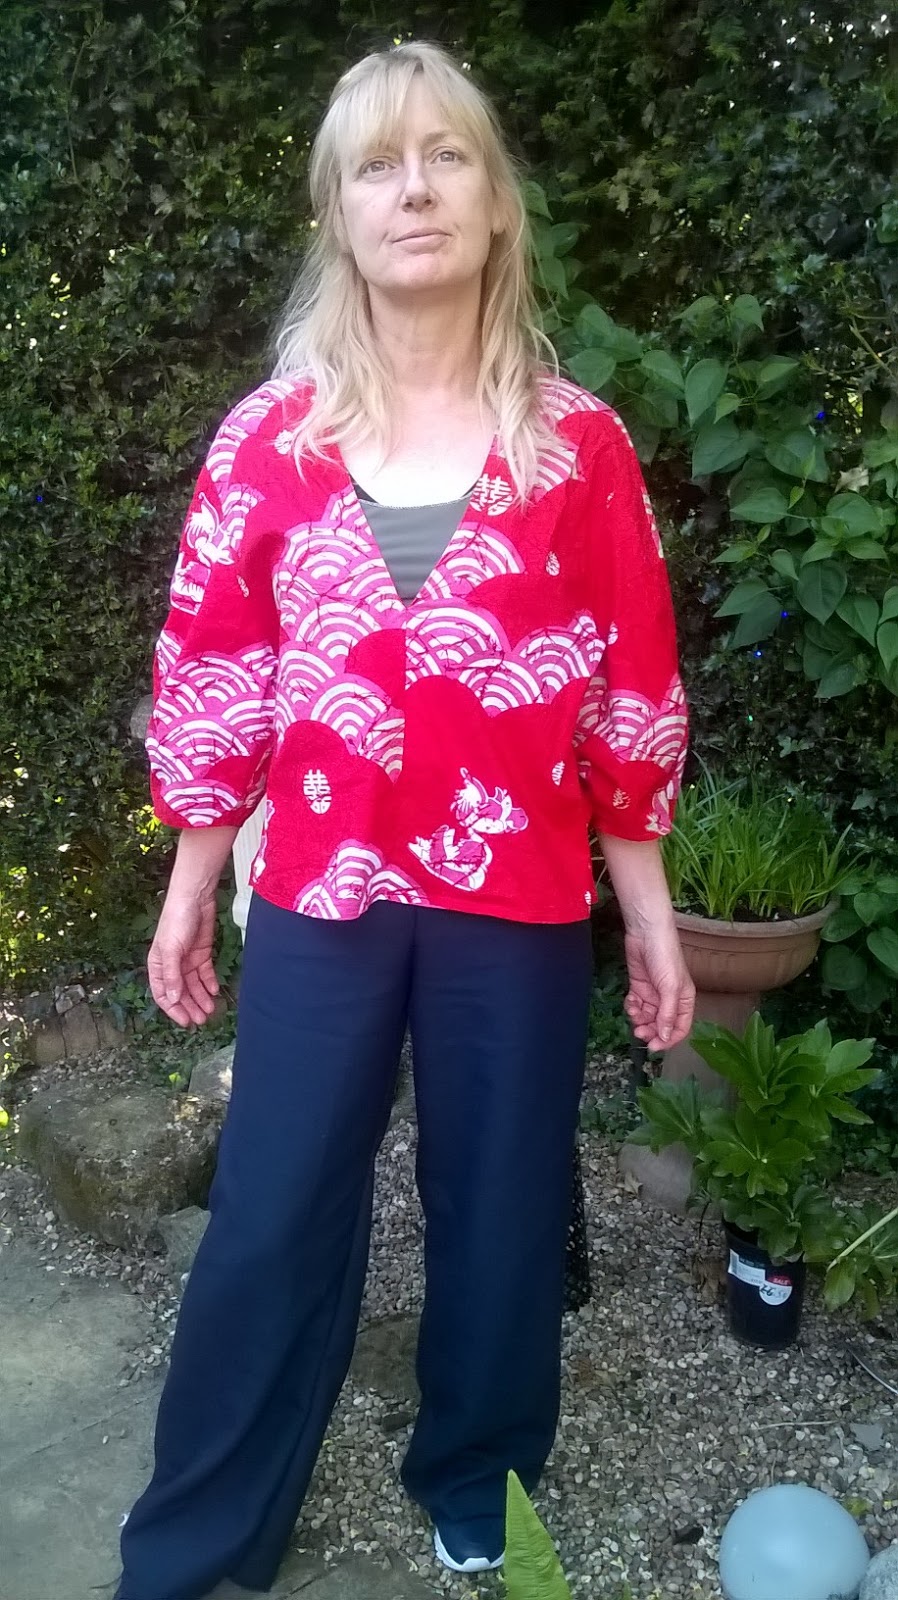
This is the Ginko shirt pattern and is the first one I have tried out from Mood and I have to say I am very impressed and will be making more of their patterns because it went together a dream. And its a free pattern. Whats not to like?
I bought this fabric about a year ago and had no idea what to make from it. A quick Google search shows up this print as Alexander Henry so I assume thats correct. It was sold to me ( via Ebay) as Alexander Henry 100% cotton but I have no idea if this is correct or if its a copy.  The fact its a print that several gothic clothing companies have used and they used to make very "teen" clothing which I would not wear I found out later and it kind of put me off making anything from it until I came across Mood Fabrcs free patterns and boy are there loads of free patterns there and regular new ones if you sign up to their newsletter.


I have also been after a tie front shirt pattern for a while but did not want to fork out for a replica vintage which I know is what Hand Made Jane has made and its a lovely top but I prefer the 70s version and from memory this pattern is actually closer to the 70s than 50s shirts with tie fronts.

Thats in the collar the fact this is more 70s tha 50s. The 50s look has a one piece collar. Tho I did have one tie front shirt back in the early 70s that had a seperate waist tie band at the front rather than the extended ties, but that may be one for making at a later date once I get to grips with this Mood pattern.
I cut the second to smallest size - no idea what size that is because I just measured and it was about right but I cut the largest size on the sleeves to give me longer sleeves which will make this more wearable.
I have lots of tattoos which these days are accepted and normal but in my youth were a big problem. I love them, don't get me wrong. I regret none of them, but would like a few updating since they are very 80s and tattooists these days seem more talented than back then or maybe its the tattoing equipment. I love the fact tattoos are now accepted, but in my youth they weren't unless you were a punk, goth or biker typeand lets face it even if you are you have to toe the lie and be "normal" in your eveny day job. I was but that still meant covering them up for example at work. I knew of more than one male back in the 80s and 90s who lost their job when wearing a white shirt to the office and their tatts showed through. And as for caterers - a very close friend actually had surgery to remove the tatts from his hands since he could otherwise not work with food which was what he decided was his ideal job. The world has moved on since then thankfully, but I still sometimes feel the need to cover up. I have a particular dislike of cutting my tattoos in half with short sleeves and I also avoid the sun or at least, although I love it hot, this current UK weather really suits me, but I do not like sunburn and I burn very easily. Anyway I feel the occassional need to wear sleeves so I cut these longer than the pattern and omitted the turn-up tabs completely because I hate that look. The fact the larger sizes have longer sleeves is very convenient in this particular pattern - assuming you print out all sizes. The function to print just the one size seems not to work on my printer unless I am just doing things wrong. Not sure if its included with the free Mood patterns anyway but I just gave upon that several years ago now. It can be better to print the multi-sizes altho does mean more paper wasteage in some patterns.If you do print them all tho its very easy to merge two sizes together and personally I am not a perfect size anything.


I also omitted the pocket. That is an end of product decision because I actually cut two pockets cos I do like my pockets but then I decided I prefer the design simpler because that does not break up the print. I suppose if I was better at sewing I could have attempted to pattern match so the pocket was invisible but its a lot of faff for something I probably will never use and I really prefer the top ( in this fabric anyway) without the pocket.

This pattern has the sleeves cut as one with the body so I suppose Kimono type sleeves. I overlocked everything but then stitched the shoulders and side seams as well since after my recent disaster with woven fabrics coming appart if only overlocked this seems the best way to go. Stronger seams altogether and I do want this to last a while. The collar I constructed by attaching the upper collar to lower collarband before attaching to the neck of the shirt and it all went together with zero unpicking which is brilliant at any time. So I am feeling like I am onto a winner here. I am actually very very pleased with my collar as well which I reckon could pass for a well made RTW collar !

If I had known it would work so perfectly I would have taken more photos but I expected to have to do more unpicking and fiddling. Brilliant pattern in fact!
Any regular visitors to my blog will know of my repeated bugbear of the automatic button holer foot on my Janome 8050XL which never seems to work out right. I always test first and it always works but when I do the final real ones it always F**ks up. I am being very polite here since do not want to offend anyone with my bad language!
So this time I decided instead to use my ancient Brother PX-100 which has a three stage button hole function which used to work fine most of the time and lets face it with sewing nothing is ever 100% perfect all the time so this machine makes OK button holes but is not clever. Mind you my conclusion is my Janome is also defo not clever when it comes to this particular task.The Janome also seems to hate zigzagging which is another pain but I will leave that for another day. Mostly its an OK machine.

However no doubt about it my Brother works better. At least with button holes tho I admit its not automatic but also its better with zigzag and also my Brother willtwin needle sticth whereas the Janome won't. So really after considering all this just because the Jnaome is newer its the Brother ( bought froma catalogue about 15 years ago!) is probably the better machine. So finally thats my conclusion. Never mind. I do love the Janome. They have different positives tho right now I am struggling to work out what the Janome does better. It does more but that does nto make it a better machine does it? 
Well y old Brother PX100 (which I lost the manual for about 3 houses ago and I have been in the current house going on 11 years! ) gave me perfect button holes so I am very happy this week about that one. A lesson learned here I think. Just becaus you have a newer machine sometimes the older manual one does things better and more reliably.
Anyway my new shirt has sat on Harriet the dress form fora whole week and I have seen it daily - whilst weraing my corporate uniform and its lovely. Today I got to wear it and yes its still a good shirt and I am now going to make a new one because this pattern is awsome. I kid you not.
Honestly if you want a free tie front shirt try this free Mood Fabric pattern.
 
Thanks for visiting, and I really hope this post gets a few people to try this freebie cos I love it
Bracken


Sunday, 8 July 2018

Self drafted dropped waist dress

Back in my extreme youth as in 1982 I was 17 and my Mum bought me two dresses from Miss Selfridge. This was before they were taken over by Arcadia Group and they had very lovely clothing which was much better than for example Top Shop or Chelsea Girl ( later became New Look). Sadly I have no photos of these dresses so this is all from memory but in the summer of 1982 this style was what I lived in.

Both dresses were very simple and almost 1920s with dropped waists with drawstrings and frill skirts. Just before we went away to Somerset  I received this fabric from Ebay. I immediately decided to make this kind of dress. Its not what I bought the fabric for but it was very hot ( it still is) and a loose summer dress seemed just the ticket for my holiday. Well I never managed to finish this so did that yesterday. The top is simply 2 rectangles which are slightly angled to give longer shoulders/ sleeves. The skirt is also 2 rectangles which are gathered and attached to the top part. Then two strips make up the casing for the pull cord and the pullcord itself.   The hems are finished with overlocking and then sewed up with a single needle thread. The sleeve hem the same. The neck is turned over twice to make it neat. No facings or bias binding so just like the original dresses back in the 80s. Easy. To do the neck you need to have the turned over bit slightly wider at CF and CB and taper it to the sides. Its a basic boat neck. Alternatively I reckon I could have turned them over before sewing up the shoulders. On the sleeves I hemmed them before I sewed up the sides. Its so 1982 I cannot find the words!
 
My only alteration on dress two ( yes I am making a second one) will be to make the neck slightly narrower because it falls off the shoulders. This was not the look of my original dresses. Yes we had lots of off the shoulder tops etc but not in this particular style so I may resew up the shoulders and stop this from happening by making the neck opening a bit smaller. I need to wear it a few times first to decide if I need to do this but I am fiddling with it a bit because of this which is slightly annoying.


 There is a casing with pull-cord just above the skirt. The casing bottom is sewn into the seam of the frill. Its below the natural waist. I will not be using this pull-cord to be honest its just for show but was on the original designs. I never used it back in the 80s either 😁
This is what the basic design is like. I am not a fashion designer so excuse my rubbish drawing but you get the idea easier from this sketch I think than from the photos.


I was unsure if having worn this style as a teen I would still handle wearing it as a 50-something but as it turns out I like it and its cool in hot weather and very comfortable. The fabric by the way is the Raven Skull fabric which is 100% cotton and I bought off Ebay. My other half reckons its something to do with Edgar Allan Poe but I really do not know if that is right. I was not sure when I bought it what to do with it but once  saw it in real life, I loved it so much I have ordered another 2m of it.

Thanks for visiting,
Bracken

Wednesday, 30 May 2018

Saturday, 26 May 2018

#MMM18 another goldfish dress


So as promised
 here is a second Gold fish print dress and I have to say its a hit. I used the top pattern from the costume pattern and added a slightly A line skirt and its ace to wear. I have to make another in the same style. I am finding it very easy to wear tho not I think suitable for work despite my inteding for it to be.
http://brackencrafts.blogspot.co.uk/2018/05/new-fashion-top-from-costume-pattern.html

With it some ancient RTW leggings and my belt which is original 1980s pirate style and I fixed a while back.

http://brackencrafts.blogspot.co.uk/2017/03/1987-vintage-belt-fixed.html

It had completely stretched out of shape and was unwearable but for some reason I carried it round with me for years before I got round to fixing it.

I forgot the belt is me made and because dresses are really only one garment I also wore a Me-Made necklace.


 So I intended to wear my agreed two items using my necklace but actually my belt counts too so I have 3 Me-Mades today.
Thanks for visiting and I am off to drink prosecco now!

Bracken


Wednesday, 23 May 2018

#MMM days 22 and 23 and new Navy Trousers

I was not very well yesterday. Had a migraine which I rarely get and did not go to work at all all day. You would think it would be fun being off work but not with a migraine. I felt a bit better yesterday evening but not really enough to blog so again I have 2 days to tell you about. I actually wore 2 lots of me mades yesterday but did not take a photo of my first set of clothes but never mind. I went up to water the allotment yesterday evening and my other half took these. I got an Adder bite last summer when up at the allotment so tend to cover up even if its hot. It was a dry Adder bite so no poison but I may not be so lucky next time. So here is my lovely satin backed goth top with my ancient and worn camo trousers:


I changed the original buttons for bows a while back and have yet to decide which I prefer!

In fact when I got to the allotment I remembered my feet and had not worn boots so was totally paranoid I would get bit again. Needless to say we watered and left quickly.
 On the way up there I also realised my lovely Mick had worn his hangman top:


Today I finally got to wear my NEW navy trousers. These were a very quick make ( because I am seriously desperately needing some new work "bottoms" as has become very apparent this #MMM.These are made from New Look K6013 which was a very early pattern from a magazine which I bought right at the start of my adventure into clothes making. I also made one of my bugs dresses from this pattern:
The new trousers are a synthetic / linen mix fabric which does not look like it will crease too much. I am going for synthetics for work cos I hate all the ironing. Its not so bad once in a while but I do not want to spend every sunday ironing and when I am happy and actually prefer to wear creased cottons it does not work for work.

I wore my red egg shaped top with my new navy trousers: http://brackencrafts.blogspot.co.uk/2017/07/another-red-topburdastyle-022014117.html

I also made the top under it but will have to take another photo of that a different days since I forgot all about it till now!
Thanks for dropping by my blog
Bracken
Thursday, 10 May 2018

New fashion top from a costume pattern, #MMM18 day 10


 I bought the fabric I made this top from back in July last year when I was given some money for my birthday. Its a very cheap poly cotton from an Ebay seller. It cost me about £4 a meter including postage and I bought 2 meters. This is a the blue design. I also bought the red but have yet to use that. Its still on Ebay but the price has gone up. This was sold in July as Halloween fabric!

I used a costume pattern for the top which has a generic "Carmen" or gypsy top. There are loads of costume patterns available with this kind of design of top. They are often very cheap when the sellers have a sale. This was half price or less so about £2-3. Compared with a fashion pattern for the same design of top, costume patterns are usually a bit cheaper. You have to see what the drawing is rather than look at the packet the pattern comes in. The elastic casing is just white satin ribbon which I bought as a job lot somewhere and until now could not find a use for. I like it better than using black for a summer top regardless of the fabric being skulls.

This was a very quick make with the edges being just rolled on the overlocker - which worked fine on this woven despite it playing up n the white top I made! You can read about that disaster here: http://brackencrafts.blogspot.co.uk/2018/05/lindy-petal-skirt-white-lace-trimmed.html

Anyway bearing in mind this style of top is currently around on the high street for about £20-£28, I reckon its a great success. Perhaps I should stick with easy makes😊.

Seriously, I am not going to do that. I have a bit of FBA to sort out soon else I will not be making any more fitted clothes, but its tempting to just make easy stuff. I do need to continue to challenge myself.

I wore it with my well worn wide leg trousers ( again!). Must make some new trousers.

http://brackencrafts.blogspot.co.uk/2017/07/working-wardrobe-1.html

Thanks for reading 
Bracken


Saturday, 21 April 2018

Burda style Long Cardigan 10/2014 #102 - with tails!

This cardigan has been on my "possible makes" list for a few years. I bought the magazine with this pattern ages ago. It was one of my very first Burda Style magazines. I never realised though that it has tails! I definitely would have made this ages ago had I realised this. Mind you it might say easy but despite my magazine being the english version I still needed to use google translate to understand what was written on the pattern and to interpret what I needed to do. This was an origami cardi. I cannot describe it any other way.


As I made this I was so confused because you seem to sew the sleeves onto the wrong side of the front/back and they point towards each other inwards. But then as you follow the very strange directions you sew it up at opposite sides to give a strange tailcoat like cardigan.

I labelled the Burda diagram to help me.
See left for this.


I have been wearing this for work several days now and its lovely. Its like a shrug at the front and then you have these lovely tails at the back. Its really quite gothic. Brilliant. I have to make a few more. Have any of you made this?
I am so surprised how well it has turned out.

I love it.

Thanks for reading
Bracken


Saturday, 3 March 2018

black mesh Frieda Petrenko inspired top

I watch Holby City most weeks. Not because I like it because generally I hate hospital soaps, but my other half comes from a family of nurses which is I think why we have to watch it. He is not himself a nurse but his Mum, Sister etc etc are all nurses and by the sounds of it he grew up watching these types of TV programs. So I watch.

For the most part I am pretty bored and get on with cleaning the kitchen or similar essential mundane stuff. One character I have got into though is Frieda Petrenko played by Olga Fedori. She is very much a Goth and wears some really nice gear. Petrenko usually wears mesh or lace tops under here Doctor's scrubs. They just kind of peep out. The tops tend to vary over the weeks and try as I might I cannot find a picture of this top that inspired me to make todays post.

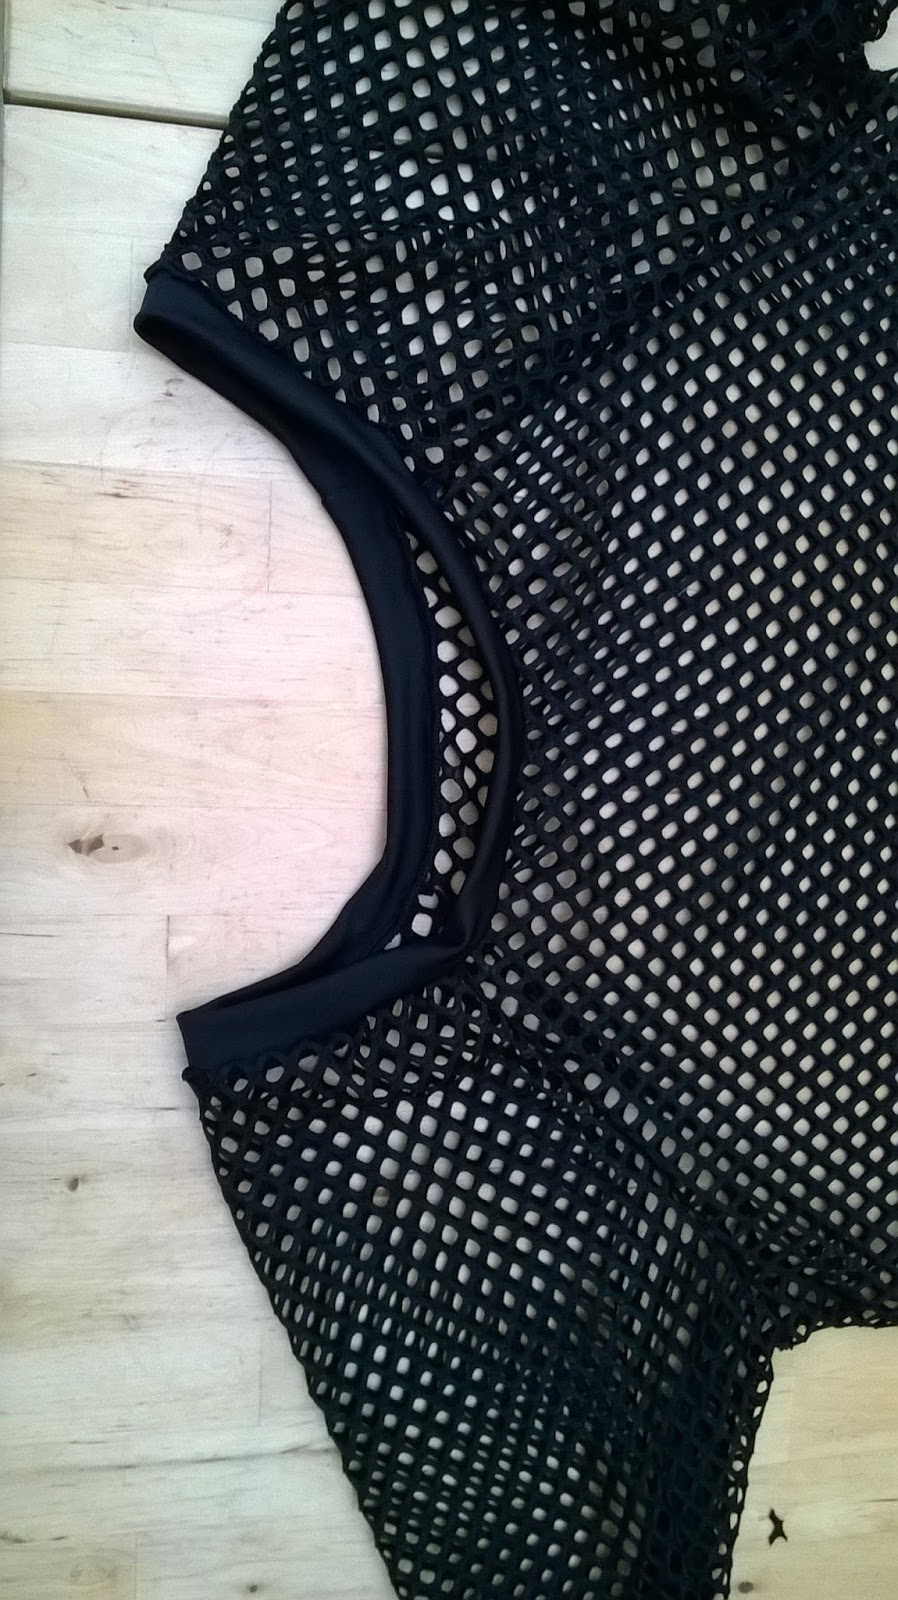
This one particular under top is made from wide mesh and unlike most tops of similar designs I have come across it has a "normal" T shirt neck and possibly wrists.


Well mine has wrists anyway. I did not really want to sit through several episodes of Holby to check that small detail because I know the last time she was seen on screen wearing tis top is 3-4 weeks ago now so it would mean far too many episodes just for this blog post. The top in questions seems not to be in any easy to find internet posts.

So my wrists and neck edges are black lycra fabric left over from something else I made. I used the Its always autumn free pattern for this top - one of my internet favourites which I have used several times before.
Great pattern. I seriously recommend it. You can see some of my previous versions here http://brackencrafts.blogspot.co.uk/2016/03/25-comparing-free-raglan-sleeved-t.html
http://brackencrafts.blogspot.co.uk/2016/04/26-more-free-raglan-sleeve-tshirt.html
http://brackencrafts.blogspot.co.uk/2016/05/36-raglan-sleeved-black-and-blue-top.html

and a hack of it here:

http://brackencrafts.blogspot.co.uk/2016/10/68-joe-browns-inspired-upcycled-tunic.html

Stupidly this time I made it bigger to accommodate as much fabric as possible rather than have a few left over scraps which would go to waste. That was a mistake. I am sure Petrenko's original is tighter and more Tshirt like. I may have to make another but with some fishnet which I have in my stash.

I bought the fabric full price on my birthday back in July so its kid of precious and I virtually never buy full priced fabric so this was for me expensive at £7 a meter. I wanted absolutely no waste. Well its worked out bigger and more baggy that it was meant to but I reckon still looks OK.

That is until I show you this:


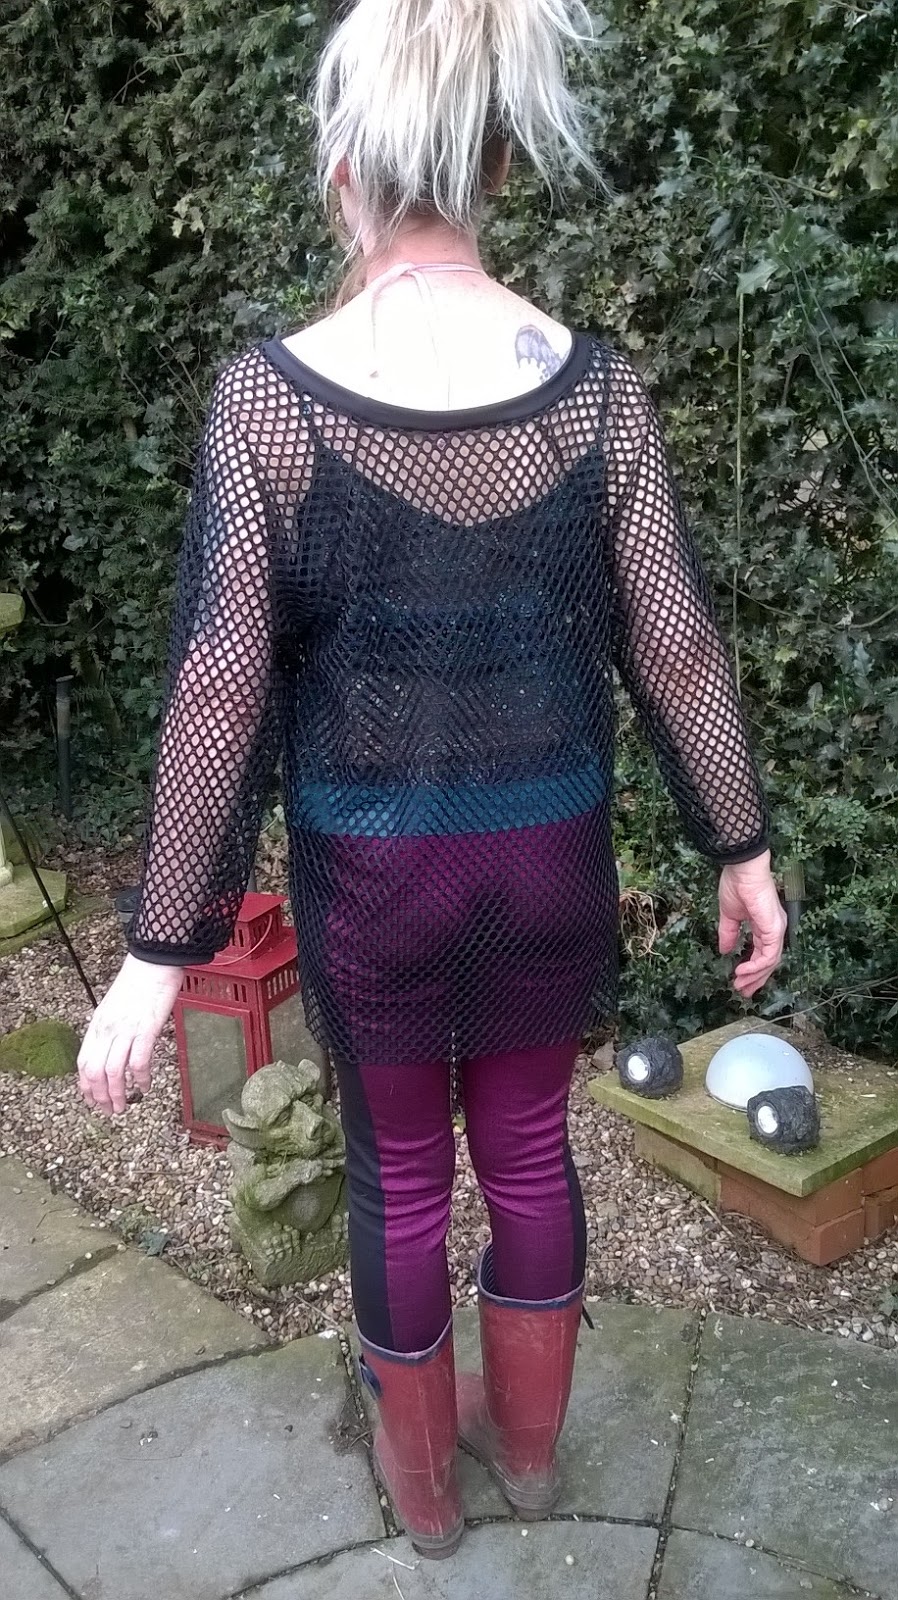
Looks like some reject from the market eh?

I cocked it up.

Its all twisted and lop-sided!

It happened because I sewed one sleeve with the fabric on the wrong side. You can just about see here:
Its actually very difficult to see which is the right and wrong side but there is a difference so what I have done is make the back and front of one sleeve the wrong way round if you see what I mean so the lower front neck ends up on the back and the higher back, on the front, but only on one side so the final result is I have twisted it.
Because its so hard to see and to sew as well, because sewing is a bit tricky, so I actually had a larger than usual seam allowance to ensure I caught all the ends of the cut bits of mesh into the seams, so I really do not want to cut this appart and resew.

I could resew but it looks perfectly Ok on me and is comfortable and if I take it all appart I could wreck my precious and expensive fabric so its staying just as it is. The mesh is very forgiving and I think other than me most people, probably all people, will never realise the sleeve on one side is sewn on inside out.

 Sorry about the toast. These were taken when I was not planning on being a model yet.


Well being someone who has grown up wearing cheapo discount and market clothing that's not so bad and it looks Ok on me I think so I am not that worried. I just kind of find it a bit funny. The hem I have so far left unhemmed and raw which I quite like although depending on how it wears I may yet get round to hemming that. I prefer it raw. It works with the look I think.

Its a bit of a shame the neck is so wide and unlike what I set out to make but in all its a success because I am very sure I will be wearing this lots. Its just my kind of garment.

In case you were wondering I also made the leggings.
http://brackencrafts.blogspot.co.uk/2016/05/38-side-panel-leggings.html

Thanks for reading and feel free to leave comments
Bracken


Saturday, 1 July 2017

Birthday skirt

 
Today is my birthday and I have spent several weeks on and off trying to get round to finishing this skirt. Its very 80s but not frilly like most 80s raras. The frills are all cut circular.
This is made from
 coated stretch indigo cotton bought a couple of years ago with no idea what to do with it but it was ridiculously cheap.
The pattern I got free back in 2013 when it was released at Burdastyle.com where you can now buy it. You cannot get this pattern from burdaastyle.co.uk but interestingly in this pattern there are 4 variants of skirt and you get them all. You can buy two views from burdastyle.co.uk and two from burdastyle.com but you cannot see a picture of the other two views on each website.
 Hopefully this will make sense. Anyway if you locate one of the variants you also get this pattern.


 This is the side where I decided to add rivet tape. I was intending to use black lacing but in the end I never got round to buying a black lace so used this rainbow one I bought several years ago. It is meant to have an invisible zipper but I never had the right colour so used the rivet tape I bought at some point because it might one day come in useful to have some to close this skirt. It works very well though probably I will eventually buy some black shoe laces and replace this rainbow one.

The skirt was intended to have just hems on each frill but when I overlocked the edge with an intention to twin needle stitch the edge under I marked the coated fabric with the foot of the machine so I then tried to turn it up twice. This just looked terrible and did not lay right so I undid everything and added lace to the bit I damaged which covers the problem area on the top frill. I then added lingerie lace to the rest of the frills and along the top frill to tie it all together. Because the lingerie lace is meant to lay flat it does not like my circular frills so I ended up cutting the pink embellished ribbon and knotting it. It works. Very well infact though is definitely not a skirt for work!

Its worn with a vintage Tammy top and a vintage OMEN top both from the mid 90s.


Have a lovely day,  I intend to do my very best to!
Thanks for dropping by,
Bracken