 |
| Original dress was badly fitting and too big |

So I took the
dress appart a while back. You can see how it looked on the top right.

I had no black thread in the machine because I was at that time sewing lots of summer stuff with white thread so had to wait then to resew until I was had finished that job and changed back to the black thread I used for this dress. Yes I know its a bit lazy, but I find I am far more productive if I make several items with the same coloured sewing thread. Then I can steam through seams really quickly.
So for example I made a pair of trousers and some circle cullottes
(More later on this in a separate post) both with white thread - see my later post on summer elastic waist
clothing!
This means I can literally just sew all side
seams, overlock them, sew fronts to back, overlock again on CB/CF seam,
then move on to waistbands so I am sewing up two garments at once.
This saves
time with swapping back and forth with the overlocker and sewing
machine and changing coloured thread.
Since I usually know what I am
making in the next few weeks it works well for me to sew like this.
I
seem to always have a list of "intending to make soon" stuff so this is
the way to produce loads with least stress and effort - for me anyway.
It also helps to keep the stash down. Its a
very good way to sew when you are using basic or TNT patterns anyway. Obviously,
if its a new pattern that takes loads of concentration to work out what
to do, then it will not work so well.
And of course it means I have a blog post garment for a future week waiting for me to photograph and write about! Staying on target with approximately one post a week really does stretch me to be honest about things. Its OK when I make something fast and simple but not very achievable when making something like this dress that takes me more time.
I managed to make the waist tie do up off-centre as you can see here. That's due to my wearing this to travel to work before managing to get the photos taken.
Never mind!
The ribbon belt is held to the dress with a couple of loops of thread at each side. Yes! I know I should make some proper chains to hold it in place and I will do eventually. It does do up at the centre, but slips a bit due to being shiny slippery double sided satin.
I suppose I could fasten it on one side by sewing to the side seam so the bow stays in the CB. Right now I am not too worried about that but just happy to have made this dress fit me.
I have to have this piece of ribbon because the waist seams are not pattern matched to the bodice seams - in fact it is not at all pattern matched unless by accident. I had no extra fabric from this dress for pattern matching and little left over (or maybe enough for a couple of hair ties ) due to having just 2m of this and it was also, as often seems to be the case not well cut, so I cannot make a matching waist tie belt either so a piece of ribbon ( salvaged from a posh box of biscuits someone gave us at work so would have been thrown in the bin and sent to landfill after we ate them otherwise) does the job.
This is the side view:
You can just about see here the side seam. I will get a better photo of this without the belt attached. The darts line up to the front/back bodice seams and the skirt side seam. Its a bit tricky to get this right and does mean quite a bit of pinning and messing around to get both sides to fit as well as making sure the front bodice and skirt side seams are exactly inline but it can be done with patience.
To make this fit from
the original dress
I took in all side seams but tapered them in so that I kept the original skirt hem width. I also took both sleeves out and re-inserted. This time I sewed the side bodice seams first then inserted the sleeves. The first time I sewed the sleeve onto the bodice with side seams open and then sewed the sleeve seam and side bodice as one seam so its constructed slightly differently here. This was the easiest way to reconstruct without totally dismantaling it. I also added gathers to the sleeve heads rather than pleats. The original The Vampires Wife dresses seem to have pleats ( and shoulder pads!).
My analysis of the 3 dresses based on the style of
The Vampires Wife dress is as follows:
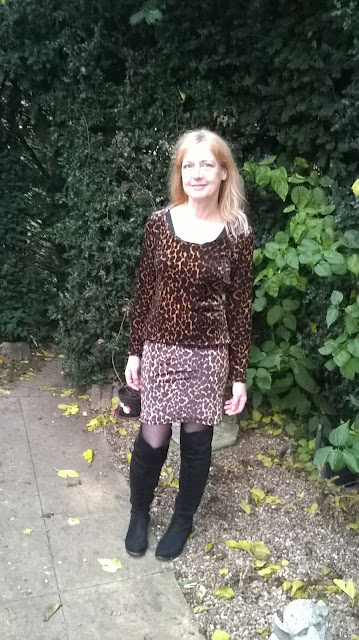
Version 1
This fitted pretty well for my first attempt at this style bearing in mind I have not really much idea of pattern cutting and just followed Winifred Aldrich's book - Metric Pattern Cutting - which I bought second hand to make this. It worked first time!
The sleeves though were not right in that instead of being puffed on the shoulder were the basic block sleeves because I thought they would need to fit from that perspective before making any changes to my basic block and rather than sew a hundred muslins first I wanted to make an actual dress so I had yet to make the puffed sleeve block. I was happy enough they just fitted into the bodice block with very little adjustment.

Version 2
The only changes I needed to make to the first dress pattern were the sleeves which for a real TVW style needed to be puffed at the shoulder.
So I made a puffed sleeve.
And of course this is the midi-skirt length
 Version 3
I added more fabric to the top of the sleeves making them more roomey but kept the sleeve width at the bottom. I think this was a good change. The sleeves work better. I prefer the single to double frills but thats a cosmetic difference.
I also added 1cm at knee length to the skirt block and then
tapered this to the waist so it was actually less than 1cm on the CF of this skirt block due to the fitted part of this skirt being well above the knee when not including the frill in this length. I do not think the skirt needed this. It sticks out just slightly at CF and I think the first two dresses were better without this.
I did the same to the back skirt block. This is a good alteration. The back skirt hangs better and its easier to walk with this, so I will do that alteration again for version 4 of this dress.
The neck is slightly wider on version 4 to the other two. I prefer this. Its more comfortable. Its really because I never did stay stitching me being lazy and then tried this on for fitting. The fabric is thin and I slightly ripped the neck down by about 1cm to had to lower it. I stay stitched after that though not just to prevent stretch but to stop further rips!

So now I have a reasonable idea of what I what my final, and 4th, version of The Vampires Wife inspired dress is going to be from a pattern block point of view. I even know what fabric I am going to use to make it. Its likely to be my last version though for a while at least. Unless I cannot resist of course. Its been interesting that despite accurately cutting etc, I still needed to make adjustments to the second and third dresses. I suppose I need to take that on board.repeating something does not mean it works perfectly first time.
I have actually now started going through my wardrobe, partly due to what I found during the Me Made May adventure this year, where I realised quite a few items I do like, need a few minor changes to make them more wearable, so that is an ongoing background project. I will probably show you a few of these as I get round to sorting them out.
Back on the subject of The Vampires Wife style: I was interested to find this NEXT dress in my inbox:
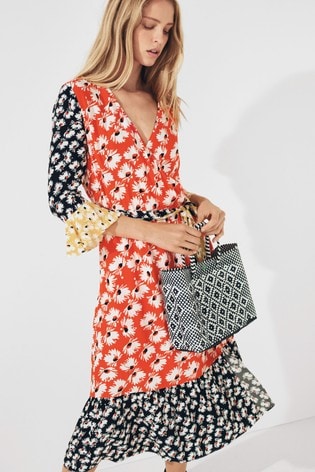
Very The Vampires Wife really, though a different neckline.
I cannot help but notice the similarity though.
I do not expect to bother copying this version. I think with the latest dress I have planned, which will be version 4 of The Vampires Wife inspired dresses, I really will have quite enough of this style in my wardrobe. I really cannot resist making just one more though!
Bracken


