Thursday, 1 August 2024

RP Cerena hack in camo double gauze

 I bought the camo double gauze back in January and it was sold as having a defect. I cannot see one anywhere on the piece I got. This makes my reduced price "seconds" fabric really wantable and I wish I had bought more. 

I did also buy this fabric in blue camo but have yet to decide what to make from that. I am veering towards a dress next time. That will more than likely not happen now until next winter/ spring because I am seriously starting to plan my winter wardrobe right now rather than as I usually do leave that until its cold and nasty and finish making nice warm clothing in time for spring! So I want this year to be different which means I need to be working at least 3 months ahead of the expected weather to make it happen.

Anyway back to my lovely cool camo trousers which were made a month or so back from the Rebecca Page Cerena pattern.  Or at least the trousers parts.

Sad what happened tp RP. I read that loads ( around 300 people!) of the ambassadors lost credits for patterns as well as people who paid for their courses, which is quite disgusting. I would now never buy from the new RP Etsy shop as a result though I also read that its got nothing to do with Rebecca Page herself but to the new business owners. To be honest I really hope Rebecca makes a come back because I like many of her patterns and had lots of fun when I was myself an ambassador. Even when I stopped I still took part in the Facebook group and that has also now gone. 

Well the Cerena pattern as a jumpsuit was not a favourite of mine but I don't really go in for jumpsuits so thats not a surprise. I did make one here.  Then I sesibly updated the jumpsuit into separates and have worn the trousers part loads since. I particularly love the trousers but they are now old and far too wintery being velvet so I decided to use the same pattern for this fabric.


Because the legs on the Cerena a probably too narrow for double gauze I added 2cm to CF and CB. I also missed out the pockets because I actually did not have enough fabric for them to match and could not find anything suitable in my alarmingly large stash of offcuts! So no pockets which is not ideal but still these have worked out to be lovely for the summer. 


So in the end with the gathered (elastic) ankles, these are more like harem pants than the jumpsuit, but the pattern gave me a great starting point.

Its 28 degrees -ish now in the Uk most days so these are perfect when I need to be semi-respectable in the city I work in. I can get away with these even in the office. The camo does not matter because its currently so "in".

So, I am enjoying these. They are worn here with my tie front top which was actually made for a BBQ outfit. Its a bit much for work wear admitedly but I do like loud for the weekend and days off work. Together these area  great outfit for avoiding the sun but staying cool when covered. 

Have a great week and enjoy the warm weather if you are i the UK. Otherwise I wish you well and thanks for popping by,

Bracken

Thursday, 25 July 2024

A very work worthy dress

My intention was to declutter and recycle unused and old clothing and sort out my sewing area as well as my wardrobe when I rediscovered this dress.

I made loads of these types of dresses back in 2019. I left this one in bits in a freezer bag cut out but mainly unsewn until I was clearing out my sewing area a few weeks back and found it. I do love when you come accross these UFOs and actually still want to wear them. More often that not I really wonder what possessed me to even cut them out, but this is a good one, or will be once the weather cools off a bit. Today its 25 degrees C. Anyway for now this will have to remain unworn in my wardrobe. 
 
But for winter this is the perfect smart work dress so I am unable to explain why I never got round to making this one. It will though give me a slight head start on planning for this winter. Since the last two winters in the UK have been mild, I would suspect we will this year get snow and lots of ice. But then who knows. Its the UK. It mostly rains and we actually had a whole generation of drivers back in the mid 2000s who had never seen or driven in snow since we went for I believe over 10 years with none - at least in England anyway. I think Scotland still got snow. How sad to grow up to adulthood without any snow!
This just shouts office to me!

So a work dress this is going to be. For the colder weather though.


Back to the dress:
 It was made from left over scraps so a real stash buster yet for some reason ended up left and forgotten. 
The waist is  a cross shape and for this I cut a half a cross of faux suede with a half  cross of faux leather. You get a matt vs sheen contrast. The skirt and top are both scuba.
Being scuba its too warm for summer but now I have rediscovered this its staying and will be the start of my autumn / winter look for 2024. 
Now this has slightly spurred me on to finish my capecoat which has kind of got stuck in my sewng area and since this is now in sun ( being based in a hot conservatory) its liable to end up fading. Its waiting for lots of hand sewing to finish it. It will though give me a nice new winter coat for 2024/5 so I intend to get this one finished and after that to concentrate on what else will be finish-able from my pile of UFOs which will work for winter. Why cut more when you have loads of half finished stuff that is suitable.

I am also working on some twisty summer dresses but more on that once I get them to work.
Thanks for popping by and see you next week
Bracken
 

Tuesday, 16 July 2024

Small cute reversible hand made hat from scraps of fabric


Back in the 80s and again in the 90s this kind of small hat was everywhere. My first few I bought but then I started to make them. I even sold a few. Then I suppose I just got bored with wearing this style and I have not made one since the early 90s. 

But I have all this fabric left over from my projects and you know you can only make so many hairbands and scrunchies and pocket linings. Yes  all are very useful and you do lose the odd hairband or scrunchie in life but I have not only got a drawer full of hair bands and scrunchies I also have a plastic bag full of half made ones yet to be finished. I will keep them because as time passes I will make them as I need them but I am not so keen right now to add to what is already a rather large bag of half sewn hair ties. Then it struck me. Winter is coming. Why not make a hat. Not a big brimmed hat - though I do have the patterns for them, but one of these small and very useful easy to stowe in a bag or pocket hats.

 Brim down 90s style


Brim folded up at front 80s style!

To make one of these is pretty easy.  And I do like a challenge and the sewing of this intrigued me for a few days.

You cut a circle for the crown and strip to fit your head circumferance and then sew together. Join the strip to make it a circle before adding to the crown. Easy basic hat.

OR a clever way ( I think so anyway!) to make a reversible hat with minimal sewing:


So first to find a circle to use as the crown. Ikea sell mats for use in the kitchen for hot pans. They are made of cork and looking at them I reckoned they will be about the right size for my purpose. 

So yes not science here at all with regards to hat sizing. Its all done by eye and previous experience.

To make a reversible hat: You need two circles of fabric cut this size and in different fabrics. For a simple non-reversible hat just cut the one circle. 

I used a piece of my cotton lycra jersey skull fabric teamed with my cotton lycra sweatshirting and by sewing the hat as shown - leaving a  small gap for turning, I get a rather cleverly made hat I think.

So once you have your circles, measure your head circumferance.  Measure round the circle. If there is a huge difference you will either need a larger or a smaller circle. If not much difference so say maximum of about 1cm smaller then you can stretch your fabric to make it fit or ease it in if bigger. In fact my strip was the same size as the cicumferance of the circle and I was lucky because it fits great. 

This was just an experient though and its great it worked but I was really just having a play with scrap bits of fabric so if you have some very precious fabric you want to use for a hat I would first make a practice one to check it all fits ok.  Take photos of what you do and you have a really good record so its easy to repeat with your good fabric. Or to write a post for a blog etc.

I added 1cm seam allowance to the end of the strip of fabric. Then I joined the ends into a circle. Then pinned to the first half of fabric crown so in this case the same fabric as my strip. Then carefully I folded the strip which is now pinned to my first crown inside the circle and I pinned the second crown over it.

Unfortunately I never took photos of this. I will add them next time I make one of these which will be soon. Overlock very carefully round the outside leaving the last 3cm or so to turn the hat.

Now you shoudl have two circles with the brim ( strip) sandwiched between them on the inside of the sewn circles.

I have one side that is patterned and the other is grey sweatshirting ( with glitter!)

Turn them rightside out and you get this:


Sew up the hole used for turning. I have sewed because I cannot see another way to do this neatly. Unfortunately I find I still need to do some hand sewing! You need to sew both the different sides closed - so grey circle side ad the red circle side.


I only had to sew about 3cm by hand ( each side) to finish this so it was a very fast project.

And it fits perfectly!

I have another hat cut out and will eventually get that one sewn as well. I need to wait to find a fabric for the reverse of the crown first but I am sure I have something useable.

This took much longer to figure out how to make it so its better than my old versions from years ago than the actual cutting and sewing time, so its a very quick project to do if you wanted a hat for winter and of course you could make it without it being reversible so that would be even easier. I like the reversibleness of it. Saves space when storing. But if of course I lose it, I actually will lose both sides whereas if two different hats I would still have one of them. 

Photos of my hat:


Have a lovely week and I really wish you all have better weather than we ( in the Midlands UK) have right now because its very cold and raining and not at all like summer!

Have a great week and thanks for popping by my blog. See you next week,

Bracken

Tuesday, 9 July 2024

Stripey maxi- dress

This fabric was really cheap but it turned out really nice when made into this dress. It feels like a knitted cotton. No idea what the fibre content is. It cost just £1;50 /m! I bought 2m. So this dress was at most around £3.50 including threads and ribbing.
 
 
The fact I only bought 2m and wanted a maxi dress meant I could not make long sleeves which I had visualised. But hey! It's summer!
3/4 sleeves it is then.
Originally I intended to just overlock and hem the neck and sleeves but it went all baggy and stretchy. So my trusty, (also very cheap), multi coloured ribbed fabric came in handy again to create a ribbed neck and sleeve hems. 
And it looks very "burda" I think with the two types of stripes. Though it's not a burda pattern. 
Its McCall's 6612 and the last thing I used it for was this spiderweb printed top which just shows this is a very versatile pattern. It can make a lot of different clothing and also there is a second view which I only ver made the one dress of. Thats got a cowl neck. 

I wore it just once so far. To visit IKEA. And we did the entire shop so lots of walking!  
 
The downside? Well it was just above my ankle bone at front and slightly longer at back which was intended when I finished hemming the side splits and hem. So a slight high- low hem. But I reckon its got a bit longer since wearing for a day. These photos were taken at the end if the day. The dress is now in the laundry and I have yet to see if the fabric springs back or continues to grow.
That's easily fixed of course but it will be annoying to have to re-hem it every time I wear it if it does keep growing.
 
I bought more of this fabric in a red stripe but thought it might make nice PJs for next winter. More on that if I get round to making them. 
 
Dreams! 
I reckon if I could make all the items I dream about making then I could possibly justify my stash!
This includes the crochet I want to learn and the knitting I rarely get round to let alone the macrame that has been on my list to learn since I was 9 years old!
 Of course I would also then have a much smaller stash too😄
 
Thanks for popping by my blog. It makes me so happy when I look at the stats and find I really do get visitors. Feel free to make a comment if you want to and hopefully I will see you again soon.
Take care
Bracken

Tuesday, 2 July 2024

Grey flares with a brocaide trim


Right now in Kilsby its a very dull, damp, though not rainy day. Its the middle of summer in the UK but you really would not know. Its certainly not warm!

So I am making transition clothing. I bought this fabric which was described online as stretch denim. I received it and decided the reverse which is duller and grey is better so was then going to use it for work clothing but am currently making summer clothing which I hope will be ok to transition into autumn. 


So I am using what I think is probably the reverse of the fabric. The other side is a shiny black denim. I bought "Black stretch Denim". However its trimed with a different fabric which is the same kind of weight and actually extremely similar though its a brocaide. I used the selvedge edge of the brocaide which has a machine made frayed edge so very useful for a Hippy kind of frayed trim.


The brocaide was sold to me as Bengaline. I am really not sure exactly what that is. I am especially confused by the name as well after buying a second piece of stretch fabric called Bengaline which appears to be a shiny cotton mix of stretch denim similar to the stuff I was sold as denim and have used for these trousers. 


Still it really does not matter that much. I am making a second pair of the same pattern trousers from the brocaide as well because its a lovely fabric. I decided to use the patterned fabric to trim these to stop them having that "school uniform" look. They do look a little that way without it but right now I have accumulated so much grey fabric I am targetting that in my makes. 

So far as well it seems to be giving me a very wearable wardrobe that everything can work together in a mix and match way and thats a really nice way to live because getting dressed when you are in a hurry to get to work ( or anywhere) is so much easier if you can grab this or that top and bottom and you do not end up having to empty the wardrobe to find X top because its all you can wear with X trousers. Have to say I am loving my new grey look. I just need a bit more magik I think so it slightly more Fae/ goth look and I will be happy. The brocaide though makes me feel very happy with what is otherwise a pair of ordinary trousers. Me made though. And so easy to wear!

Anyway despite the fabric is intended for work I decided I would like it as a basic but "decorated" pair of flares. Its a very stretchy fabric really but is woven not jersey. I was not really sure this would work out if I am honest, but went ahead anyway. One of those adventurous sewing moments I suppose!


Anyway the stretch woven fabric used with a jersey pattern worked well though the trousers did need a yoke to raise the front and back waist but I will remember that for next time and just cut them higher if I use this pattern again. I suspect I will because the fit is great and I love these and so far have worn them four times in two weeks. 


Because the patterned trim is relaively subtle I reckon I can also wear these for dress down Fridays at work. I would not wear when I have an important meeting to attend at work but they are still work worthy. Right now though I am on holiday anyway so I do not have to think of work and I have been enjoying them very much.

And these were made using the free yoga pants pattern from Naptime patterns. I have made them loads of times before. They are high on my TNT pattern list of favourite patterns as well. Until now though I have stuck with jersey to make them but they do work in woven if you add a rectangle for the yoke and then add elastic at the natural waist. Otherwise you will get very low waisted 90s style pants. Thats fine if thats what you wanted though and will work but I wanted some normal waisted pants this time hence they needed a yoke. 

Ah they are worn with my camo pixie top.

Have a great week, 

Bracken

Saturday, 22 June 2024

Self drafted Childs DIY towelling poncho from a beach towel


This was a very quick make and a long time to think about exactly how to make it. Two weeks in thought and just about 45 minutes actually cutting and sewing!

I do not have any photos of this on a person as yet but it does fit - goes over head etc. It cost just £5 using a beach towel from Asda. The small person I made it for says he loves it. I reckon it will fit up to age 3-4 years though current small person is around 2 years.

When you cut a towel it has ( like fabric with nap) all the designs going the one way so originally I cut in half, turned one piece the opposite way up, then realised to keep both pieces the same length and to keep as much fabric as possible available so I had to unpick the original hem on the front of the towel so that there was enough fabric to have it the size I wanted because I did not really want to have to use two towels for just about 1cm extra length due to cutting off a hem so I went to the trouble of unpicking. The unpicked edge then became my shoulder aand neck edge on the front. It could just as easy be the back but in my case it became the front. 

Then having unpicked the new top edge I hemmed the other end and I did a slight shaping for neck hole on both pieces. To do this I cut round a hoody coat in a similar size ( I used an outdoor coat hoody for sizing to make sure its a large hood. My outdoor coat actually has 3 seams but I squashed the hood to get a flat half a hood with just a central seam. It works!

The really big deal with this was to remember to turn the second half of the towel over before doing anything else over so the crab motifs were all the right way up hence I unpicked one original hem to give me the right length. I then hemmed it the opposite side to provide a new hem the right way up. 

Then I sewed the hoody central seam and used the original edged hem so I never actually hemmed it at front edge. Not perfect but it works.


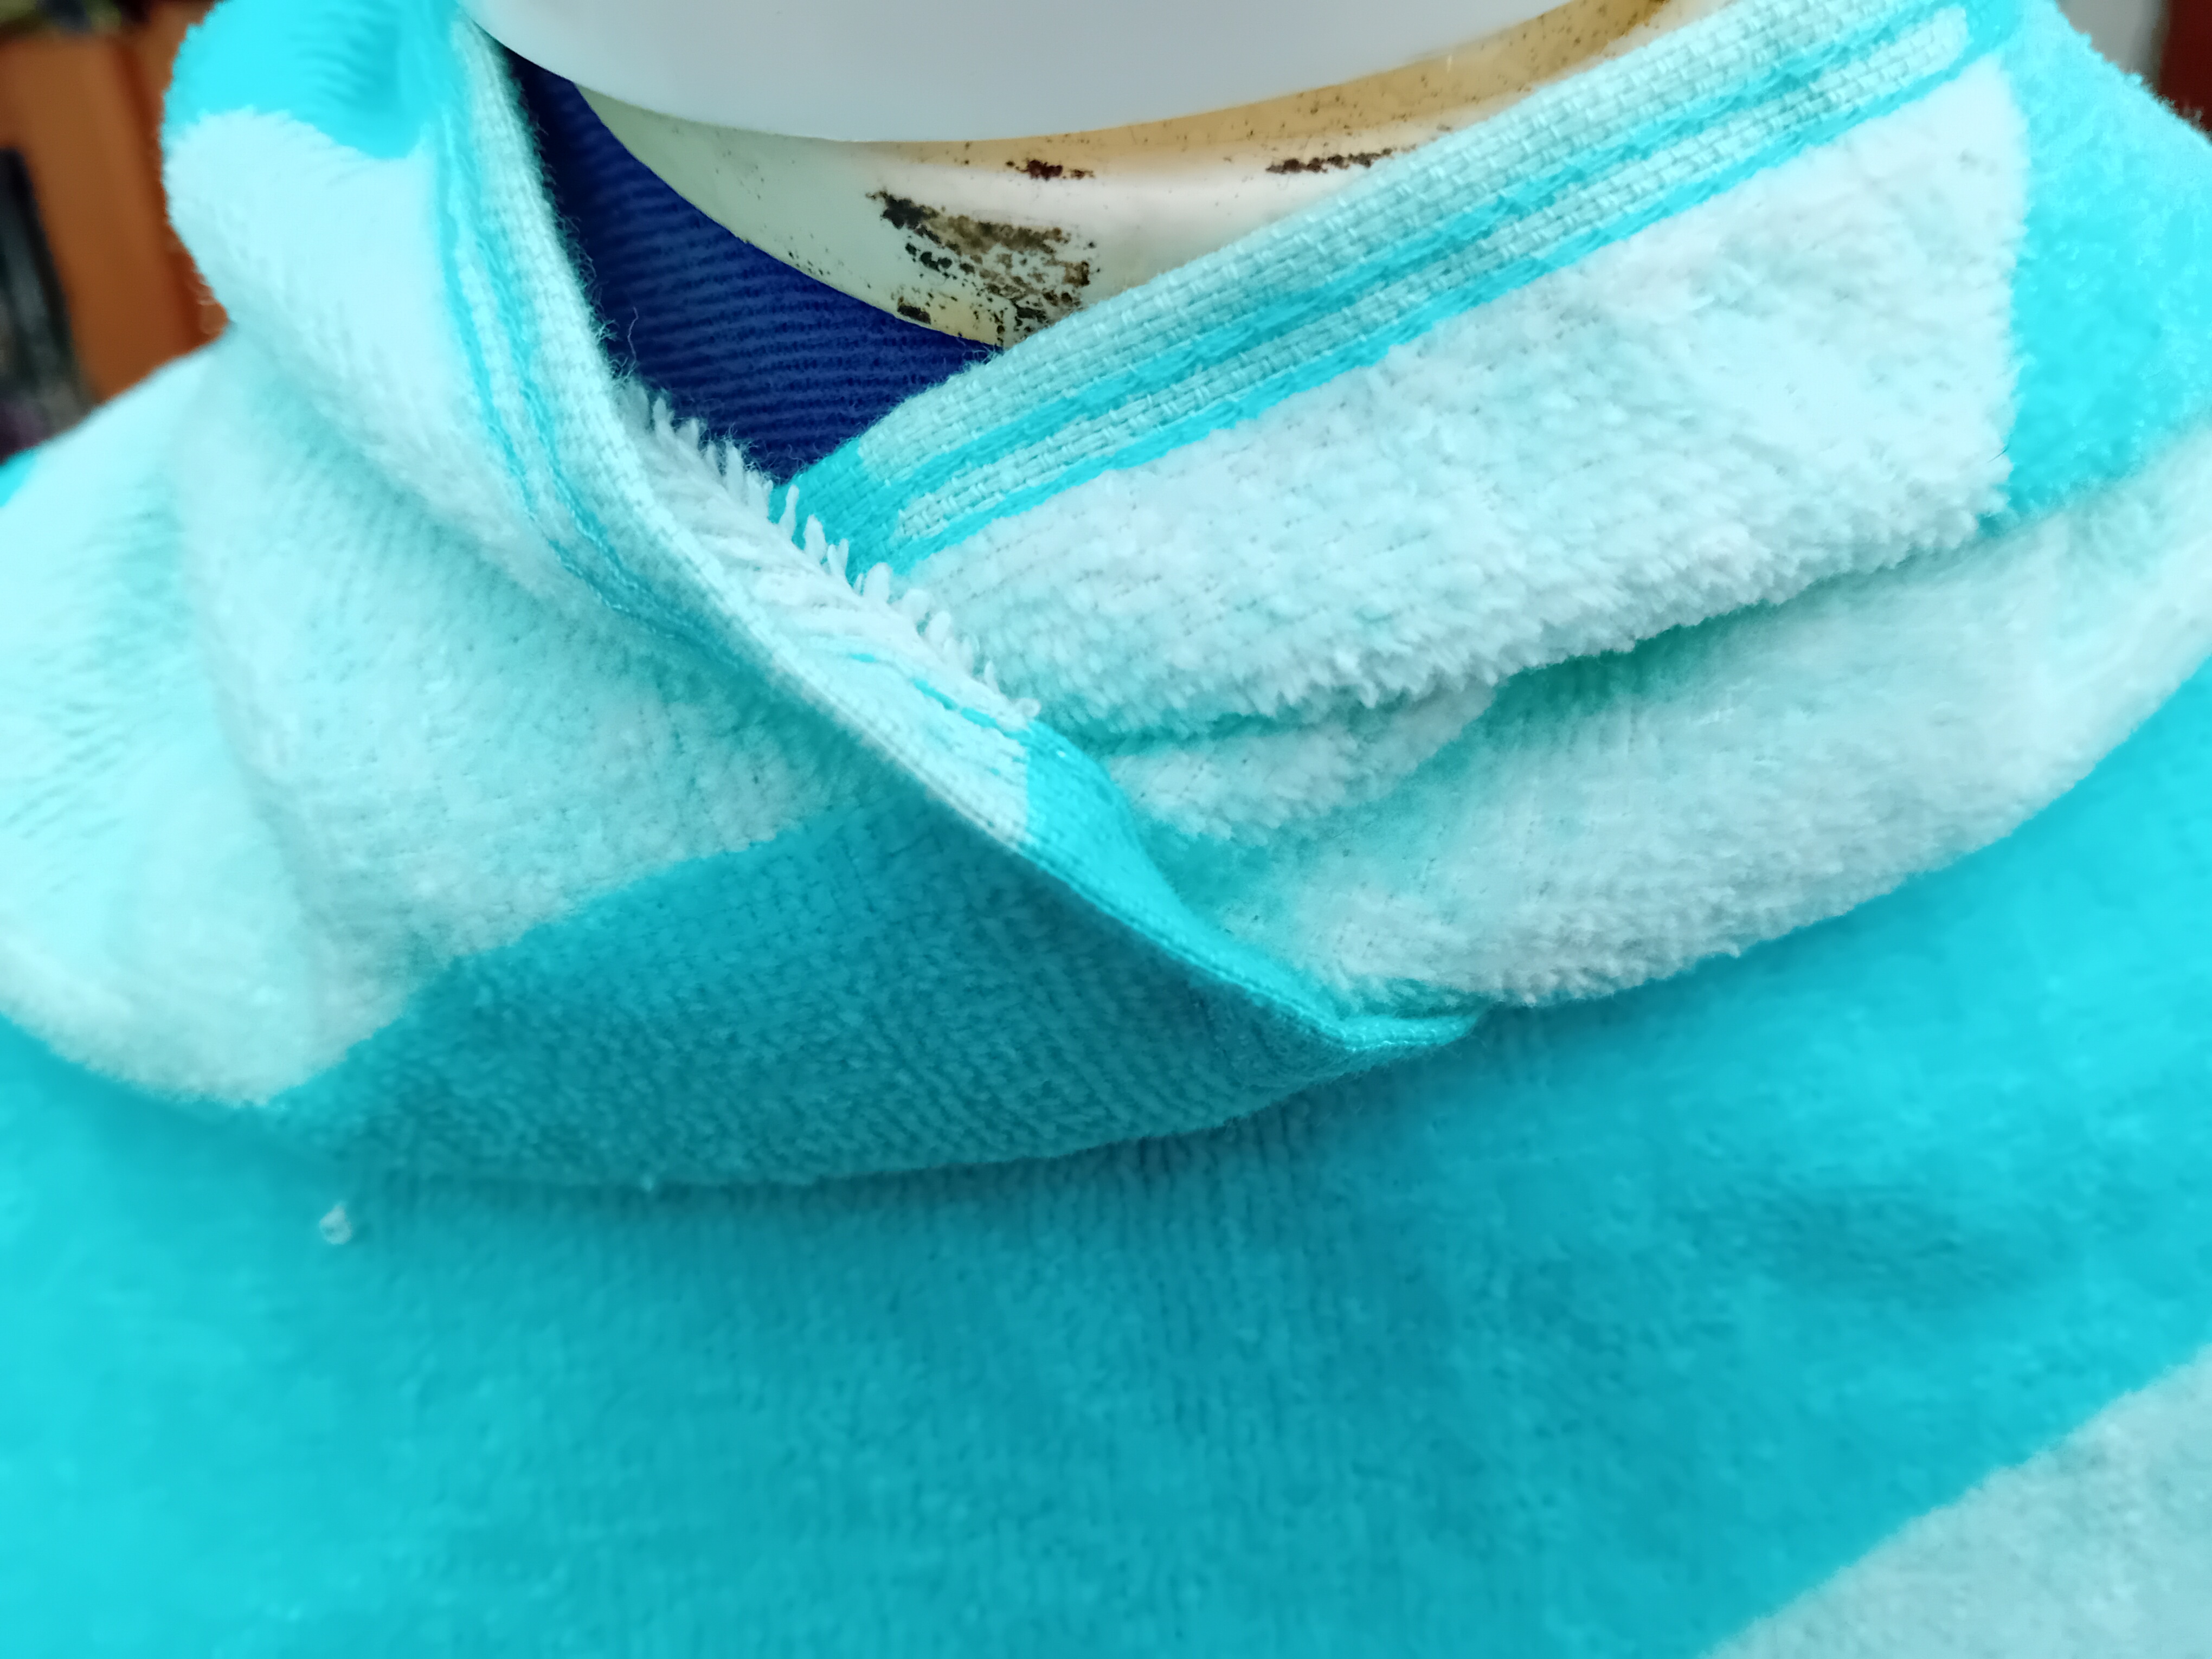
and then overlocked along the edge to keep it from fraying. That does mean for a slightly imperfect centra front hem edge as you can see above but I topstitched it down. 

This is the central hood seam. I took minimal seam allowance so you can see the original hemmed edge is fraying just a little. Top stitched along the top seam and also the shoulder seams. Its not perfect but by the time I hand sewed the frayey bits in it looks as good as any RTW poncho. No one noticed ( but me!)


Top stitched the shoulders. Again the hem edge is the original towel edge carefully lined up as best I can do.

Below overlapping hoody central front.


No pattern matching due to minimal fabric available.  But it will work for swimming for a small person who feels cold after swimming. And its bright and affordable. RTW pochos for small children are £15 upwards in the UK so this is much better at £5 and actually has a nicer print than most.


All in all its a successful money saving swim poncho and looks as good as many RTW ones. Our small person likes it anyway. 

If you fancy making one of these and decide to give this a go please do let me know. With two towels you could make an adult sized version easily. Its shown below on an adult sized manekin.  So if you wanted a short poncho you could get away with just one beach towel. Two, I think, would work best for adults though.

My only advice, because this is really a very easy make, despite there is no pattern, is take your time cutting and think, think, think. It took me a full 2 weeks just contemplating and working this out in my head, but really its very easy, and very rewarding as well as useful.

Have a great week,

Bracken