Saturday, 26 December 2020

Black Mesh tops x 3


 I love mesh tops. It has nothing to do with current fashion either. I have worn them since I was about 17 when I got my first mesh t-shirt in the 1980s. 

These are all made form very ( relatively anyway) cheap fabric from one of the online fabric pound shops. I reviewed the shops a while back when I made my tiger stripe mesh top. The problem with these three tops is on the photos you cannot really see them so I deided to post about all 3 at once. It took a few weeks to make these due to time constrictions since I now work full time again, but they are really very similar. 

They are all self drafted similar to the navy top I made years ago now. I have made lots of versions of that navy top and found another piece of the navy mesh fabric in my stash which is brilliant because the three navy and one white top I made are very tatty now so I can make some replacements and actually throw a few items out ( whilst replacing with the same number of new ones I expect!). I seem to hoard clothing I make in a  similar way to the fabric I stash. These 3 tops, all though, have the boat neck from the pattern Butterick 5562 rather than my straight across neck in the original versions.

Anyway the most expensive of these is made from powermesh from ebay. That cost me £6.99 for one metre. 

This one is the most drapey fabric and is very stretchy - being made form powermesh.


Its also the most boring but wearable of the three tops.


Then the circle top is my second one is from pound-a metre.co.uk. Its not as stretchy and is prone to go into ladders when overlocking if you pull the fabric which usually on hems on this kind of mesh I would do, because I like a slightly wavy edge, but not the rolled edge you can do, because I want an overlocked punk look. Its sold as glitter circles but I reckon most of the glitter must have dropped off which is probably why its only £1 a metre. I only bought a metre and have enough left to maybe make a pair of knickers which could be nice.

This is much lighter weight and less drapey. BUT very evening wear.
Sadly there will not be any New Years Eve Parties this year because it would be ideal. Never mind it may still be around for the festivals next summer. If we get over Corona virus by then.

Top number three is lovely. It hard to see here though.


Its actually my favourite and is a shiny, glitter glossy mesh that has very good stretch but is not as heavy as the powermesh and is also quite drapey but again less than the powermesh. Its just perfect for a disco look. 


I will try and get some more photos of this because its really hard to capture in daylight but may work better on camera under electric lighting.


I will be wearing this over Christmas.

Its the perfect: punk, glamourous slobbing top, for wearing with velvet track pants, over a dress or under a slip dress  or over a small vest like I wore here. 


Take care and have a lovely Christmas 2020. 

Bracken


Friday, 25 December 2020

Sequined RP Laura dress


I have to be honest when I saw the line drawings for the Laura dress I was unimpressed. I thought it was not worth the fabric or effort to make this. There was no challenge, it being such a simple design. Then I saw it on people and it was a lovely simple and very wearable summer dress. I did not need another summer dress this year though because I had already made several by the time the Laura came out. 

Onwards a few months and its Christmas. Yes we cannot go out really but its still party season and when else do I get to wear sequins?

 I really want to finally get round to using this fabric. It comes out of my stash every year but I never find what to make. My initial reaction to needing a pattern was to go to Burda. I am very lucky in owning Burdas right back to 1968 and I have a good selection through to the present. I reckon about 200 copies. So you can imagine I have lots of different choices of patterns. But the problem is I really want to use something thats a simple design with no darts. Burda are generally either sack dresses or very constructed. That makes working with sequins, especially the old fashioned chain mail type, very difficult.

This fabric was an Ebay bargain around 5 years ago. I got 7m for £2.50 and I even picked up from the seller so never paid any delivery charges. Its proper old fashioned mesh backed fabric with real metal sequins. In fact I suspect I now need a new pair of cutting out sissors because this is hard to cut.

Then I remembered the Laura and I have  a credit still to spend with Rebecca Page patterns so I buy the pattern. Thats was about a week before Christmas. I printed the pattern last weekend. But I was tired after work every day this week and that was as far as I got.

Roll forward a few days and I have my fabric ready and sorted from my stash and its December 23rd. After work I put the pattern together. I cut my fabric.

I made a slight mistake and cut with the nap going sideways not down or up. I was in a  mad hurry to make this due to lack of time and I cannot sew at all over Christmas. My sewing table is the dining table so from Christmas Eve lunchtime there was no sewing allowed or even possible in my home and so it will stay for around a week.


Late 23rd and I am sewing this up. I lined with a rather horrible shade of coral scuba that is another Ebay bargain ( 99p for 6m) has also been hanging around for years and has made a few prototypes/ muslins but I don't like this colour at all so its fair game for this and happens to be easy to find because I sorted the sequins from the stash but never though till I was cutting about the lining and by then its pretty late already. I really cannot handle sorting through my stash looking for a possible lining fabric. So coral cheap scuba it is. It will also make the dress warmer for this time of year.

I am wearing it right now its its nice and warm despite the short sleeved design.

I start sewing and the instructions are as good and easy to follow as usual - I do like this about RP patterns. They instructions are usualy really good and I have started to use them for other patterns ( eg Burda) when the design is similar. 

 Unfortunately thought the Laura is not originaly lined so I need to work this bit out for myself. You sew the back vent first then the rest. I think thats probably the key - starting with the vent. I did the sequins as the pattern directions using my normal sewing machine. I considered pockets and even cut them out but it was by then really late and I have to work Christmas Eve so I need to get this done now. I cannot think properly due to tiredness by now let alone work out pockets and linings. I use the overlocker for my scuba lining but I did not do the back vent yet on the lining. I left it open.

 Put both bits together and sew the scuba to the sequins at the back vent. Then how to do the rest? 

I am not good at linings. Start sewing it all together flip it and Oh dear but my sequins are on the inside facing the lining. I have done the burrito method before but cannot remember. I do not have time to watch Youtube and work out how. I am tired and need to stop but if I do there is going to be no dress to wear this Christmas. Well I have lots so there will be something I can wear but not this one.

I unpick my neck and sleeves hems. I put it all together again and decide to just sew to the dress and tuck it all in together because you cannot see the stitching anyway.


 I use the stretch neck facing from the pattern but add to the inside and sew it down because I do not want it seen on the outside. It would ruin the look.

Finally the hem which I flipped over twice on top of the scuba layer to make everything neat - making this a bit shorter than I think probably it should be. Though I am taller than the person the RP patterns are based on. I usually add a couple of inches to a patterna dn forgot. The hip shaping is slightly high I think but still its a lovely comfortable unresticting dress.

And so here is my lovely lined sequined Laura dress.


I love the "tails" at the back. I will be making a few more of these come next summer.
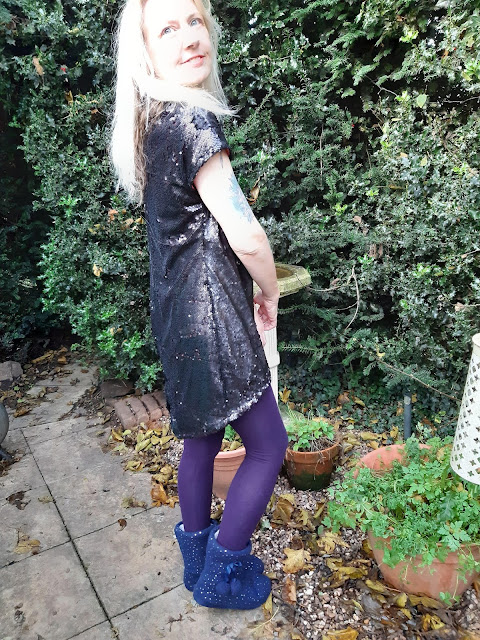
I probably should have lengthened though. I usually do lengthen RP patterns but I do not mind this short and its really good. It will work very well with leggings too. I am so happy despite the sequin directions error. I actually can see me wearing this lots too not just for Christmas. I have a thing about grey marl - like sweatshirting - mixed with sequins and trainers. This will work well with a tshirt under it so that will be  a great look for January and I think surprisingly warm as well due to the scuba layer.

Happy Christmas!

Bracken


Tuesday, 22 December 2020

Blue Leopardskin print cotton T shirt top


This is my second recent version of a top I made ages ago. Its a T shirt shaped top with cut on sleeves and is an ideal way I feel to use up nice but relatively small scraps of woven fabrics.  I made a cartoon print version of this a few weeks ago and its very wearable so I decide to make another. Its a quick way to get a new top I can wear for work. Its self drafted really by just cutting around my previously sefl drafted top but like the cartoon print version it has shoulder seams which the old yellow top doesn't.

I had a few issues with the neck. I originally just tried to overlock the edge and turn it over. It just looked rubbish to then I unpicked the edge and restitched very carefully having pinned first which I did not do the first time. 

But it left a mark.

Then I was trying to decide how to hide this because otherwise I think this will be a nice wearable basic top.

The answer is my usual quick fix when things like this go wrong. Cover it with ribbon or lace and in this green ribbon. 

I have seen this kind of radomly sewn on ribbon edge decoration in several high end high street shops so I tried a random sewn edge and it works I think.

I also added a ribbin edge to finish the sleeves so it all ties in together.

I have used this fabric previously. Its Ikea cotton fabric which I bought many years ago now and its has just sat taking up room in my stash for ages. I have made a dress from this a long time ago now. I still have the dress. 


I also used it to line my hospital bag for my hip replacement.

I still have quite a bit left. I am thinking summer trousers maybe? I really could do with using this one up soon because its a nice wearable fabric but has been hanging around oin my stash for far too many years.

So once more here is my top. I really should iron before getting photos taken but I just wore this that day and it was a weekend so I did nto really care. I haet ironing and actually quite like clothig that does not have an over pressed look. Its just too formal and worklike for my taste.


I can see this one being a favourite.

Take care

Bracken

Wednesday, 16 December 2020

Wristlets


These are just a very quick make from some scraps that if I could not think of a use for them would have been thrown away. Well how terrible so I made these instead!


 If you ask me they would make the perfect present for a teenager. I certainly would have liked these then.

 What can I say about these? They are two tubes with were sewn large, then I tried them on and then took them in till they fitted my arms - easy. They were sewn using an overlocker. I overlocked the edges at each end.

 Then I added stretch lace to trim the edges. I do love the effect though!

And thats it. Of course you could do similar and make mitts but I wanted these as wristlettes not gloves. I am intending to wear these to make my arms warms with the Raggy dress.

They will look good with my Raggy dress. or with any T shirt and will brighten up my Chrismas wardrobe I think but I do not expect them to last long really. Perfect for Chritmas though.


I did not have enough fabric for the raggy dress to have long sleeves but this will sort that problem out though the fabric used for these is actually left over from my top and has sparkle and sequins which the dress does not but its very similar and will look Ok together.


I made some very similar mitts  using the same method from stretch lace.


I just left a hole on them for the thumb to go through when I made these. 

The wristlettes though, are to keep my arms watm over Christmas when I wear my lovely not so little black dress. 

 Or even a vest top, track pants and wellies!


I do love these though! 

Keep safe

Bracken


Saturday, 12 December 2020

Woven Cotton cartoon print T shirt

I made this top with no pattern. Its based on this top I made a long time ago. The yellow top I wear loads in summer and since there was just a small piece of this fabric left over from my Partly Sunny Frock I realised I could make a similar top from this lovely cartoon fabric.


I am though going to make a couple more of these T tops because I really like them. They are I think better in summer than winter but despite that its the right time for me because I need t destash and I need to do this now not in 6 months time.

 My old top has been a summer staple for years now so its well over due to make a few more. They are very cool and airy in the heat. In winter being woven they are less useful unless you wear something underneath but if layered, they seem so far to work all year round.

Ths is comfy top despite being thin summery cotton and its now winter. I will admit to wearing a vest under it when it was nasty cold day a few days ago but its big enough and loose enough to be able to do that. It looks great with jeans and leggings. I have not yet worn with a skirt but cannot see why it will not go and I have to say I very much like this despite the simplicity of the design. Its just two pieces - a front and back -in what is a vague bat wing shape to allow for ease of movement but its not too bat wing meaning I cannot still wear something over it which is essential this time of year.


And I love this print!

To cut this out I literally laid the old top on my fabric and cut around it. I had to cut front and back seperately due to the shape of the bits I had left, but if making from new uncut fabric you could cut both together and just slightly lower the front neckline with respect to the back neckline. 


My original yellow top is actually all one piece so no shoulder seams. I have found that although aesthetically thats nice its does not work well on my body because I seem to end up pulling it forward and backwards to find the right place on my body. This has shoulder seams and works much better.

The neck is imperfect. Thats the only thing I did wrog with this. Or not wrong but I just overlocked the edge and sewed it over and I think it may have looked better if I had either made a facing like my yellow top or eve just bias bound it. I decided having made it I would try it out and I do not intend to change the neck but its not as tidy as it could have been.


So this is a bog success and I think I need to stop worrying about using easy to make designs because I find most of the time they are often also the nicest designs to wear. I tend to gauge my makes on how difficlt they are. Well there is an arguement in favour of pushing yourself but it should not I think be at the cost of making things you really like. This is a very simple top. You need minimal sewing skills to make this yet its probably, going by my yellow version, going to be worn more than many more difficult designs. I intend to make at least a couple more of this kind fo T shirt.

Have a lovely weekend and stay safe;

Bracken

Saturday, 5 December 2020

Purple mohair mitts free knitting pattern.


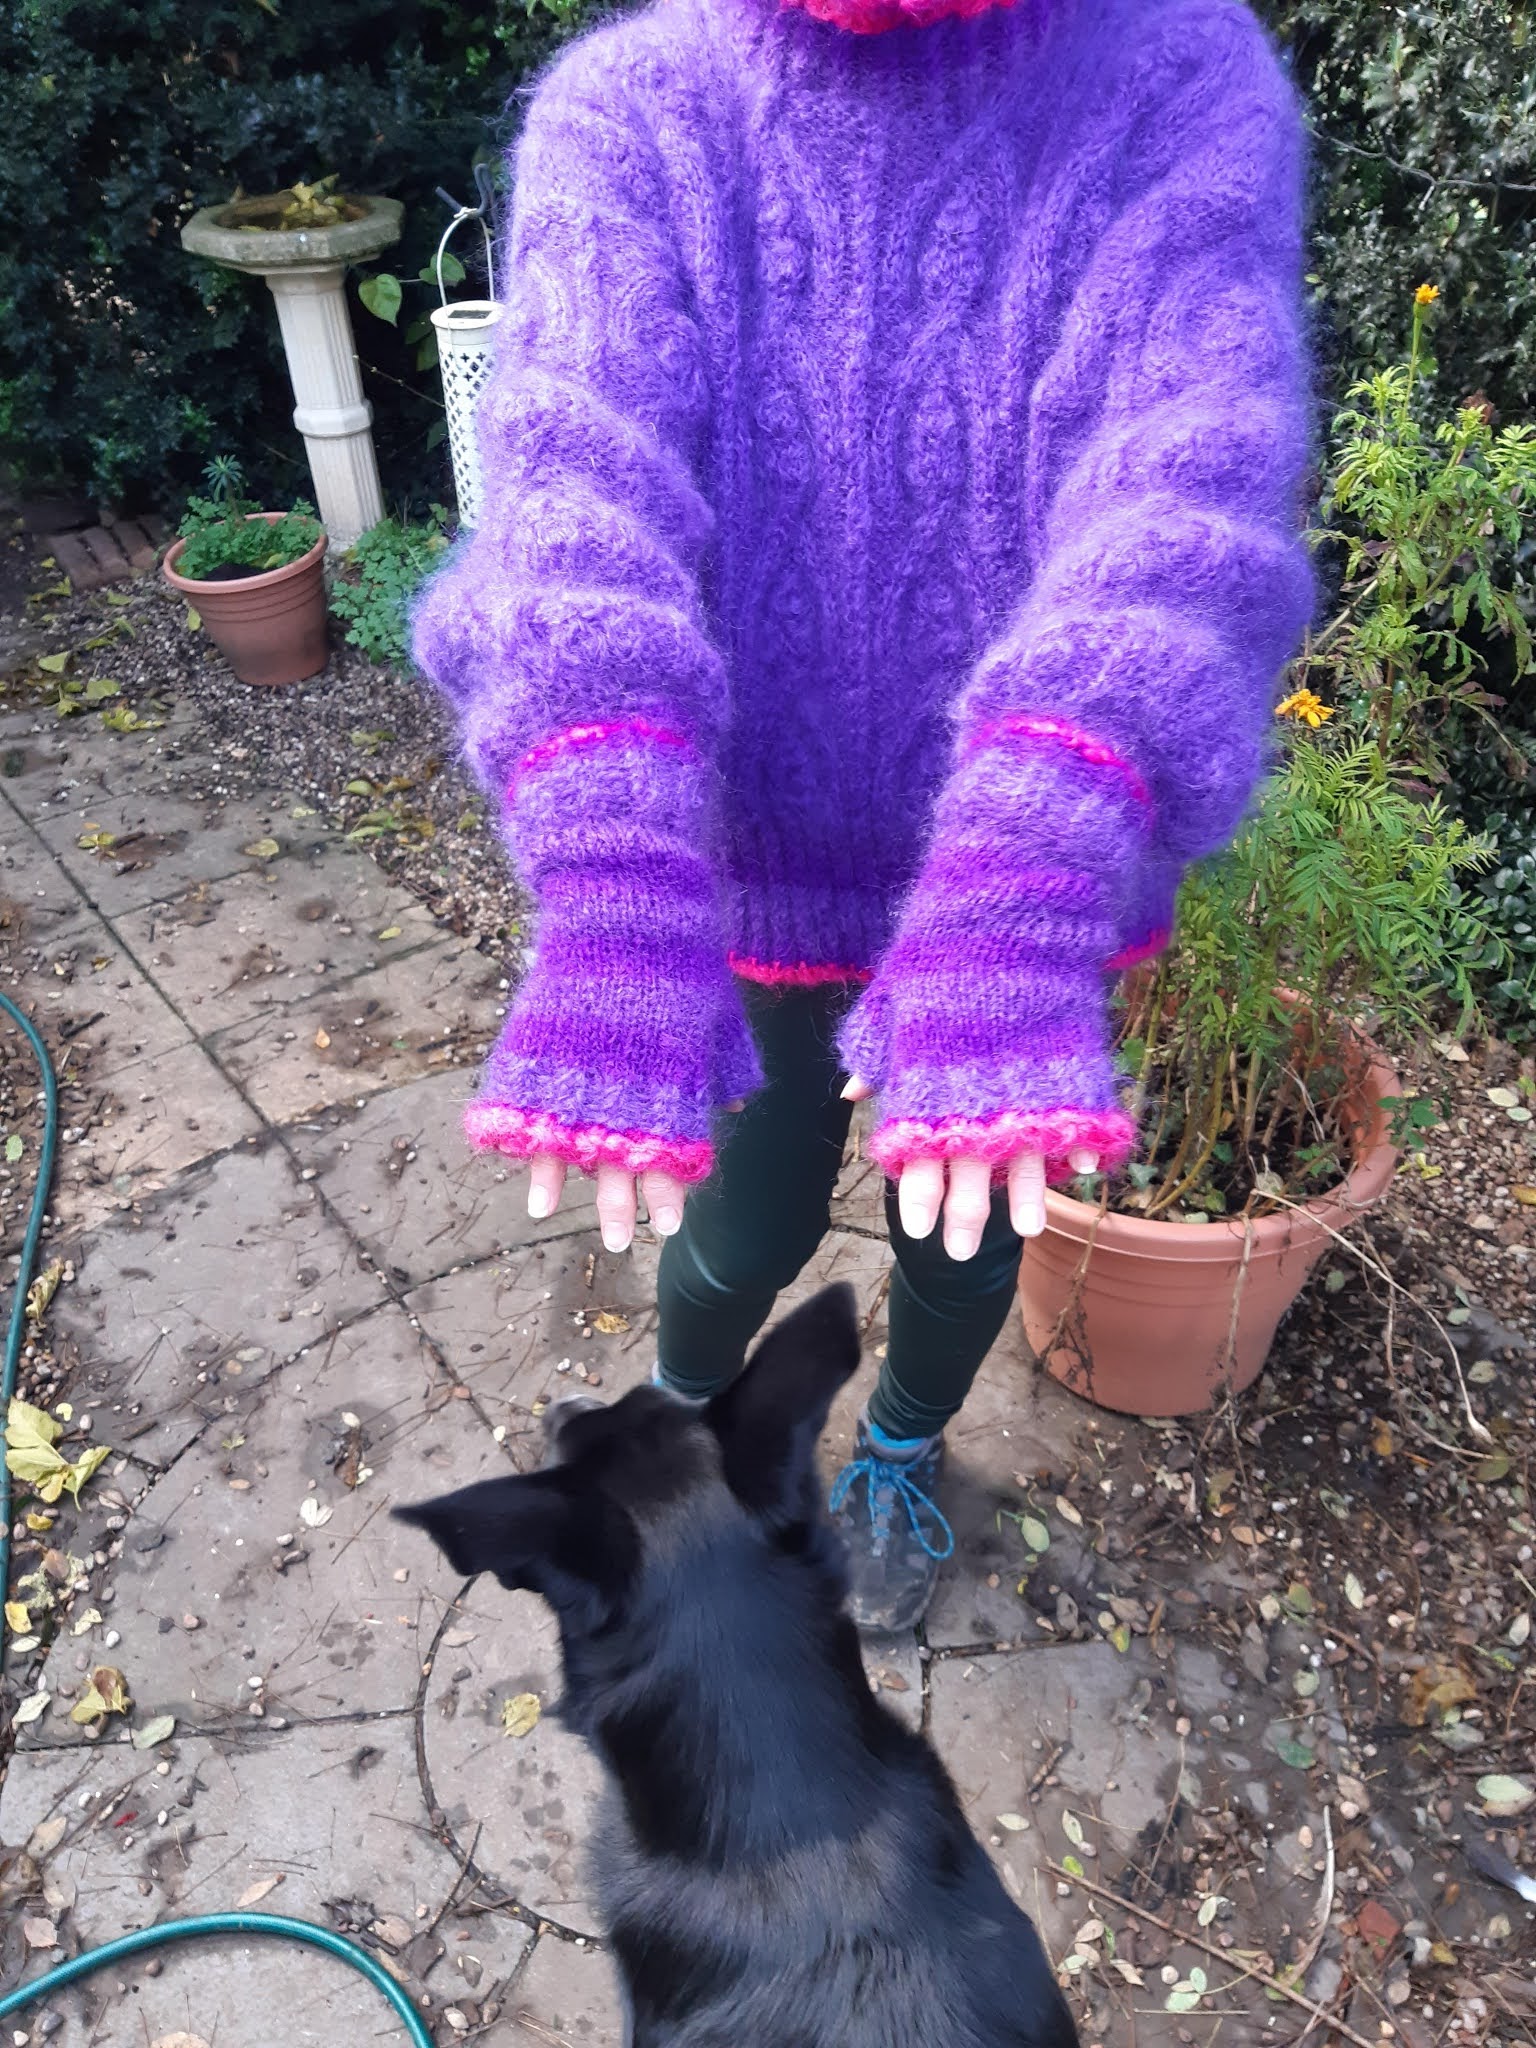
The purple mohair mitts ( left)  were made from my own made up pattern which is detailed below if you want to make some. On the right are my latest version using double knit with the Aldi pattern I made before when I made the Anarchy mitts.

I made these to match my purple jumper and hood:
 
Mohair equates to chunky but I could not find any flat knitted patterns, only ones knitted in the round. I am going to attempt some in the round soon but I had to buy some double pointed needles because I did not have any in the right sizes. These have now arrived. Though I think maybe I prefer to do some sewing first because I have now got lots of knitwear and am missing my sewing.

One reason to make up my own pattern was that I also want to use the yarn I have and not have to buy more - and of course that also means these will match my purple jumper. I did not add the diamond cables like the jumper though. That was just too complicated when I have yet to work out even how many stitches I need for a basic pair although I did do these in a cabled rib which matches the ribbing on my jumper and hood, but I did not do any other fancy difficult stuff for this pair. They are just stocking stitch. I might see if I can do that another time but this is my starting point so I need to know how to get the right size etc. 


 I think these would work with a normal double rib as well but that may mean changing the number of stitches,  I will see on my next pair. I intend to make a few variants of these this winter and see what I am able to come up with. For me this is a real challenge to totally make a knitting pattern up from scratch so I think this project could be fun. I also will enjoy doing some smaller knitting projects I think rather than jumpers and now I have 8 jumpers, I really do not need any more at the moment so should just make what I do need as in gloves and hats.


Being 1980s mohair they are chunky weight so 5-6mm needles. I actually used a larger needle on the ribbing to the body of these which is not usual for knitting. 
 
These are my latest pair of mitts made using double knit with the Aldi pattern:

  I really liked my knitted mitts made using the Aldi  pattern. I have made two pairs of them now but they are double knit yarn and I currently have lots of bits of mohair from my various jumper projects so I decided to try and do something similar in mohair, but of course the needle size and therefore stitch numbers etc are all going to be different.
 

The wrists are the same twisted rib I used for the ribbing on the edges of the jumper and the whole of the hood is also this twisted rib pattern. I was a pain to knit and I wonder if its really any better appearance-wise that fishermans rib because the fluffy mohair does obscure the look of this. Still never mind its very thick and warm. And stretchy.

The thumb in the first glove is increased the wrong side so these are imperfect but it took me a while to work out exactly how to do the thumbs so I left the first one in order to work out the second then decided its not so bad so one is not really quite right but they will do for my prototype.

Anyway this is really my experiment but it worked so well I decided to share it.


 PATTERN

So here is my own pattern. I am excited to be sharing a knitting pattern with the world. 

I do hope this makes sense:

Using  5mm needles and double yarn ( to make it wear better) cast on 31 stitches. I used an aran type of cast on where row knit through both loops when making stitches to get a firm edge. I did the edge cast on in pink but the changed for the first row to purple.

Then for the rest of the pattern I used a single strand of yarn and knitted as follows:

Row = R

R1 (wrong side) using just one strand of the purple yarn : k1,* p2, k1 * repeat to end of row.

R2 ( right side): p1, *Cable 2 stitches, p1 * to end of row.

Repeat these rows for however long you want your ribbing on the wrist edge to be.

I did rows of stripes in purple, lilac and mauve ( for want of a better description of my purples) with just a narrow bit of the violet used for my jumper The thumb is in violet too because I only had a small scrap left over of that colour, but lots of the purples used for the jumper ribbing. Probably I had only eough violet to do one or two rows in a jumper so not even a quarter of a ball of yarn. It really was just a scrap of yarn. Using it carefully does mean the gloves will tone with the jumper.

Ok so once you have done enough ribbing: I knitted 9cm ( or 3.5 inches) including the doubled yarn edge in pink, I used 2 rows of lilac, 2 rows violet, 2 rows of purple alternating for the stripes) swap to 4mm needles because I wanted my main part very thick and warm and hard wearing. Normally you would use a smaller needle for the ribbing to the body but I decided to do it the other way round. The ribbing is smaller due to the cables so its not normal ribbing. Its up to you. Mohair in stocking stitch would usually be knitted on 5.5 to 7mm needles so I am knitting this up much thicker. Then I knitted straight in stripes up to my thumb. To get the stripes 6 rows lilac, 6 rows purple in stocking stitch for 11 cm( 4.25 inches). I made sure I had even stripes but you could ahve different thickness stripes depending on the yarn used.

To shape thumb; k8, then put 5 stitches onto a stitch holder, make 5 stitches and k to end of row. 

Continue in stocking stitch stripes leaving the 5 stitches alone on stitch holder for 3 stripes of lilac purple and lilac  with 6 rows in each stripe or measuring 3 inches or 8cm. So each stripe = 6 rows and measures about 1 inch or 2.75cm.

Then change back to 5mm needles and continue in the twisted rib pattern. I did this for about 3cm so just over 1 inch in violet. Then I used doubled pink yarn ( two strands together) to cast off. 

For the thumb I joined purple yarn and cast on 8 stitches and using stocking stitch knitted  4 rows then changed to violet and did  k1. p1 rib ( like the edge of my hood) I knitted 4 rows of rib then cast off. 

I sewed the thumb into place carefully to the hole in the body of the mitts, then sewed up the side seams. I did cast on in the wrong side of one mitt but when I  sewed up that did not matter. It just hardly shows though I will try not to do that next time and I will post my next version of this in steps so hopefully its easier to copy. I never knew I would have a success here or want to share it so did not do enough photos for a proper step by step description but any knitter can probably understand this pattern ( I hope). 


Feedback gratefully received on this because I would like to try to write a book on knitting gloves I think because having a problem with Raynauds means I always need them and its a very gratifying to make these completely, including sewing upm in just 3 days. First though I need to learn to write accurate and understandable knitting patterns so will be doing this on the blog as and when I manage to make them.  Hopefully if you do decide to knit some of these you can follow this but any problems do drop me an email and I will try to help you.

 So here they are showing the back: 

I am very very pleased with these. They are extremely warm and I think much better than the Aldi synthetic version in double knit. I do think the seam is much more noticable on these though, than it is on the ribbed pattern so I might have to do a ribbed mohair version next with this pattern as starting point.


Maybe the seams are less noticable when worn? I am not sure really.


 The dog is Hugh. He is a collie x GSD and 2 years old. He caused this sudden glove knitting due to having eaten my old hand knit gloves. They were about 6 years old but still better than all my shop bought ones. I was very upset with him and explaining I need them to walk him did not make any difference of course!

I am not leaving these anywhere where Hugh or his brother can find them.

And the "front"


And they are very warm and ideal for dog walking in winter.

Take care, stay safe and have a lovely weekend
Bracken